Open Code in Dev Environment
Opening the project code in a dev environment looks different depending on the IDE you use: IntelliJ-based IDEs (like IntelliJ IDEA, PyCharm, WebStorm, etc.) or Visual Studio Code-based (VS Code or Cursor).
IntelliJ-based IDEs
If you use an IntelliJ-based IDE, you can open the project code in a dev environment via CodeCanvas or via a desktop launcher (JetBrains Gateway or JetBrains Toolbox).
Prerequisites
You have an account in CodeCanvas, and it has permissions to access the project repository and the corresponding dev environment template. Learn how to provide users with access to the repository and template.
You have the read/write access to the project's repository on the Git hosting service.
You have JetBrains Gateway or JetBrains Toolbox installed on your machine.
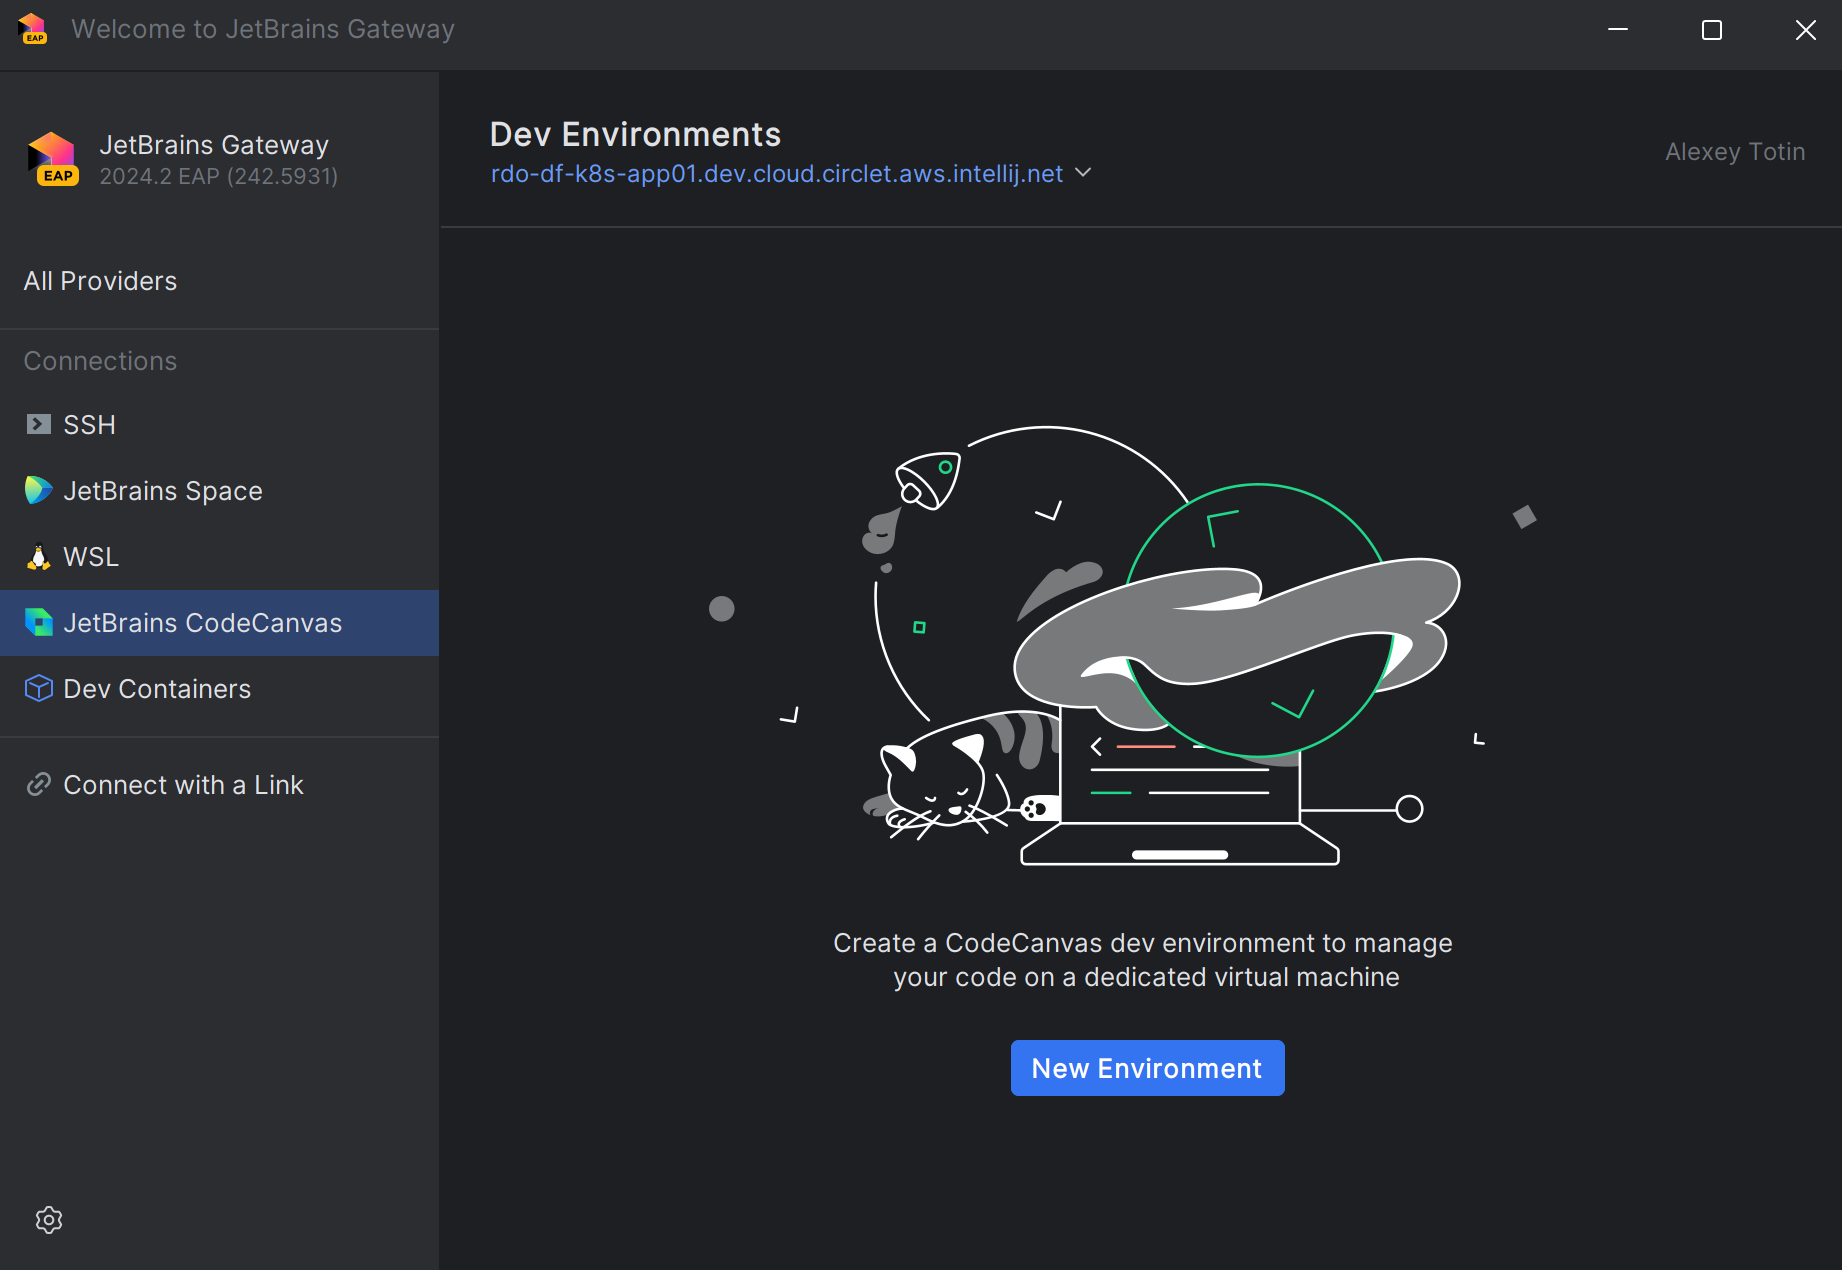
Open JetBrains Gateway.
If not yet connected to CodeCanvas:
In the list of Connections, select JetBrains CodeCanvas.
Click Connect to CodeCanvas.
Specify the URL of your CodeCanvas instance and click Continue in Browser.
In the browser, click Accept to grant JetBrains Gateway access to your CodeCanvas account.
Return to JetBrains Gateway.
Сlick New environment.

Specify the environment name and other settings:
Template – the template that will be used as a base for the environment. The template defines dev environment resources, the Git repository, the IDE, and other settings.
Branch – the branch of the project repository that will be checked out in the environment. By default, CodeCanvas uses the branch specified in the template. In case you have multiple repositories in the template, you can add branch overrides for each repository.
Warm-up snapshot – a warm-up snapshot that will be used to initialize the environment. Typically, warm-up snapshots contain project indexes, caches, dependencies, and other data that can significantly speed up the environment start.
- Warm-up and branches
CodeCanvas automatically selects the most recent suitable snapshot. The Best match is when the snapshot is based on the same branch as the created environment. If no exact match is found, CodeCanvas will use the snapshot based on the branch specified in the template. This is considered a Good match and may result in a longer environment start due to potential index rebuilding. If no snapshot is found, a new environment starts from scratch.
For example, your template branch is
mainand there is a warm-up snapshot based on themainbranch. If you create an environment based on themainbranch, CodeCanvas will use this snapshot as the Best match.Now, imagine you want to create an environment based on the
featurebranch. As there is no snapshot for thefeaturebranch, CodeCanvas will use themainbranch snapshot. This is considered a Good match. The startup time may be longer because the IDE might need to rebuild some project indexes.
Personal parameters – if the project requires sensitive parameters (like API keys, passwords, etc.), you should provide them here. There can be Required parameters (obligatory) and Optional parameters (you can skip them). You can't provide a plain text value, instead, you should use a reference to parameter in your personal parameter storage.
Click Create Environment.
This will start creating the environment. Once the environment is ready, Gateway will automatically open the IDE.
In CodeCanvas, click the CodeCanvas logo in the upper-left corner. This page lists all your dev environments.
Click New environment.

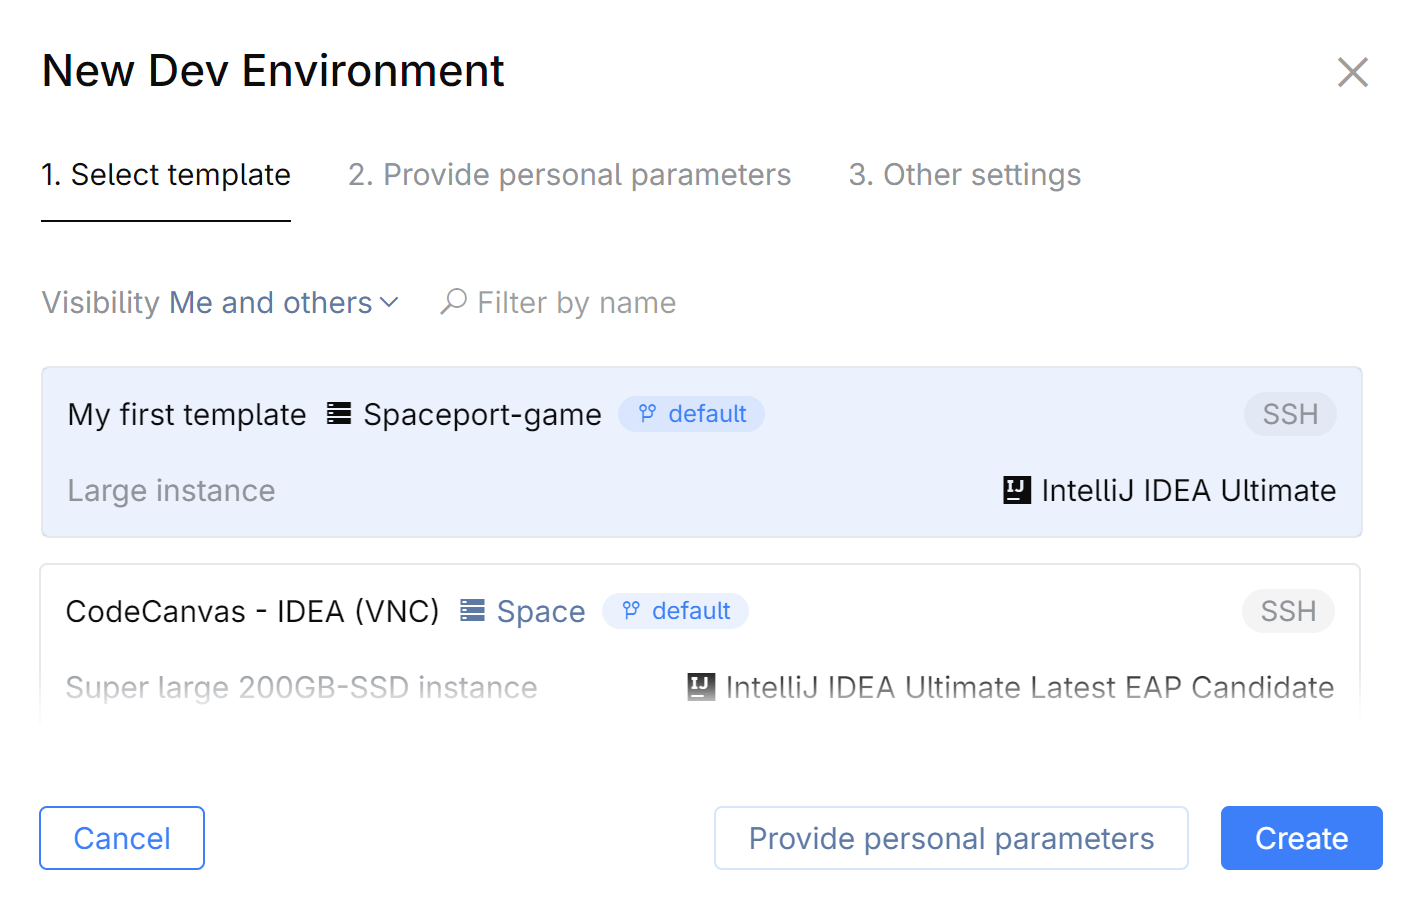
On the Select template tab, select the template that will be used as a base for the environment. The template defines dev environment resources, the Git repository, the IDE, and other settings.
If the project requires sensitive parameters (like API keys, passwords, etc.), switch to the Provide personal parameters tab and provide them here.
There can be Required parameters (obligatory) and Optional parameters (you can skip them). You can't provide a plain text value, instead, you should use a reference to parameter in your personal parameter storage.
On the Other settings tab, specify the environment name and other settings:
Branch – the branch of the project repository that will be checked out in the environment. By default, CodeCanvas uses the branch specified in the template. In case you have multiple repositories in the template, you can add branch overrides for each repository.
Use warm-up snapshot – whether to use a warm-up snapshot for initializing the environment. Typically, warm-up snapshots contain project indexes, caches, dependencies, and other data that can significantly speed up the environment start.
- Warm-up and branches
CodeCanvas automatically selects the most recent suitable snapshot. The Best match is when the snapshot is based on the same branch as the created environment. If no exact match is found, CodeCanvas will use the snapshot based on the branch specified in the template. This is considered a Good match and may result in a longer environment start due to potential index rebuilding. If no snapshot is found, a new environment starts from scratch.
For example, your template branch is
mainand there is a warm-up snapshot based on themainbranch. If you create an environment based on themainbranch, CodeCanvas will use this snapshot as the Best match.Now, imagine you want to create an environment based on the
featurebranch. As there is no snapshot for thefeaturebranch, CodeCanvas will use themainbranch snapshot. This is considered a Good match. The startup time may be longer because the IDE might need to rebuild some project indexes.
Click Create.
This will open JetBrains Gateway and start creating the environment. Once the environment is ready, Gateway will automatically open the IDE.
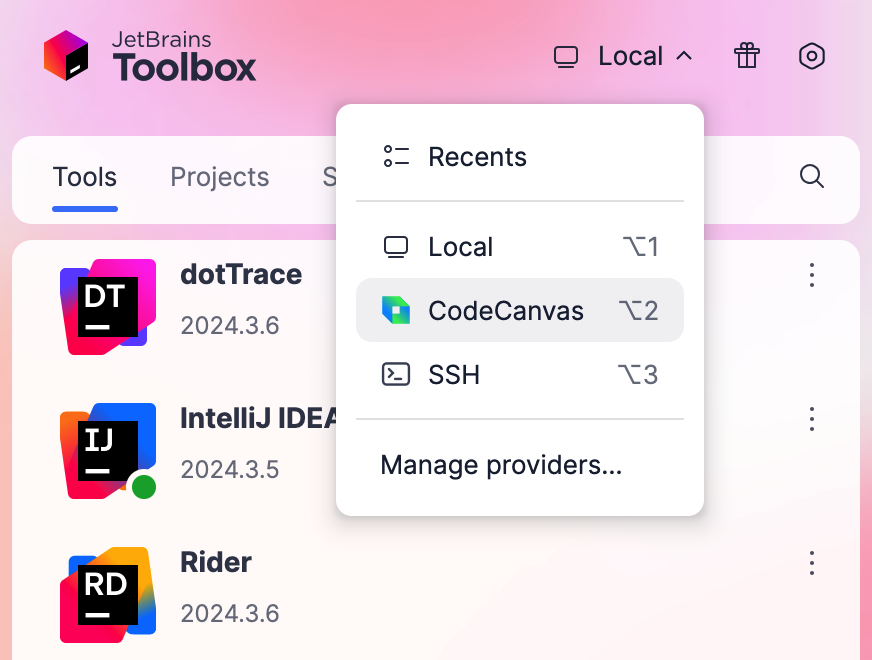
Open JetBrains Toolbox.
In the list in the top-right corner, select CodeCanvas instead of Local.

If not yet connected to CodeCanvas:
Specify the URL of your CodeCanvas instance and click Log in. You will be redirected to the browser.
In the browser, click Accept to grant JetBrains Toolbox permissions to CodeCanvas.
Return to JetBrains Toolbox.
Click New environment.
Under Select template, select the template that will be used as a base for the environment. Learn more about templates
To configure the environment, click Configure and specify the environment Name and other settings:
Repository branches – the branch of the project repository that will be checked out in the environment. By default, CodeCanvas uses the branch specified in the template. In case you have multiple repositories in the template, you can add branch overrides for each repository.
Personal parameters – if the project requires sensitive parameters (like API keys, passwords, etc.), you should provide them here. There can be Required parameters (obligatory) and Optional parameters (you can skip them). You can't provide a plain text value, instead, you should use a reference to parameter in your personal parameter storage. If you can't find a suitable parameter, you can create a new one by clicking the corresponding link.
Click Create.
This will start creating the environment. Once the environment is ready, Toolbox will automatically open the IDE.
Visual Studio Code/Cursor
To work with VS Code/Cursor dev environments, CodeCanvas uses the JetBrains CodeCanvas and JetBrains CodeCanvas for Cursor extensions. The extensions are based on the 'Remote Development using SSH' feature of VS Code which allows working with files and folders on a remote machine using SSH.
Prerequisites
You have an account in CodeCanvas, and it has permissions to access the project repository and the corresponding dev environment template.
You have the read/write access to the project's repository on the Git hosting service.
You have VS Code or Cursor installed. Optionally, you can preinstall the JetBrains CodeCanvas or JetBrains CodeCanvas for Cursor extension.
(Windows) You've enabled the SSH agent service. Learn how to do this
You have SSH keys set up: the public key is added to your CodeCanvas account, and the private key is added to the SSH agent on your local machine. Learn how to perform such a setup
Open JetBrains Gateway.
If not yet connected to CodeCanvas:
In the list of Connections, select JetBrains CodeCanvas.
Click Connect to CodeCanvas.
Specify the URL of your CodeCanvas instance and click Continue in Browser.
In the browser, click Accept to grant JetBrains Gateway access to your CodeCanvas account.
Return to JetBrains Gateway.
Сlick New environment.
Specify the environment name and other settings:
Template – the template that will be used as a base for the environment. The template defines dev environment resources, the Git repository, the IDE (VS Code), and other settings.
Branch – the branch of the project repository that will be checked out in the environment. By default, CodeCanvas uses the branch specified in the template. In case you have multiple repositories in the template, you can add branch overrides for each repository.
Warm-up snapshot – a warm-up snapshot that will be used to initialize the environment. Typically, warm-up snapshots contain project indexes, caches, dependencies, and other data that can significantly speed up the environment start.
Personal parameters – if the project requires sensitive parameters (like API keys, passwords, etc.), you should provide them here. There can be Required parameters (obligatory) and Optional parameters (you can skip them). You can't provide a plain text value, instead, you should use a reference to parameter in your personal parameter storage.
Click Create Environment.
This will start creating the environment. Once the environment is ready, JetBrains Gateway will automatically open VS Code/Cursor with your project code.
In CodeCanvas, click the CodeCanvas logo in the upper-left corner. This page lists all your dev environments.
Click New environment.
On the Select template tab, select the template that will be used as a base for the environment. The template defines dev environment resources, the Git repository, the IDE, and other settings.
If the project requires sensitive parameters (like API keys, passwords, etc.), switch to the Provide personal parameters tab and provide them here.
There can be Required parameters (obligatory) and Optional parameters (you can skip them). You can't provide a plain text value, instead, you should use a reference to a parameter in your personal parameter storage.
On the Other settings tab, specify the environment name and other settings:
Branch – the branch of the project repository that will be checked out in the environment. By default, CodeCanvas uses the branch specified in the template. In case you have multiple repositories in the template, you can add branch overrides for each repository.
Warm-up snapshot – a warm-up snapshot that will be used to initialize the environment. Typically, warm-up snapshots contain project indexes, caches, dependencies, and other data that can significantly speed up the environment start.
Click Create.
This will start creating the environment. Once the environment is ready, VS Code/Cursor will be automatically opened.
Open JetBrains Toolbox.
In the list in the top-right corner, select CodeCanvas instead of Local.

If not yet connected to CodeCanvas:
Specify the URL of your CodeCanvas instance and click Log in. You will be redirected to the browser.
In the browser, click Accept to grant JetBrains Toolbox permissions to CodeCanvas.
Return to JetBrains Toolbox.
Click New environment.
Under Select template, select the template that will be used as a base for the environment. Learn more about templates
To configure the environment, click Configure and specify the environment Name and other settings:
Repository branches – the branch of the project repository that will be checked out in the environment. By default, CodeCanvas uses the branch specified in the template. In case you have multiple repositories in the template, you can add branch overrides for each repository.
Personal parameters – if the project requires sensitive parameters (like API keys, passwords, etc.), you should provide them here. There can be Required parameters (obligatory) and Optional parameters (you can skip them). You can't provide a plain text value, instead, you should use a reference to parameter in your personal parameter storage. If you can't find a suitable parameter, you can create a new one by clicking the corresponding link.
Click Create.
This will start creating the environment. Once the environment is ready, Toolbox will automatically open the IDE.
Work with multiple repositories
If you have multiple Git repositories, you can open them all in a single dev environment. To do this, you need to create a dev environment template that includes all the required repositories. Learn how to configure a template for multi-repository projects.
After you start the environment, the IDE opens all project roots specified in the template. By default, a project root is the root directory of the repository. Note that currently, it is not possible to use different IDEs for different repositories in a single dev environment.