Attached files
Go to Main menu | Tools | Attached data or click the Attached data icon on the sidebar. You can see two categories of attached files there:
Notebook files: lists the attachments of the opened notebook. Upload files here if you want to use it only in this notebook.
Workspace files: lists the files of the associated workspace. Upload files here if you want to use it in any notebook from this workspace.
To expand the list and view the attached files, click the respective category.
(Optional) If you are working from the default Home workspace, you must explicitly provide access to its files. Click Select data to attach and select Home workspace files.

The following procedures are the same for both categories.
You have the following options:
Upload files from your file system:
Click Upload files.
In the file browser window, select the file or several files that you want to upload and click Open.
Upload a folder:
Click the arrow next to Upload.
Select Upload folder from the list.
In the file browser window, select the folder that you want to upload and click Upload.
Upload files from a URL:
Click the arrow next to Upload files.
Select Upload from URL from the list.
In the Upload from URL dialog, provide the URL that you want to use and click OK.
note
When uploading files from a URL, be aware that:
Using Kaggle links results in uploading the entire HTML page. In cases like that, we recommend uploading datasets to your local or external storages first.
To use a GitHub file link, first open the file in Raw mode and only then copy the link.
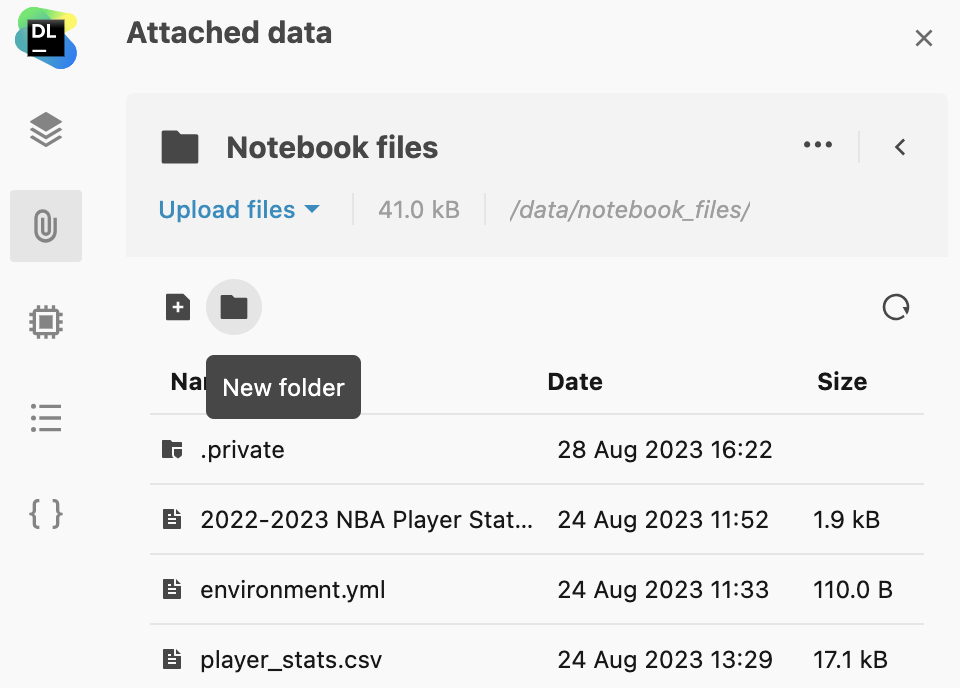
Click the New file icon on the toolbar in the upper left corner of the list.
Alternatively, you can right-click anywhere in the list area and select New file from the popup menu. The new file is added to the list.
Right-click the newly added file and select Rename to provide a name and specify an extension. You can create any text-based file (CSV, TSV, and other formats).
Double-click the file to open and edit it in the text editor. The changes that you make are saved automatically every ten seconds or on the explicit ⌘+S action.
note
For files with the .py extension, the preview window provides full code-editing support.
Click Save to save the changes.
(Optional) Click Close to hide the preview window.
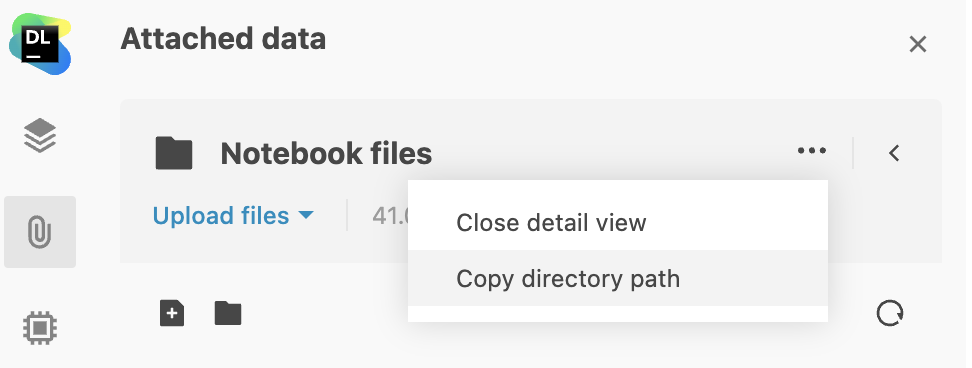
Copy the path to the notebook files directory to the clipboard:
Click the ellipsis in the Notebook files or Workspace files section of the Attached data tab.
Select the Copy directory path option.

Create a folder to store all or some of your attached files:
Click the New folder icon on the toolbar in the upper left corner of the tab.

Alternatively, you can right-click anywhere on the tab and select New folder from the popup menu. The new folder is added to the list on the selected tab.
Drag items to move them to and from the folder.
Use actions on a selected file or folder:
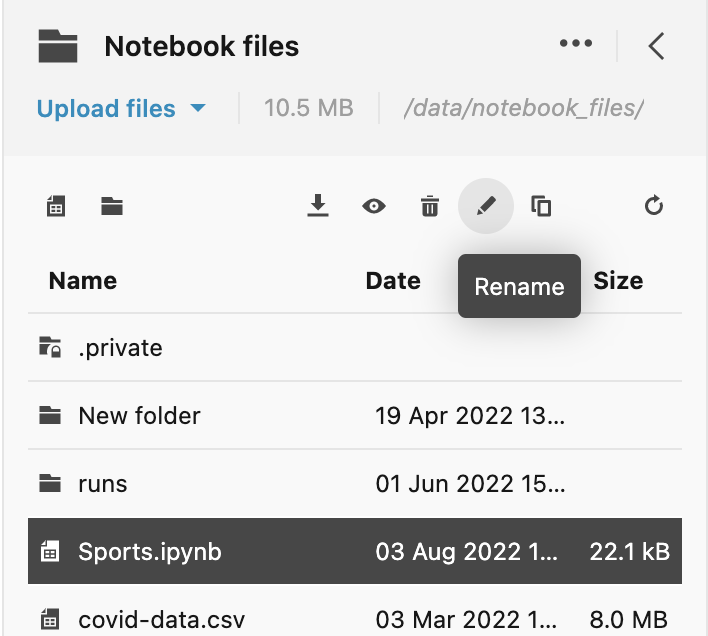
You can select an item and use the toolbar on top of the list.

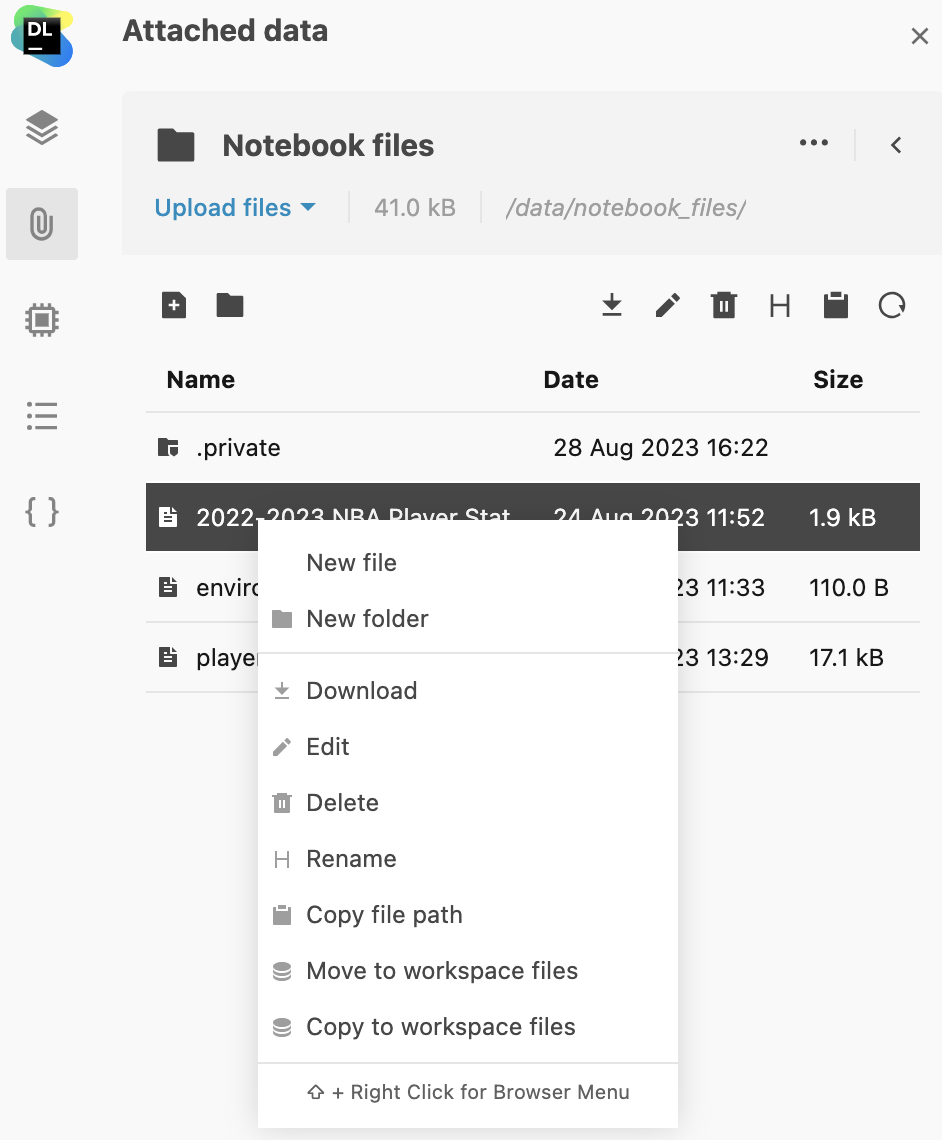
You can right-click an item and use the popup menu.

These are the actions you can use on selected items:
Download: The selected file is downloaded to your file system.
Download as .zip: The selected folder is downloaded to your file system as a .zip file.
Unpack: The selected archived file is unpacked and added to the list.
Edit: The selected file is opened in the text editor. For files with the .py extension, the preview pane provides full code-editing support.
Delete: The selected item is permanently deleted from the list.
Rename: You can provide a new name for the selected item.
Copy file path: The copied path can be used to refer to the selected file in the code.
Preview (for .ipynb): The selected .ipynb file is opened in a new browser tab for preview. You can also open the file by double-clicking it.
Move to workspace files (available in the popup menu only): The selected item is now available on the Workspace tab. You can use it in any notebook from this workspace.
Move to notebook files: (available in the popup menu only: The selected item is now available on the Notebook tab. It can only be used in this notebook now.
Reload (available on the toolbar only): The tab is refreshed to display any changes made to the attachment list.
note
You cannot edit or preview files bigger than 1 MB. Such files are only available as read-only with only a part of their content shown for preview.
You can collaborate in real time on notebook and workspace files. As part of such teamwork, you can create or edit existing Python scripts and text files. After opening an attached file in the side editor, you can see what other collaborators are doing on it in real time:
Each collaborator's avatar is displayed in the upper right corner of the file editor.
To track a collaborator's progress, click the respective avatar.
When an attached file is edited by several users, the changes are saved automatically every ten seconds, on the explicit ⌘+S action, and after the last collaborator closes the file.
If an attached file was changed both on the server side and in the file system, Datalore allows you to choose which version to save.
Thanks for your feedback!