Editor
The JetBrains Fleet editor is the main part of the code editor that you use to create, read, and modify code.
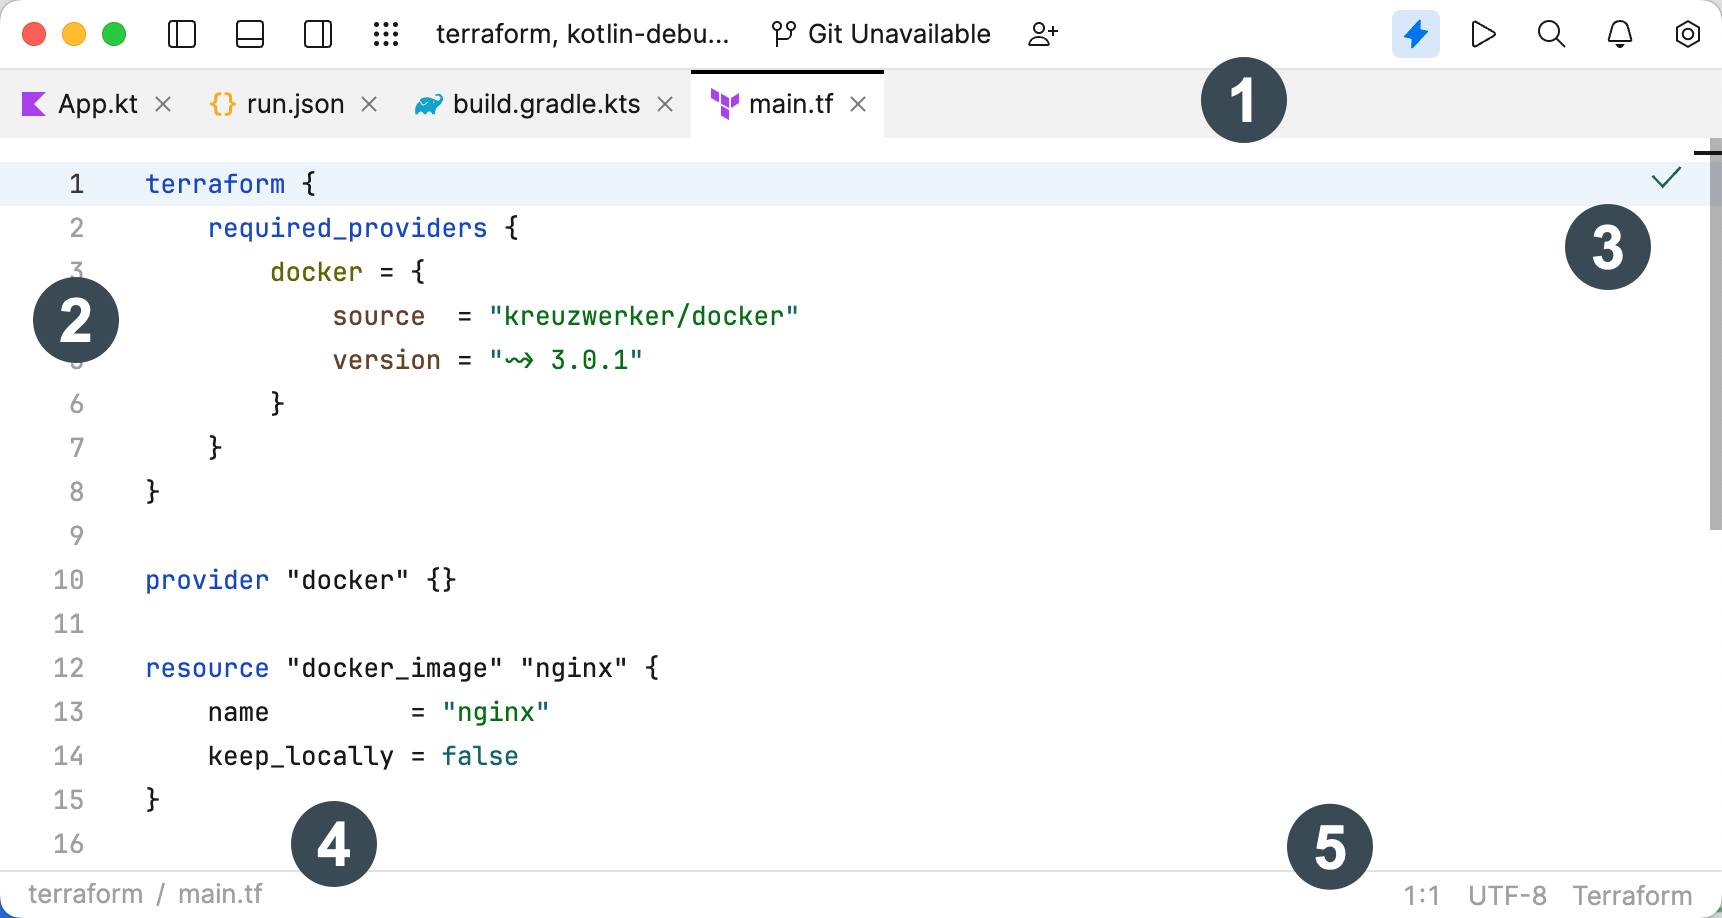
The editor consists of the following areas:
Tabs – show the names of the currently opened files and help you navigate between them
Gutter – shows line numbers and provides the related functionality, such as breakpoints or buttons for running the code at a particular line
Problems widget – summarizes warnings and errors in the current file
Breadcrumbs – show the path to the current symbol and help you navigate in the path
File settings – provide configuration such as file encoding and format
Scrollbar
When you work with code in the editor, JetBrains Fleet displays code analysis results, that include errors and warnings, on the scrollbar. You can check whether your code has issues and quickly navigate to them.
The top of the scrollbar has the Problems widget that gives you a brief summary of the code problems. Click the widget to get more information on each detected problem.
The stripes on the scrollbar indicate places where JetBrains Fleet found a problem.
It is normal to see many stripes while you are working on a file. Many of these errors, warnings, and suggestions are eventually resolved as you complete the code. Should any errors remain when you feel your code is complete, we recommend that you explore and resolve them before compiling or running your project.
The different colors of stripes indicate the severity of the problems.
Tabs and splits
Switch between the tabs
Click a tab, or use the following shortcuts:
Next tab: ⌘ ⌥ →
Previous tab: ⌘ ⌥ ←
Preview files in a separate tab
You can choose to preview files selected in the Files tree in a separate preview tab.
Press ⌘ , to open settings and select . Select the Enable preview option.
Alternatively, add
"editor.previewTab": trueto your settings.json.
Split view
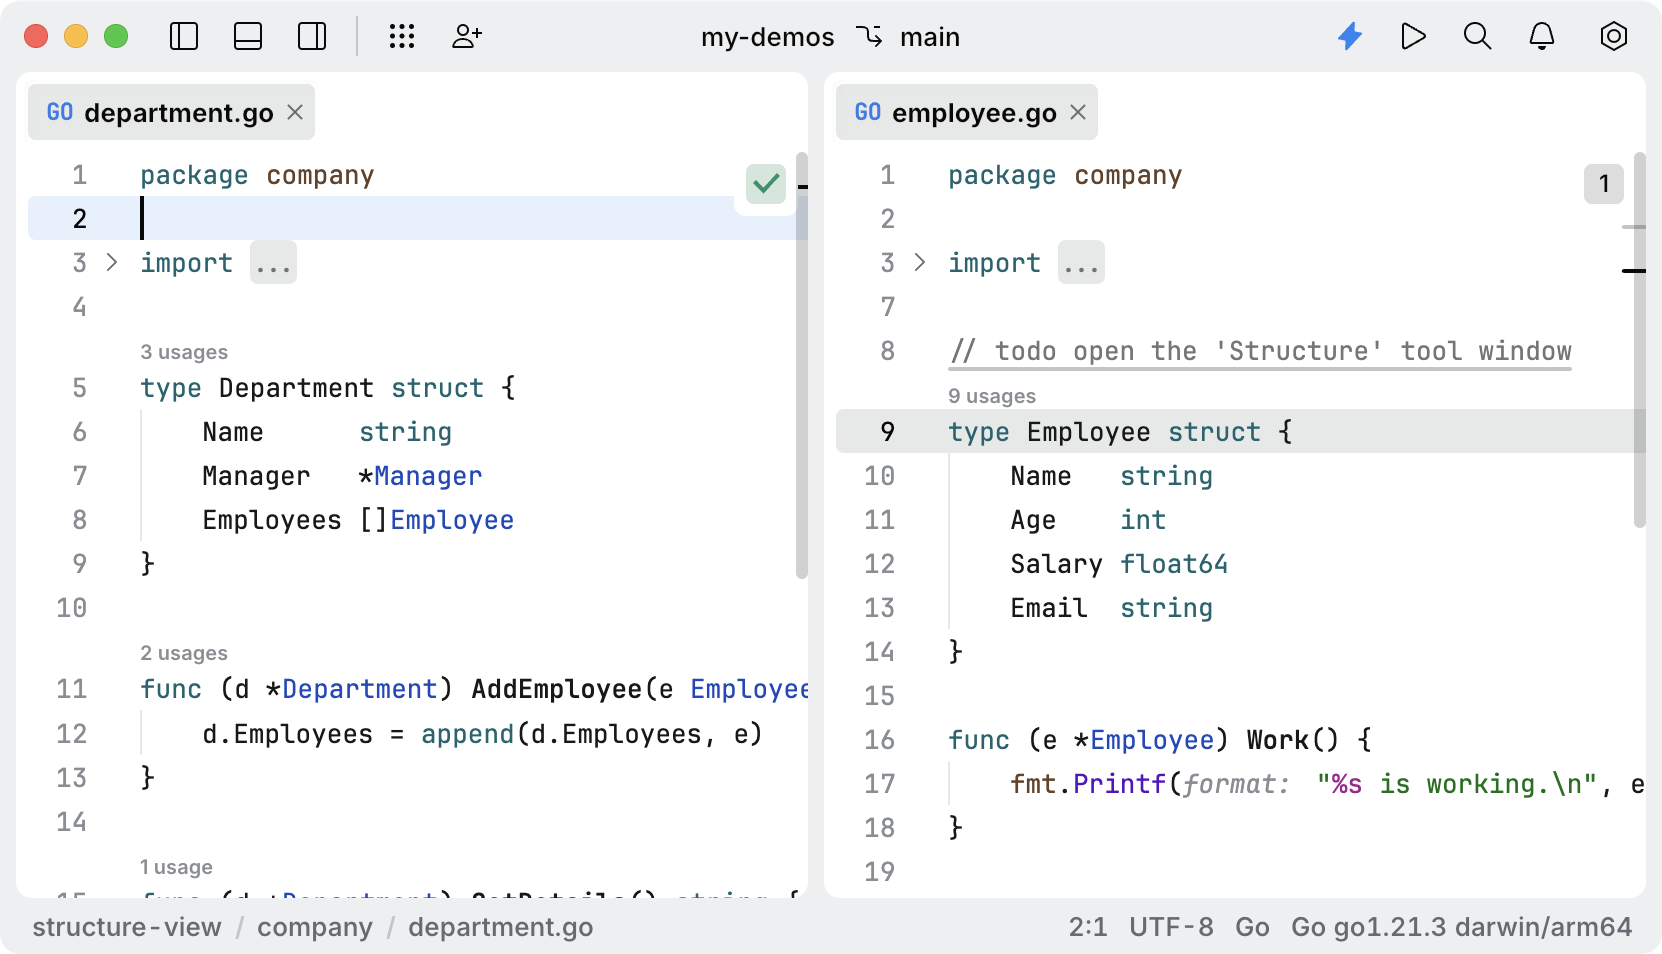
It is often helpful to work in multiple tabs side-by-side. To do this, drag a tab to the side of the editor for a vertical split, or to the top or bottom for a horizontal split.
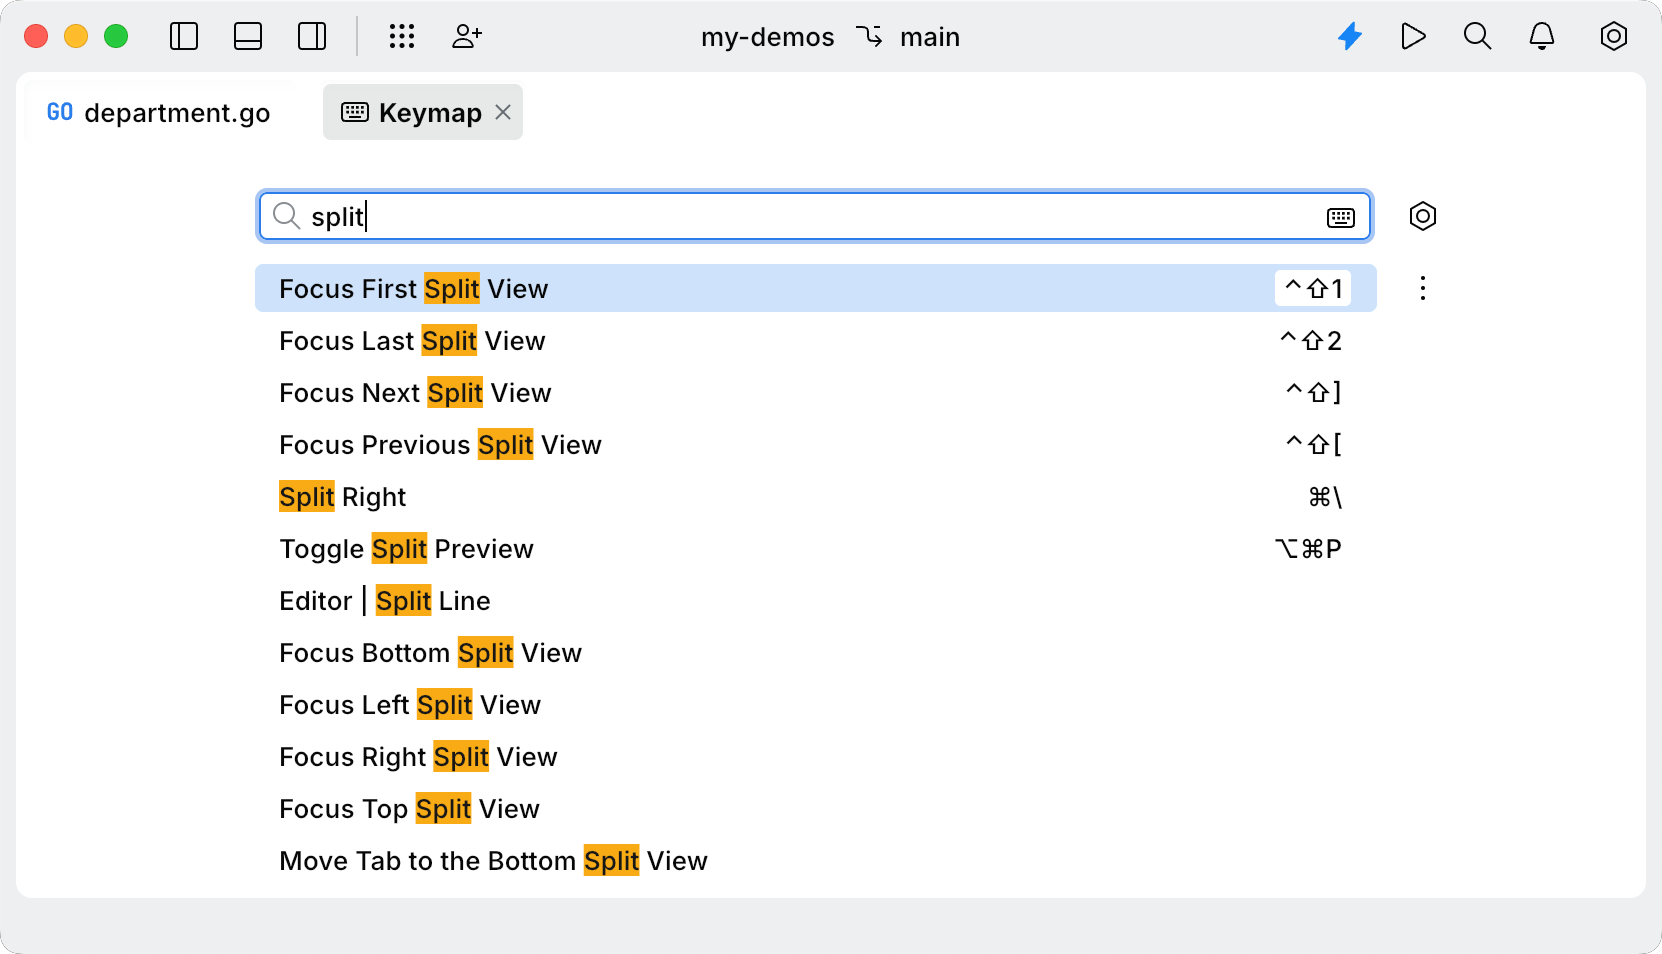
Press ⌘ ⇧ K and start typing
split. Select the split action you want to perform.You can also use the following preconfigured shortcuts:
Split Right: ⌘ \
Focus First Split: ⌃ ⇧ 1
Focus Last Split: ⌃ ⇧ 2
Focus Next Split: ⌃ ⇧ ]
Focus Previous Split: ⌃ ⇧ [
To configure additional shortcuts for split actions, refer to Review and edit key bindings.
Code
Multiple carets
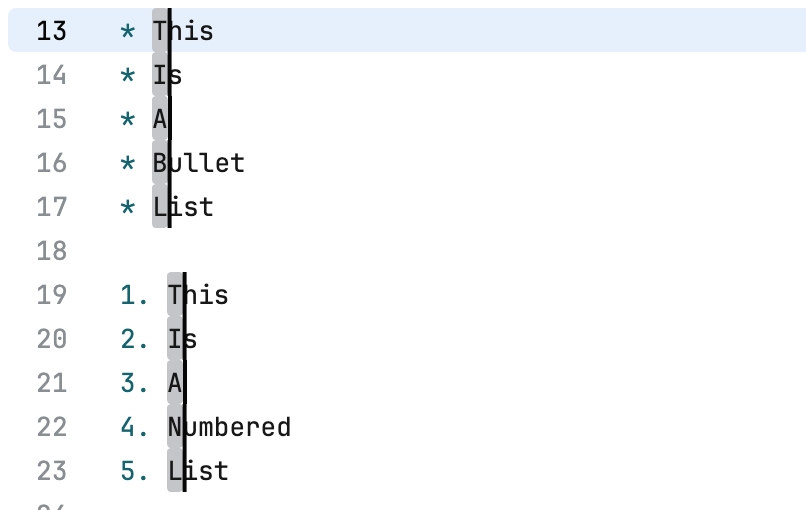
You can make changes in several places at once using multiple carets. To add additional carets, do one of the following:
Press ⌘ ⌥ ↑ or ⌘ ⌥ ↓ to add carets above or below the current one.
Hold Alt+Shift and click the places where you want to add carets.
Position the caret on a repeated word or text fragment, then press ⌘ ⇧ L to add carets to all occurrences in the file.
With multiple carets, you can type, copy, paste, complete code, and more—just like with a single caret.
Expand and shrink selection
You can expand or shrink the selection at the caret based on the surrounding text or code structure.
Use ⌥ ⇧ ↑ to expand the selection to the outer scope, or ⌥ ⇧ ↓ to shrink it to the inner scope.
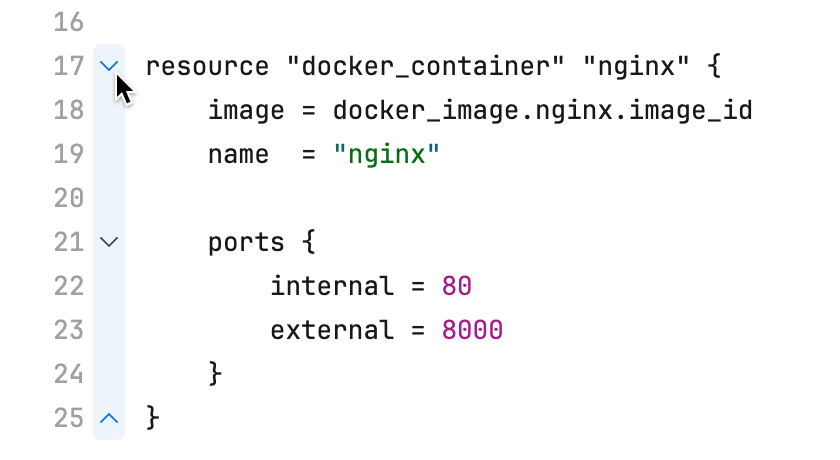
Fold a code block
Point at the gutter near a code block. This reveals arrows, which you can use to fold or unfold the respective code block.
Appearance and behavior
Configure tab size
You can configure how many spaces are equivalent to each tab in one of the following ways:
Press ⌘ , to open settings and select . Configure the number of spaces with the Tab size setting.
Place the .editorconfig file in the folder, where you want the setting to take effect.
Auto-detect indent
By default, JetBrains Fleet automatically detects the indentation style in the file and uses it when inserting new lines and reformatting code. The auto-detected indent settings only apply if the required indent is not indicated in the .editorconfig file.
You can change this behavior in JetBrains Fleet settings:
Press ⌘ , to open settings and select . Configure the Automatically detect indentation based on file content setting as required.
Add vertical guides
JetBrains Fleet supports vertical guides for code alignment and visual clarity.
Add the following property to settings.json:
"editor.guides": [ ]specifying character indices for placing one or more guides.For example,
"editor.guides": [80, 120]sets two vertical guides at indices80and120.
Select color theme
Press ⌘ ⇧ K, then type
Theme selection.
Sticky lines
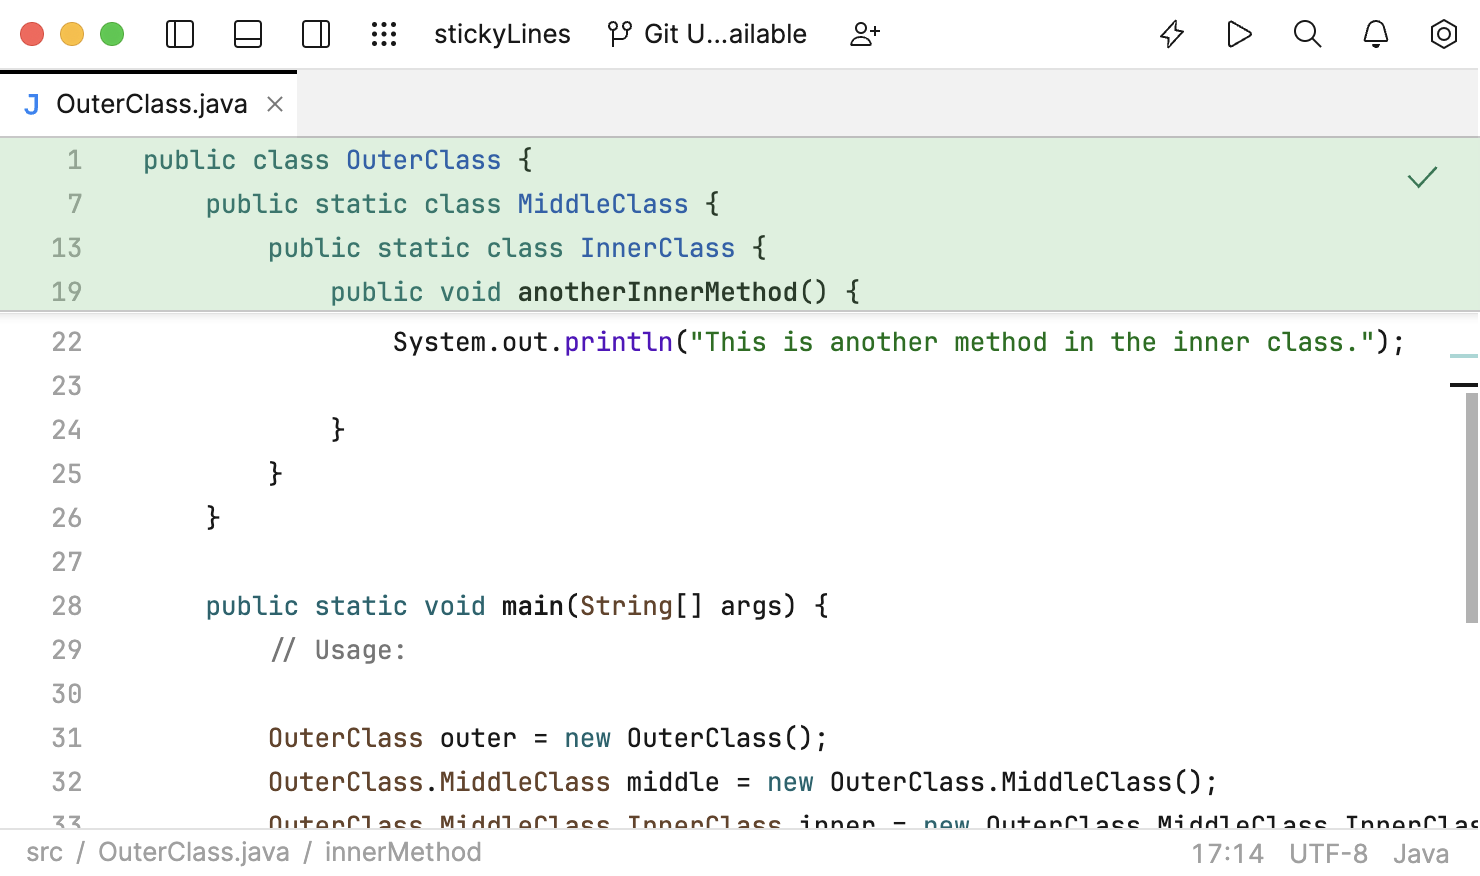
The sticky lines (or sticky scroll) feature enhances your coding experience by maintaining the visibility of parent elements as you scroll through the file, offering immediate context to your code. In a file with a complex hierarchy of classes and methods, this feature ensures that the signature of the currently viewed method and its containing classes always remain at the top of the editor.
You can also click any of the sticky lines to scroll the editor to the corresponding declaration.
Disable sticky lines
By default, the Show sticky lines feature is enabled.
Disable sticky lines for all languages
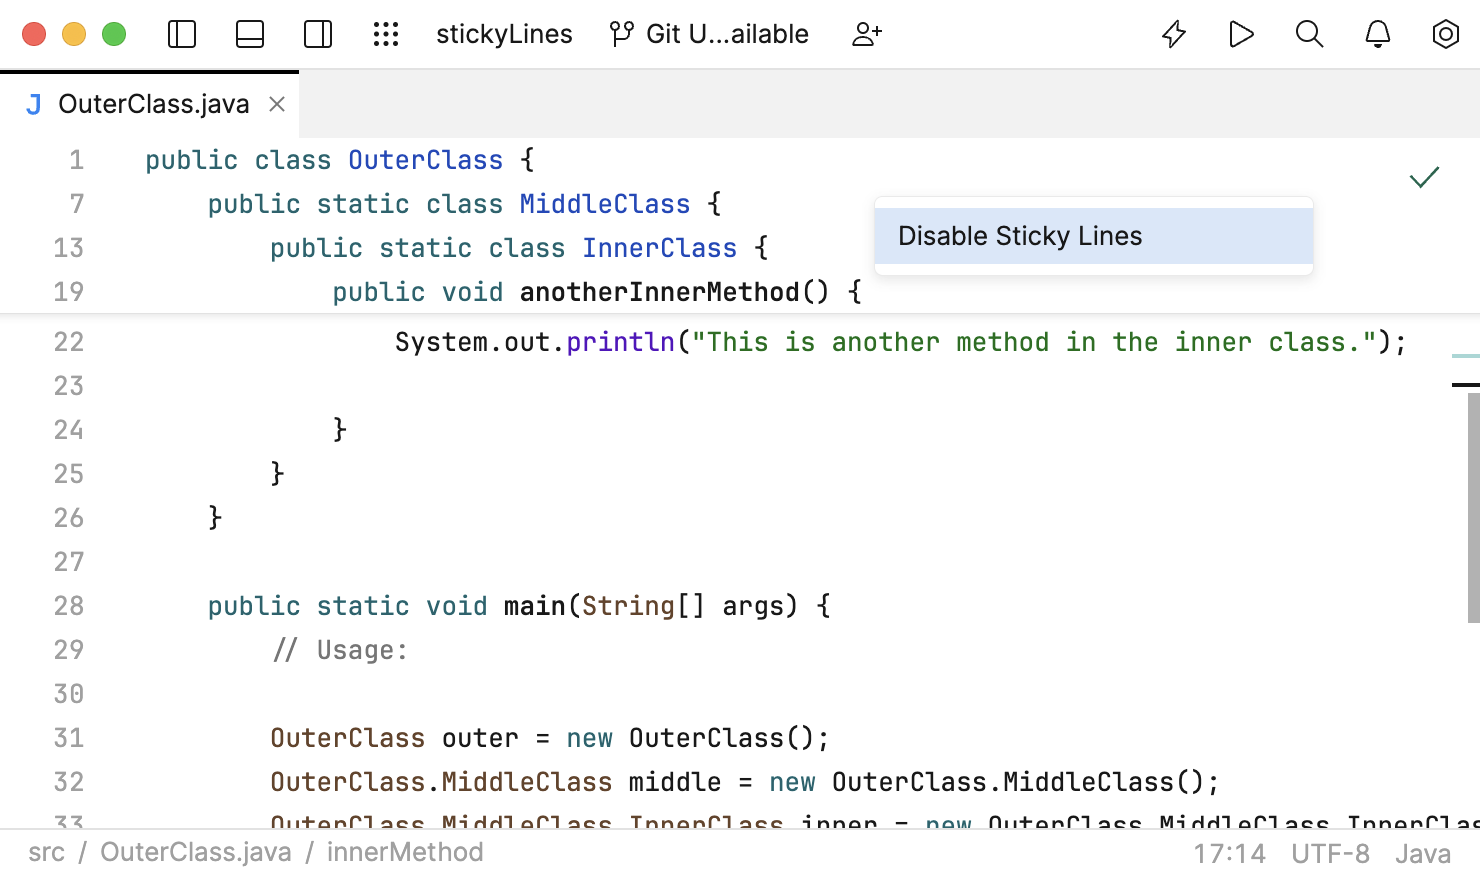
Right-click the sticky lines in the editor and click Disable sticky lines.
Press ⌘ , to open settings and then select . Clear the Show sticky lines checkbox.