Dashboards
The Dashboard is a convenient way to get an overview of the the current status of your tasks and monitor the progress of your team.

The dashboard is shown by default when you log in to Hub. Each user has a personal dashboard that is assigned the name My Dashboard. You can edit, rename, and share your personal dashboard, or keep it to yourself. There is also a dashboard that you can use to display information to guest users. For more information, see Guest Dashboard.
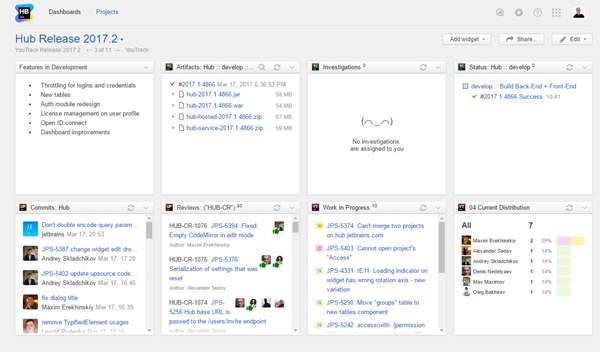
A dashboard displays widgets on cards. The type of widgets that are available on a dashboard is related to the services that are connected to Hub. Dashboards support the following types of widgets:
| Service | Widget | Description |
|---|---|---|
| TeamCity | Build Artifacts | Displays a list of artifacts from a specific build configuration. |
| Investigations | Displays a list of active investigations that are assigned to you in TeamCity. | |
| Project Status | Displays the status of builds in a specific project. | |
| Upsource | Commits | Displays a list of VCS commits in a specific project. |
| Reviews | Displays a list of code reviews that match a specific search query. | |
| YouTrack | Issues | Displays a list of issues that match a search query, saved search, project, or tag. |
| Reports | Displays the calculation of a predefined report. | |
| Hub | Quick Notes | Displays whatever message you want to show on your dashboard. |
You can add as many widgets of each type to a dashboard as you like.
To add a widget to the dashboard:
Multiple Dashboards
You can create and view multiple dashboards, each with their own set of widgets. This feature lest you set up and monitor dashboards for different projects.
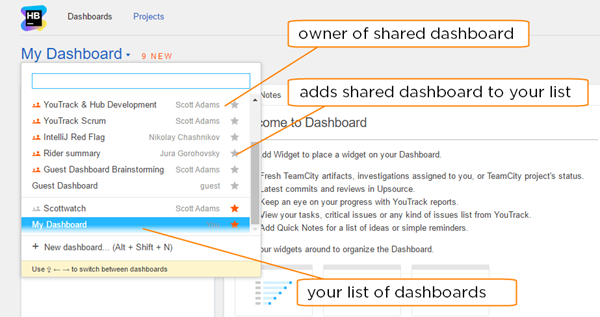
When the current dashboard belongs to your list of dashboards, the number of dashboards in your list is displayed under the name of the current dashboard. The names of the previous and next dashboard on the list are also shown.
Press Shift + Left or Shift + Right to switch between dashboards.
Press Shift + Down to expand the dashboards drop-down list.
To add another dashboard:
Shared Dashboards
In addition to the dashboards you create yourself, you can view dashboards that have been shared with you.
When a member of your team shares a dashboard with you directly or with a group of which you are a member, you see a link next to the name of your current dashboard. When you click this link, the name of the shared dashboard is displayed, as well as the name of the user who shared the dashboard.

- To add this dashboard to your list, simply click the star icon, or select the shared dashboard and click the Add to my dashboards button.

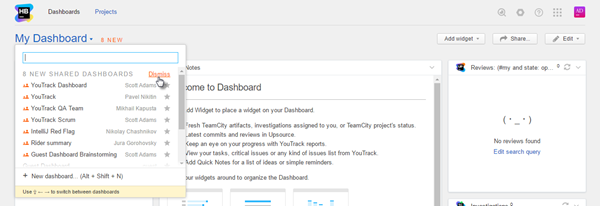
- To remove the notification link from your dashboards, click the Dismiss link in the drop-down list.

You can still view the shared dashboard even if you have not added it to your list.
- To remove a dashboard from your list, open the list of dashboards and click the star icon. You still have access to the dashboard from the list, but the dashboard is removed from the list of dashboards you can access using keyboard shortcuts or with the links in the header.
The current sharing options are displayed as a link in the dashboard header.

- If the dashboard is shared with a single user or group, the name of the user or group is displayed in the link.
- If the dashboard is shared with multiple users or groups, the link displays the number of users and groups who can access the dashboard. Click the link to display the complete list of users and groups who can access the dashboard.
- If another user shared the dashboard with you, the name of the dashboard owner is also shown in the link.
For more information, see Share a Dashboard.
Organize a Dashboard
To organize a dashboard, all you have to do is drag the cards around the dashboard and place them in the order you like.
You can size the cards on the dashboard. Drag the edge of the card to set the height and width. The size of the card automatically snaps to the closest intersection of the grid.
Additional Actions for Dashboards
In addition to the option to add widgets to your dashboards, the following actions are available:
| Option | Description |
|---|---|
| Share | You can configure a dashboard and share it with another user or group. For more information, see Share a Dashboard. |
| Rename | You can change the name of your dashboard at any time. To access this option, click . |
| Delete | If you no longer want to use a dashboard on your list, you can delete it. To access this option, click . |
Additional Actions for Widgets
There are several operations that you can use to customize your dashboard and share its content with your team. To open the list of actions that are available for a widget, click the down arrow in the title bar. To update content of a widget, click the refresh icon in the title bar.
If a widget contains information that you want every member of your team to work with, you can share the widget.
To share a widget:
- Click the down arrow in the title bar of the widget that you want to share.
- Select the Share widget option.
- Click the Copy button in the Share Widget dialog and send it to your team-mates.
If the person with whom you shared the widget does not have permission to view the data that is used in the widget, the widget is empty.
You can create a clone of an existing widget on your dashboard. This option comes in handy when you want to add a similar widget with minor changes.
To clone a widget:
You can move a widget from the current dashboard to another dashboard.
To move a widget to another dashboard:
If you want to modify the settings of the widgets on your dashboard, you can edit them at any time.
To edit an existing widget:
- Click the down arrow in the title bar of the widget that you want to edit.
- Select the Edit option.
- Modify the settings or content of the widget.
- For report widgets, select the report you want to display in the widget. The widget displays the selected report.
- For issue widgets, enter a new search query or select a different saved search, project, or tag. Click the Apply button to update the widget.
- For note widgets, edit the text in the input field. Click the Apply button to update the widget.
If you no longer want to see a widget on your dashboard, you can remove it.