Liquibase
tip
This functionality relies on the Liquibase plugin, which is bundled in IntelliJ IDEA Ultimate. Prior to 2024.1, support for some of its features was available in the JPA Buddy plugin only.
To enable corresponding features, make sure that the project contains the Liquibase dependency. It also provides a number of actions to quickly generate changelogs, run them, preview SQL statements, and so on.
<dependency>
    <groupId>org.liquibase</groupId>
    <artifactId>liquibase-core</artifactId>
</dependency>
dependencies {
implementation 'org.liquibase:liquibase-core'
}dependencies {
implementation("org.liquibase:liquibase-core")
}With IntelliJ IDEA, you can initialize your database schema based on the mappings provided in your JPA entities. It will generate a set of DDL commands for your current entities in the form of a Liquibase changelog.
Press CtrlShift0A and start typing Liquibase Init Schema.
You can also open a Liquibase changelog file, press AltInsert, and select Liquibase Init Schema. In this case, the opened file parameters will be used in the Changelog Preview window.
To generate the DDL script based on the data model, select Model and specify the corresponding persistence unit.
If you want to compare two databases, select DB and choose one of the existing connections for both of them.

IntelliJ IDEA provides an option to create migration scripts specifically for changes in selected entity changes. In the Scope list, click Selected Entities and, in the Select Entities for Custom Scope window, choose entities.
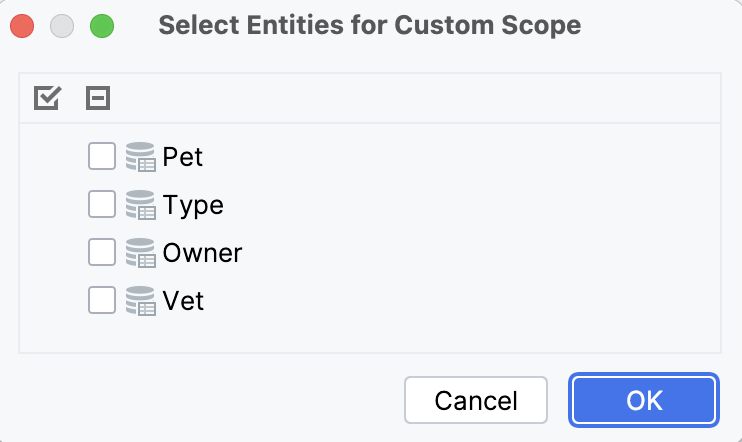

If you want to save the changelog as a regular file, then the following configuration options will be available:
Directory and File name fields are responsible for configuring the location of the generated changelog. If a changelog with the specified name already exists, you will be prompted with a warning, after which the changes will be appended to that changelog.
You can use Include to, Include folder, and Include context to specify whether a changelog should be included in another changelog. If you check the Include folder box, it generates the include statement for the entire folder, not just the current changelog.
From the File type drop-down list, you can choose one of the four file types (YAML, JSON, SQL, XML) supported by Liquibase, in which IntelliJ IDEA will generate the changelog.
If you want to save the changelog as a scratch file, then you can configure only its name and type.
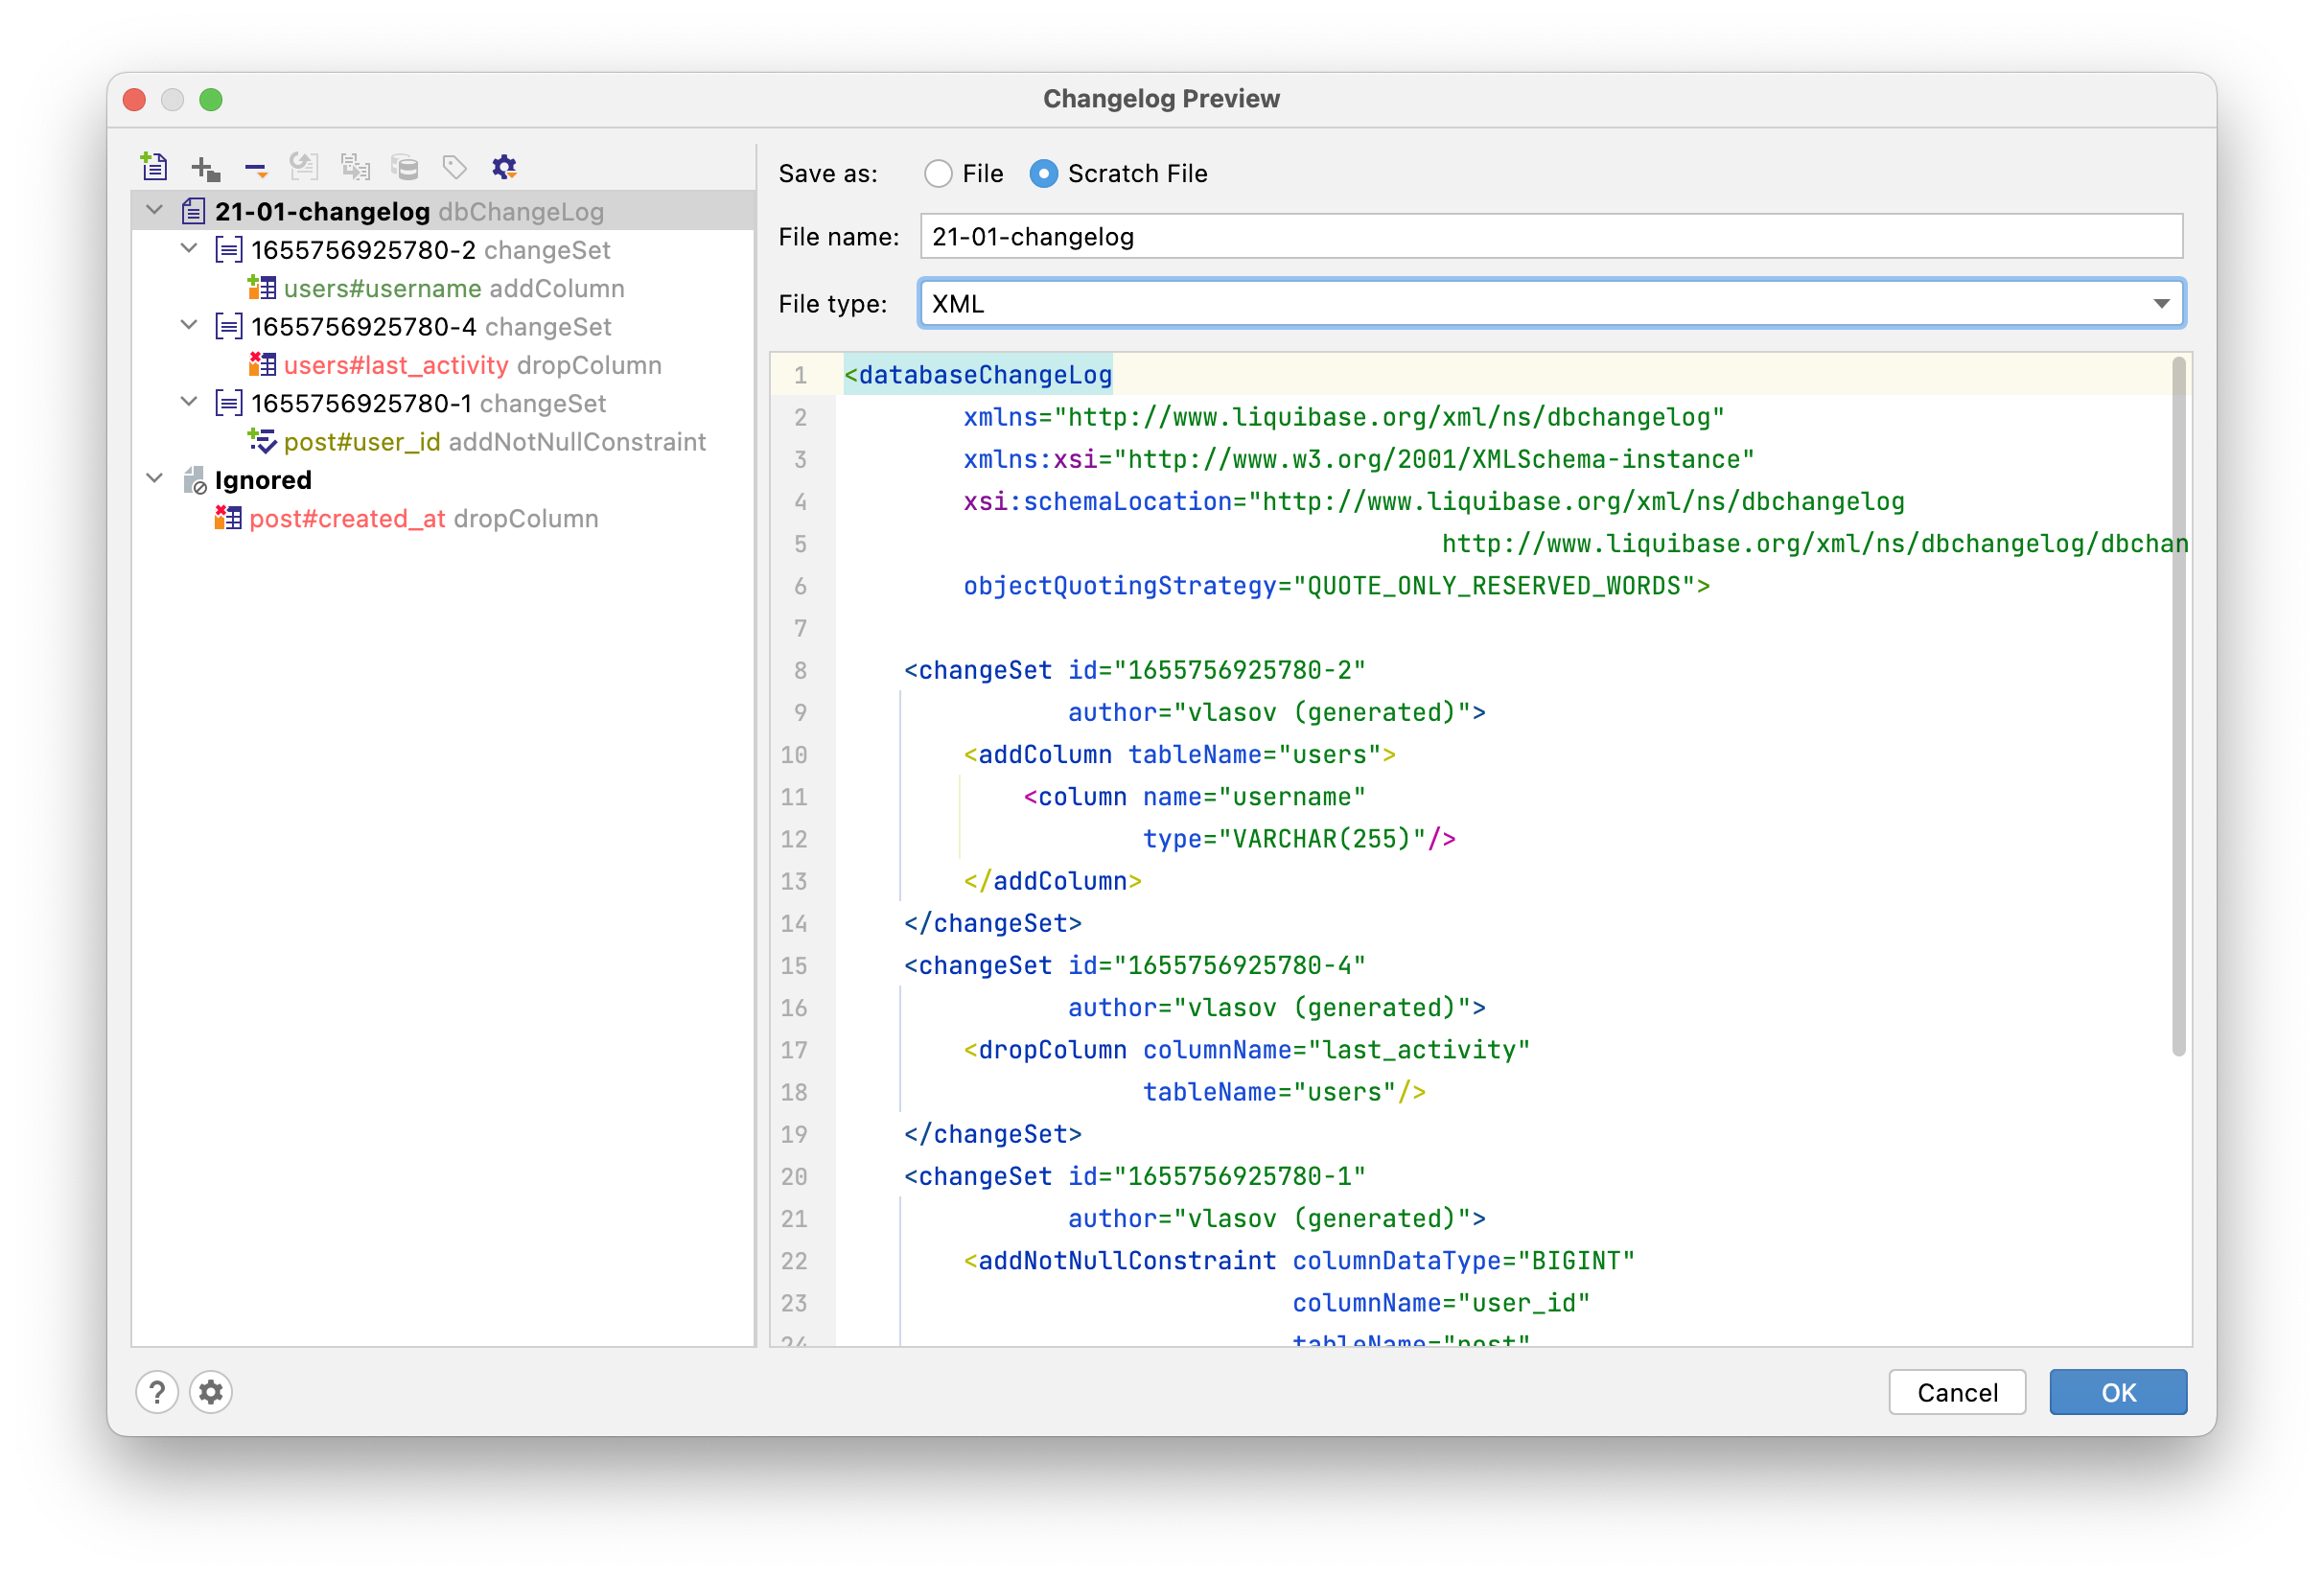
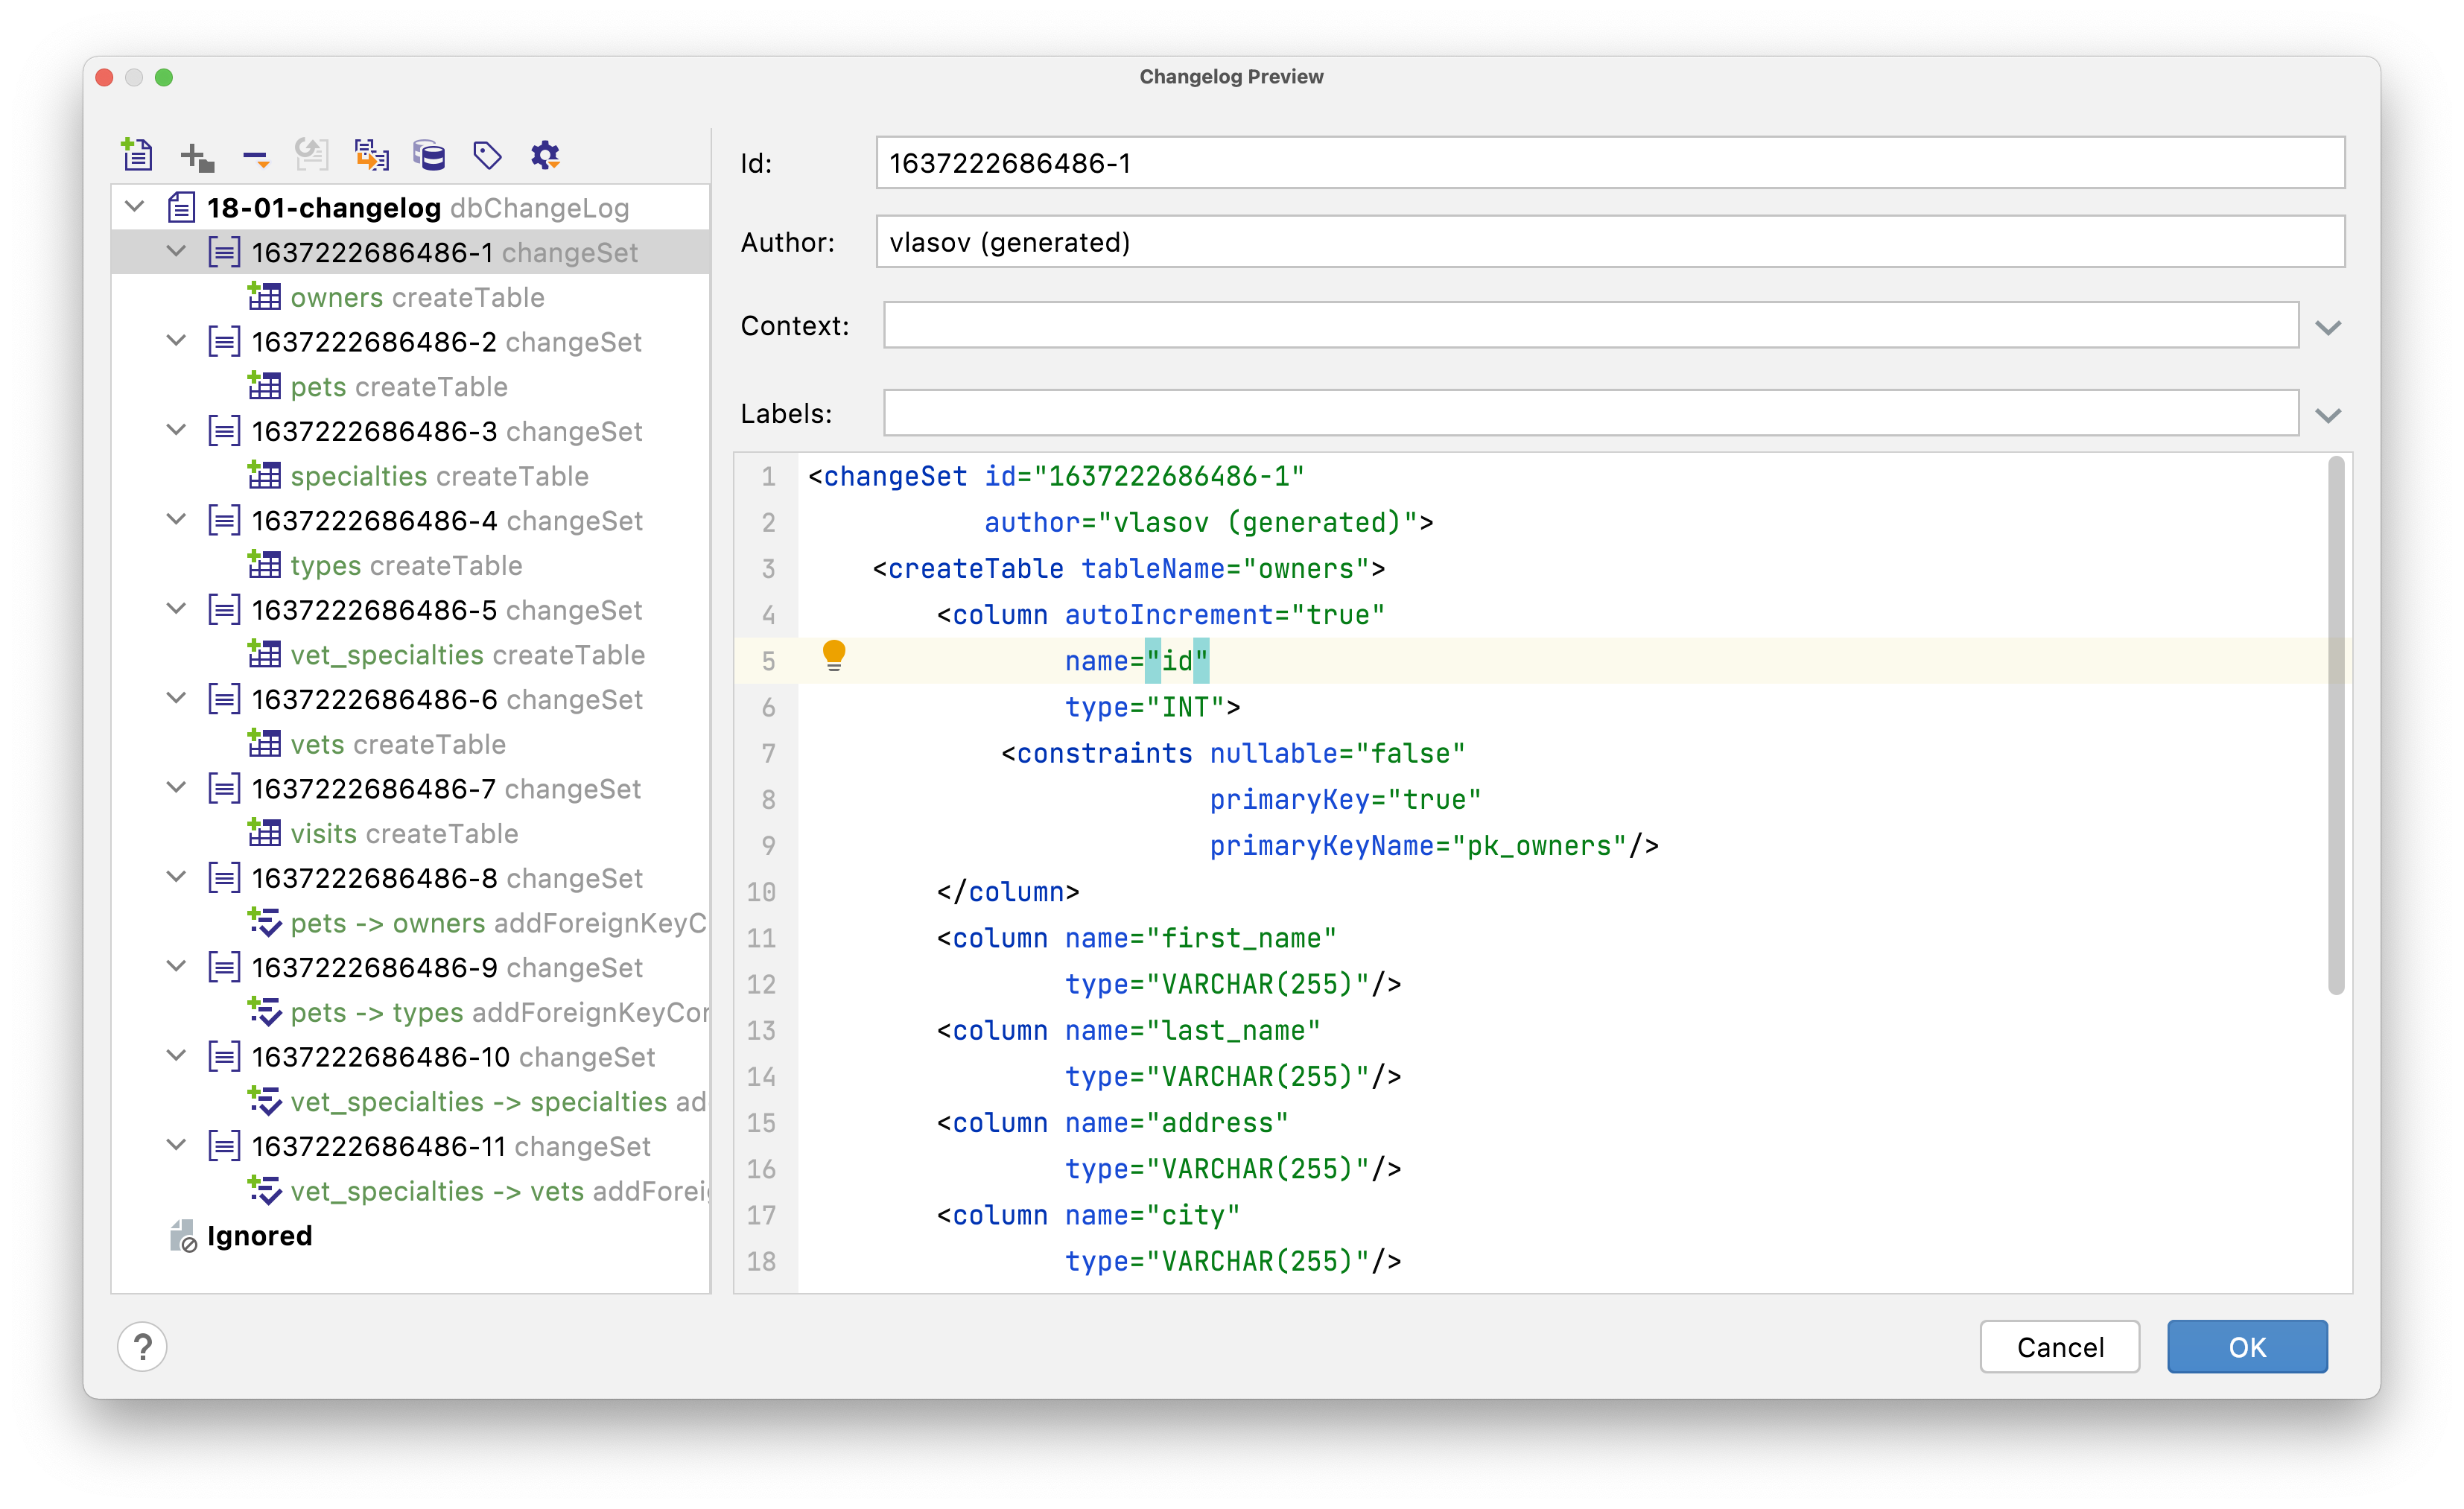
The left side of the window shows a preview of the changesets that will be generated. You can click on each change to see what it will look like. To combine several changes into one changeset or to ignore them, simply drag and drop them. The top left corner of the preview window contains various actions to modify the resulting changelog:
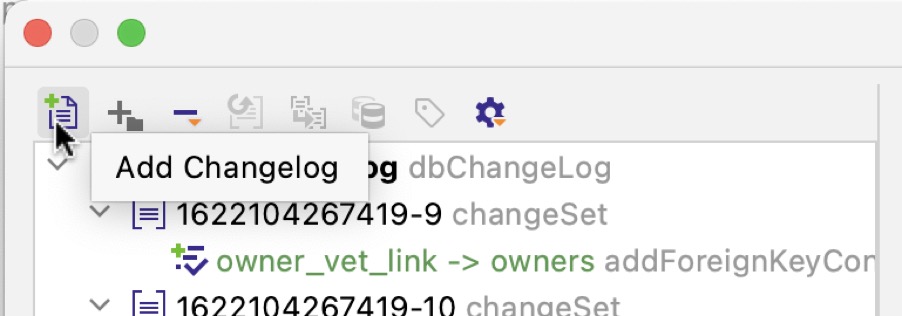
The following actions are provided:
Add Changelog — create a secondary changelog
Add Change Set — create a new changeset in the selected changelog
Remove from Changelog with options:
Remove from Changelog — simply remove the changes from the current changelog
Remove and Ignore — remove the changes and add them to Ignored, so they are excluded from future changesets too
Restore from Ignored — move the changes from Ignored to the changelog
Set Context (for changesets)
Set Labels (for changesets)
Show Other Actions — select all changes based on the danger level, expand/collapse all changes
In the Project tool window, right-click the db/changelog directory.
Select New (or press AltInsert) and select Liquibase Empty Changelog.
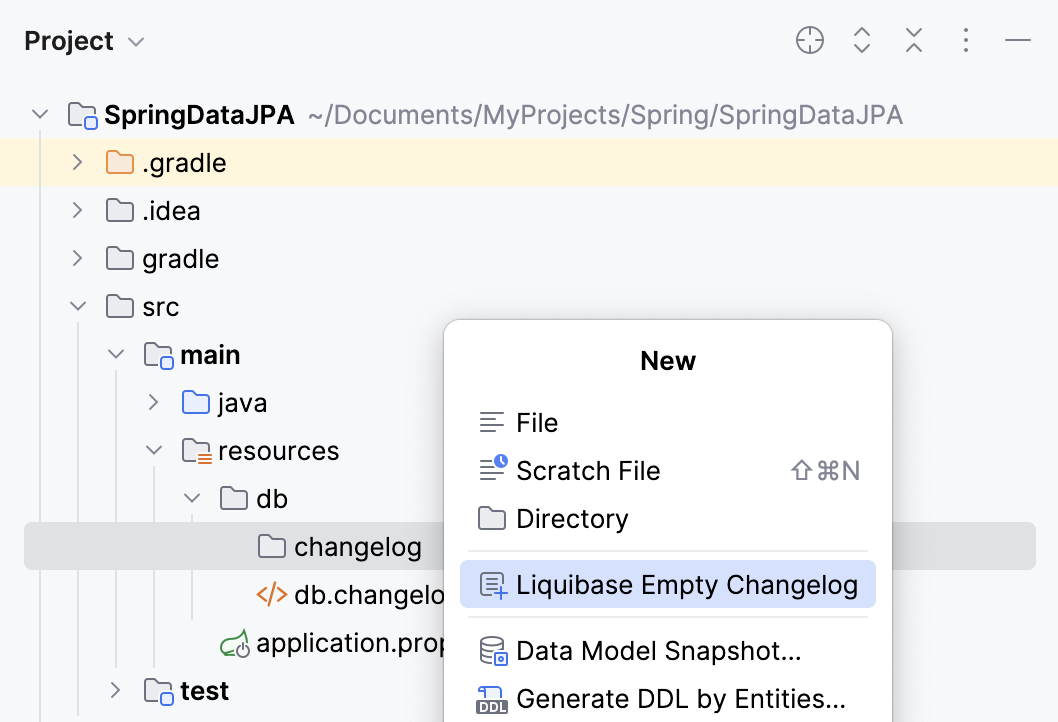
In the New Liquibase Changelog dialog that opens, select an XML or YAML format for the changelog file.
This will create a new file based on the Liquibase file template. You can check all available file templates in the IDE settings (CtrlAlt0S), under Editor | File and Code Templates.
IntelliJ IDEA provides you with coding assistance in XML and YAML Liquibase changelog files, including validation against the Liquibase schema, suggestion for known parameters, and navigation to property declarations and to included files.
IntelliJ IDEA lets you put the changes into two types of changelogs: Primary and Secondary. One use case for this is separating safe changes that can be run automatically and changes that require your attention and need to be run manually.
The changes can be separated automatically by their type (in Tools | Database Versioning | Diff Changes). Alternatively, you can create a secondary changelog manually in the Preview window using the Add Changelog action. Then you can simply drag the desired changesets into the new changelog.
By default, Primary and Secondary changelogs are generated in separate directories, which can be customized in the plugin settings. Read more in the IDE settings in the Tools | Database Versioning | Liquibase section.
If a database connection is not established, create one.
note
In Spring, Micronaut, and Quarkus projects, you can quickly create a database connection right from your application.properties or application.yml file by clicking
in the gutter.
In the Database tool window, right-click a database and select Create Liquibase Changelog.
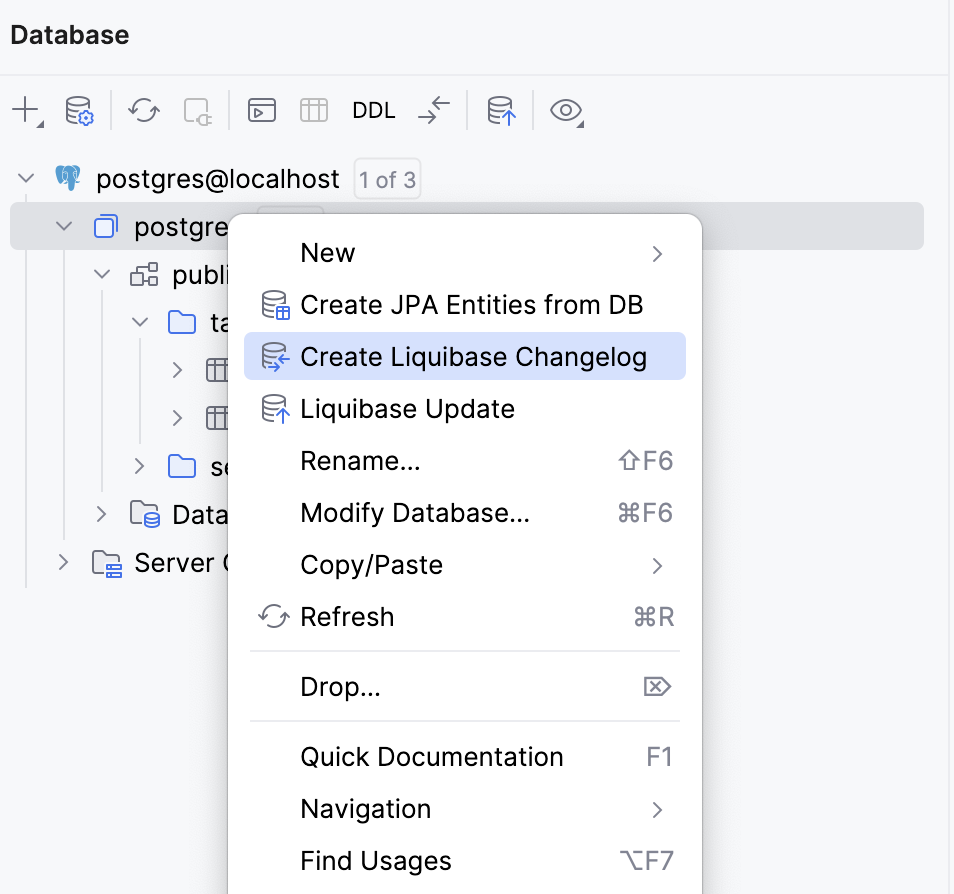
Alternatively, open a JPA entity in the editor and do one the following:
Click
in the gutter and select Create Liquibase Changelog.
Place the caret at an entity, press AltEnter to invoke intention actions, and select Create Liquibase Changelog.
note
If the IntelliJ IDEA plugin is installed and enabled, you can also right-click anywhere in the Project tool window and select New | Create Liquibase Changelog.
In the dialog that opens, select a source (the desired state of the data model) and target (the old state of the data model).
You can choose between the following source options:
DB: should be used in case you have an up-to-date database and would like to generate migration scripts for updating another DB to the same state.
Model: use it to generate migration scripts representing the difference between the current state of the entity relationship model (JPA entities) and the old (target) state.
The target can be set to:
DB — target DB with an older version of the schema.
Snapshot — use this option in case you have the desired state stored in a data model snapshot. It can be generated by IntelliJ IDEA as well.
Click OK. IntelliJ IDEA will analyze the difference between Source and Target and show the Changelog Preview dialog.
If you want to save the changelog as a regular file, then the following configuration options will be available:
In the Directory field, specify the location where you want to save the changelog file.
In the File name field, enter the name of a generated changelog file.
You can use Include to, Include folder, and Include context to specify whether a changelog should be included in another changelog. If you select the Include folder checkbox, it generates the include statement for the entire folder, not just the current changelog.
In the File type list, you can choose one of the four file types (YAML, JSON, SQL, XML) supported by Liquibase, in which IntelliJ IDEA will generate the changelog.
If you want to save the changelog as a scratch file, select Scratch File on top of the Changelog Preview dialog and specify its name and type.

The JPA Structure tab also offers a way to run Liquibase updates and preview SQL. To run an update, click the Liquibase Update button
In the Database tool window, right-click a database and select Liquibase Update.
Alternatively, press CtrlShift0A and type Liquibase Update.
In the Liquibase Update dialog that opens, configure the following parameters:
The path to the changelog file
The DB connection to use
Liquibase context and labels
The log level of the operation
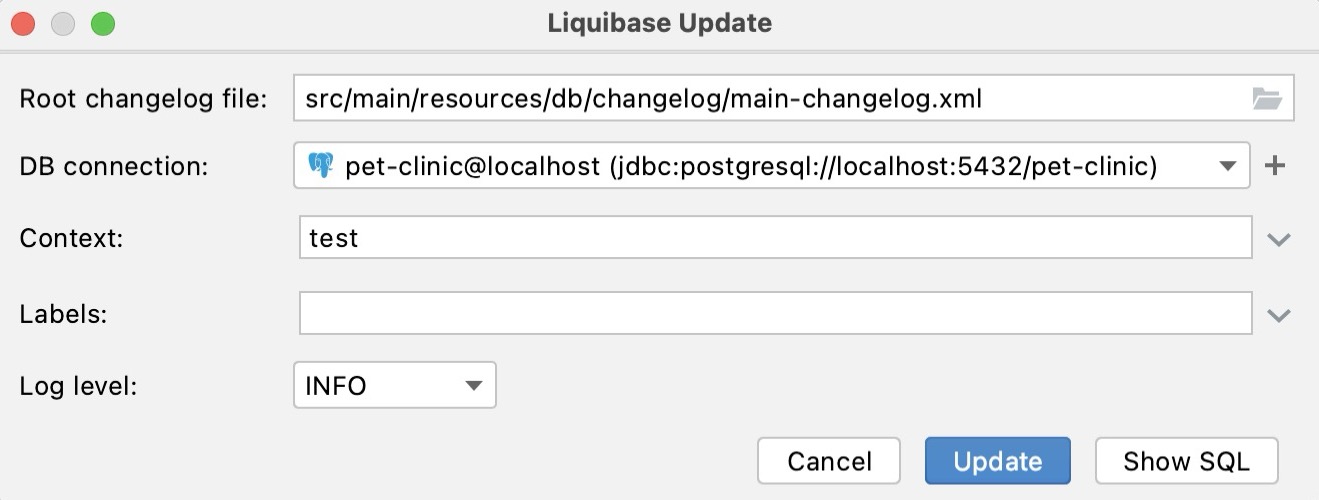
Click Update to run the Liquibase update command with the configured options.
You can also click Show SQL to show the SQL statement preview.

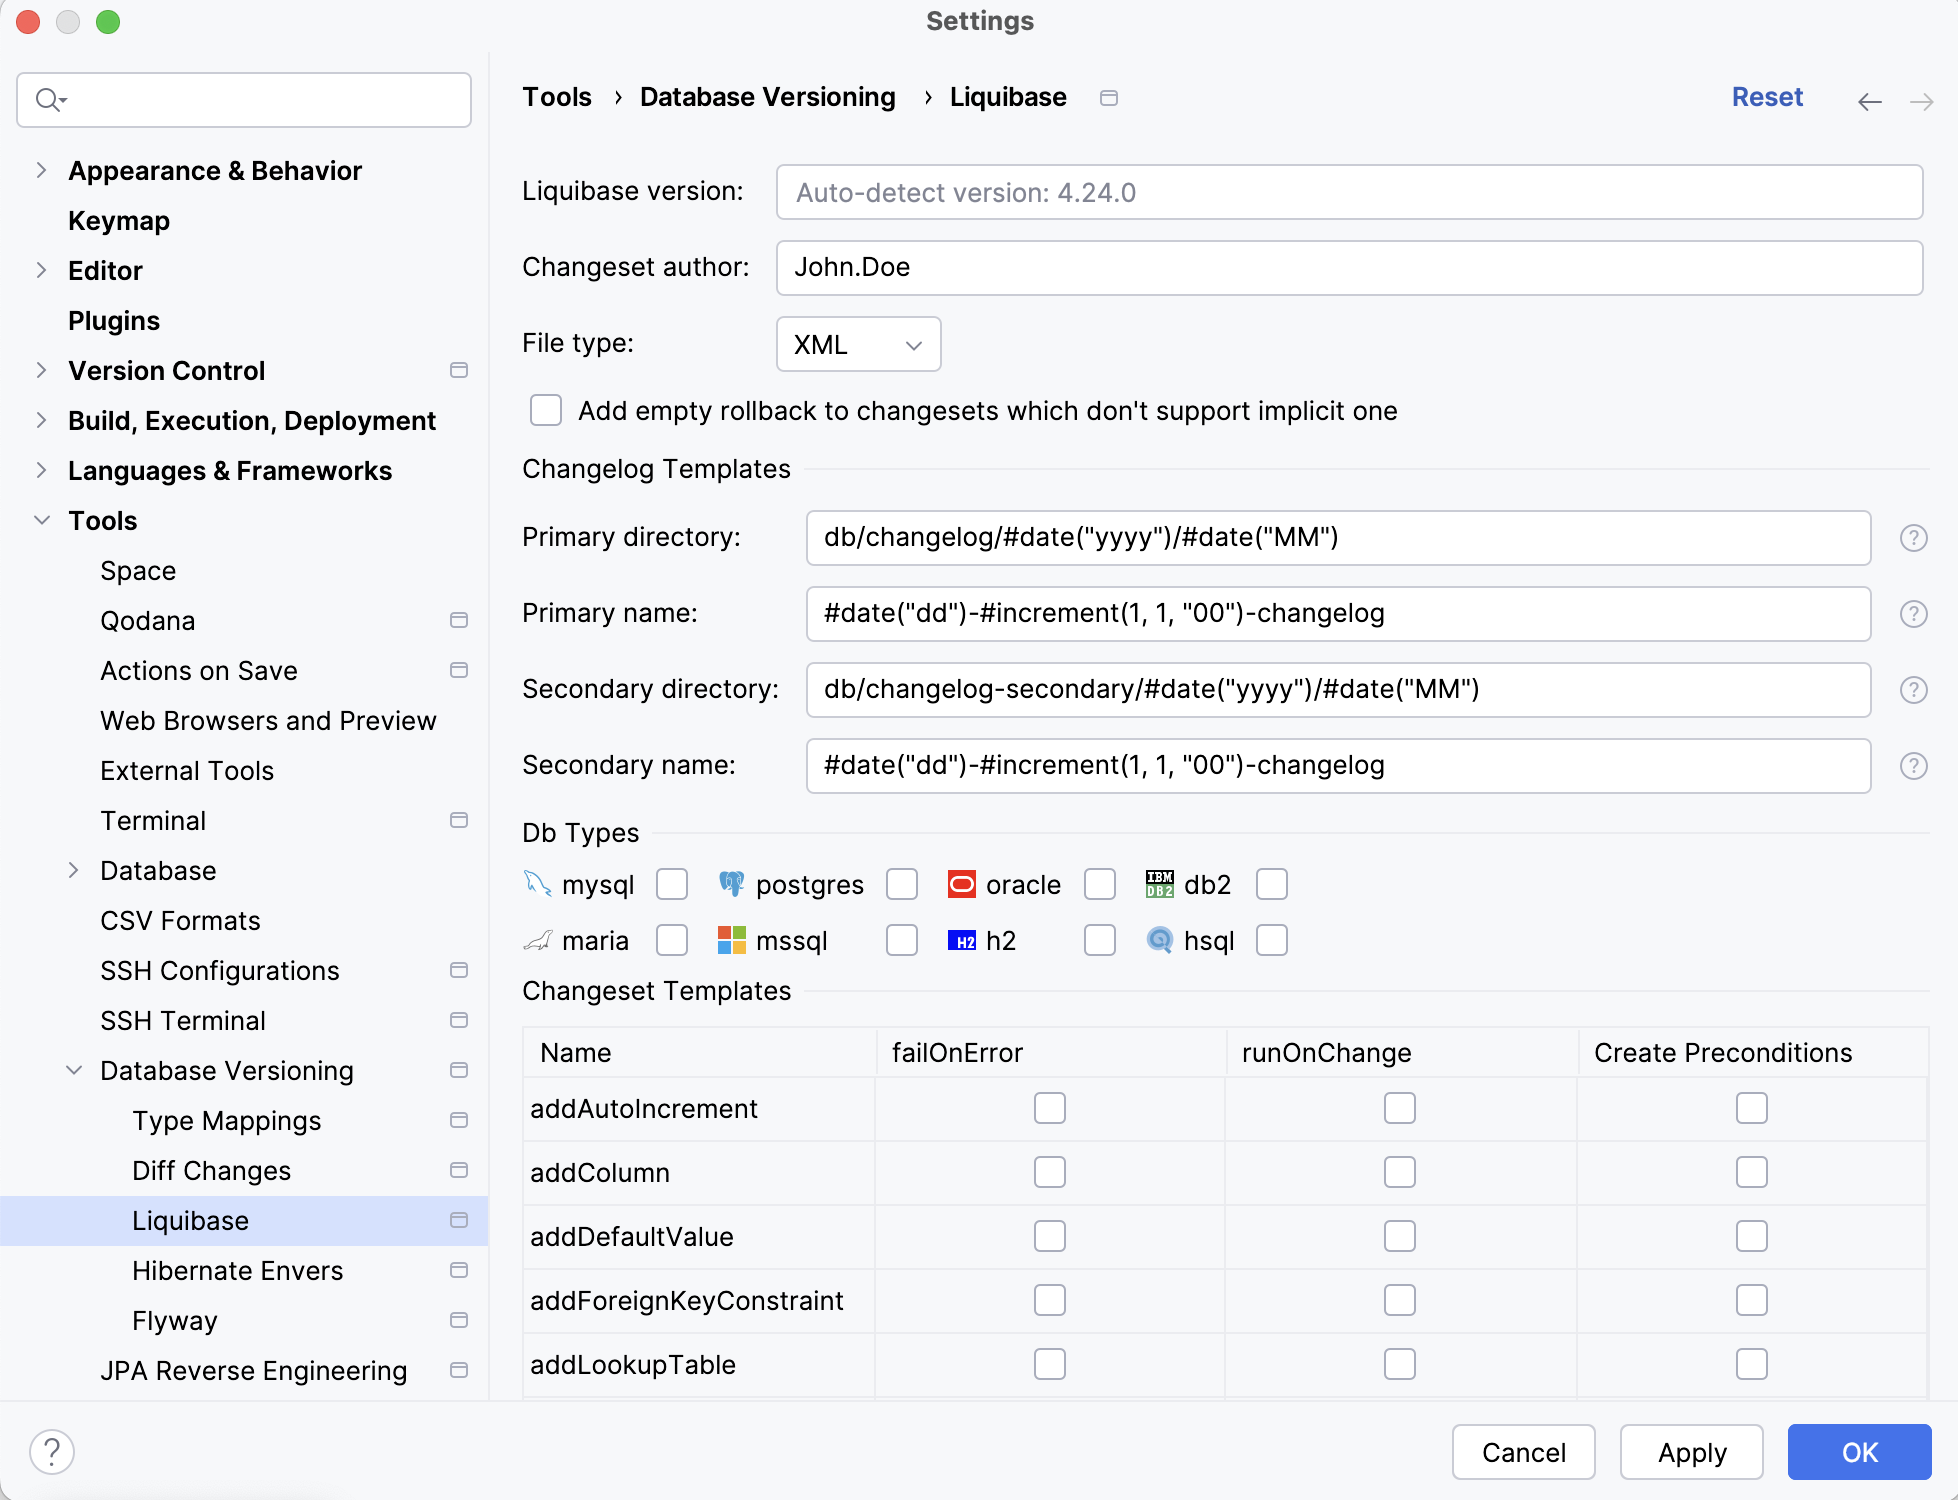
IntelliJ IDEA allows you to specify:
Liquibase version that you want to use
Changeset author name
The default file type. The following four file types are supported:
XML
SQL
YAML
JSON
Whenever an empty or differential Liquibase changelog is created, IntelliJ IDEA generates the file name based on the templates. You can configure primary/secondary directory and name of the changelogs.
The following variables and macros are available for the precise configuration:
#date([format])– the current system date in the specified SimpleDateFormat. For example,#date(\"yyyy-MM-dd\")returns the date formatted as 2020-12-31.#increment([start], [step], [decimalFormat])— a number that is used to keep the name unique.startvalue is used for the first file and is incremented by step for each next file.decimalFormatparameter specifies the DecimalFormat of the number. For example,#increment(1.0, 0.1, \"#.0\")returns the value formatted as 1.1, 1.2, 1.3, etc.semVer— semantic version of the project (aka SemVer) is a widely adopted version scheme that uses a sequence of three digits (Major.Minor.Patch), an optional pre-release tag and optional build meta tag. The object contains the following methods (the full version in the examples is 1.2.3-SNAPSHOT+meta):${semVer.getRawVersion()}: 1.2.3-SNAPSHOT${semVer.getMajor()}: 1${semVer.getMinor()}: 2${semVer.getPatch()}: 3${semVer.getPreRelease()}: SNAPSHOT${semVer.getMeta()}: meta
Sometimes software must provide support for a few DBMS types. In this case, Liquibase is the best choice, as it offers a cross-DB solution to declare DDL modifications. IntelliJ IDEA supports this solution as well. When generating cross-DB changelogs, it uses Liquibase properties to specify correct data types for each DBMS:
<property name="string.type" value="varchar" dbms="postgresql"/>
<property name="string.type" value="nvarchar" dbms="mssql"/>
<changeSet id="1622118750064-2" author="jpa-buddy">
<createTable tableName="owners">
<column autoIncrement="true" name="id" type="INT">
<constraints nullable="false" primaryKey="true" primaryKeyName="PK_OWNERS"/>
</column>
<column name="first_name" type="${string.type}(255)"/>
<column name="last_name" type="${string.type}(255)"/>
<column name="address" type="${string.type}(255)"/>
<column name="city" type="${string.type}(255)"/>
</createTable>
</changeSet>
Therefore, there is no need to create separate changelogs for different DBMSes.
Changeset templates are pre-defined structures that provide a standardized format for specifying database schema changes using Liquibase. These templates serve as a foundation for creating consistent and reusable changesets, ensuring uniformity and ease of maintenance across database deployments.
IntelliJ IDEA provides an ability to apply templates while generating changesets. This feature provides the ability to include various customizable elements in it:
Add empty rollback to changesets which don't support implicit one – this option automatically adds an empty rollback tag with a TODO comment to any new changeset lacking an implicit rollback.
failOnError and runOnChange: IntelliJ IDEA supports the commonly used attributes within the changeSet tag, allowing users to set default values for
failOnErrorandrunOnChange.Create preconditions – each changeset can have specific preconditions. For example,
tableExistsandcolumnExistsprecondition tags will be added for theaddColumnstatement:
<changeSet id="1685085536452-1" author="jpa-buddy">
<preConditions>
<tableExists tableName="customer"/>
<not>
<columnExists tableName="customer" columnName="id"/>
</not>
</preConditions>
<addColumn tableName="customer">
<column name="id" type="BIGINT">
<constraints nullable="false" primaryKey="true" primaryKeyName="pk_customer"/>
</column>
</addColumn>
</changeSet>
It is important to note that certain Liquibase changesets may not offer this option. For example, the tag procedureExists is not available for the createProcedure statement.
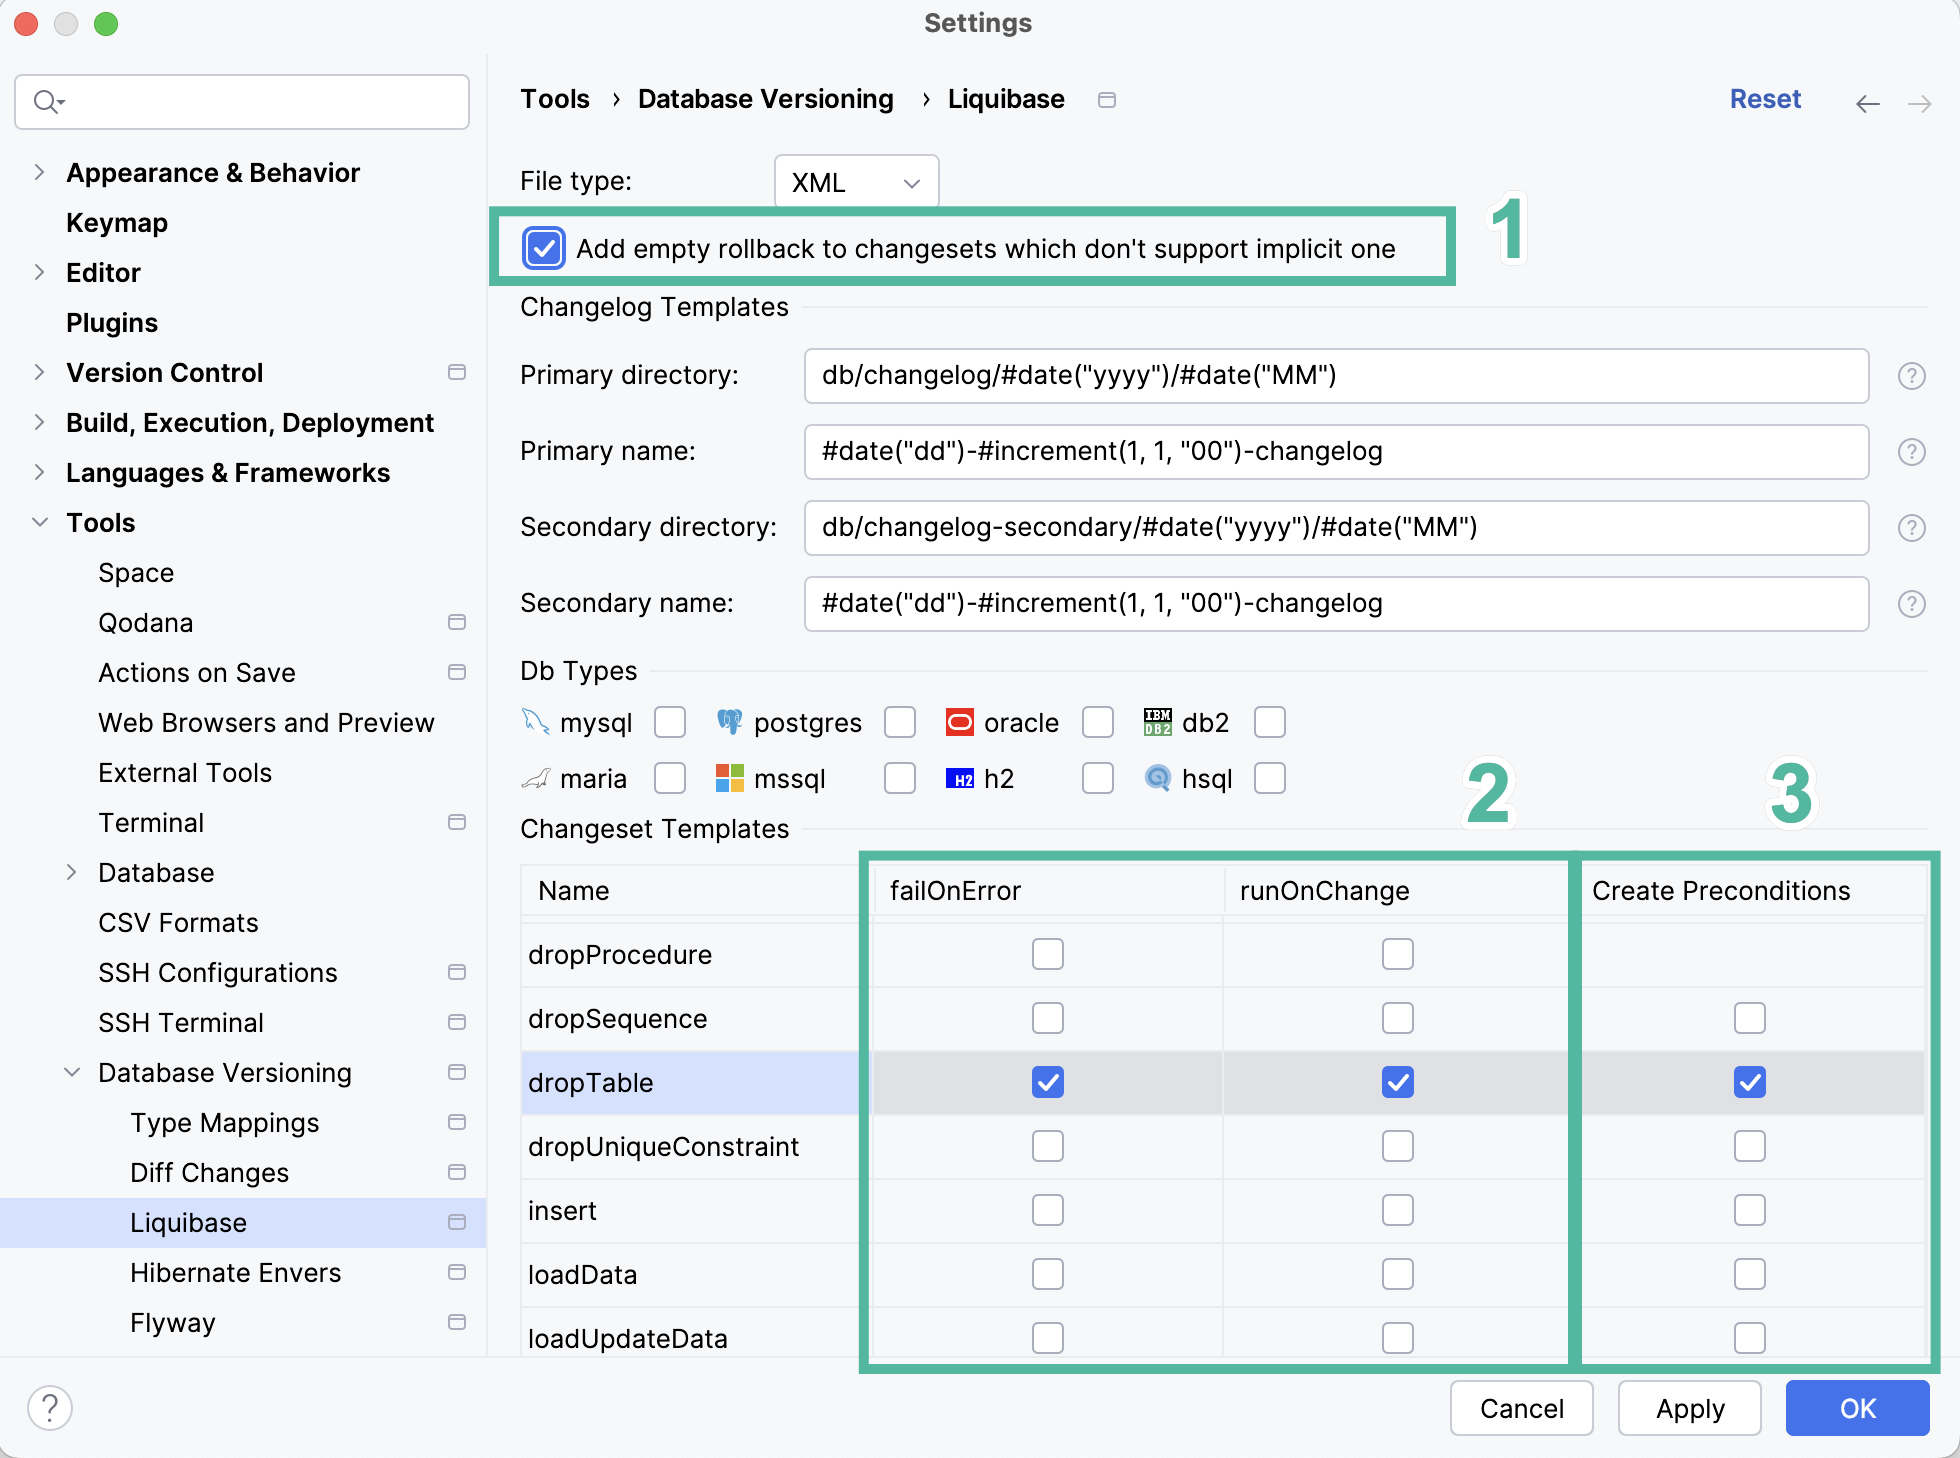
Here is an example showcasing all four features enabled for a drop table changeset:
<changeSet id="1680594632747-1" author="jpa-buddy" runOnChange="true" failOnError="true">
<preConditions>
<tableExists tableName="customer"/>
</preConditions>
<dropTable tableName="customer"/>
<rollback><!--TODO--></rollback>
</changeSet>You can install the JPA Buddy plugin to get even more support for Liquibase including the dedicated JPA Explorer tool window. It displays everything that JPA Buddy knows about the project. For Liquibase changelogs, it shows their hierarchy and contents.
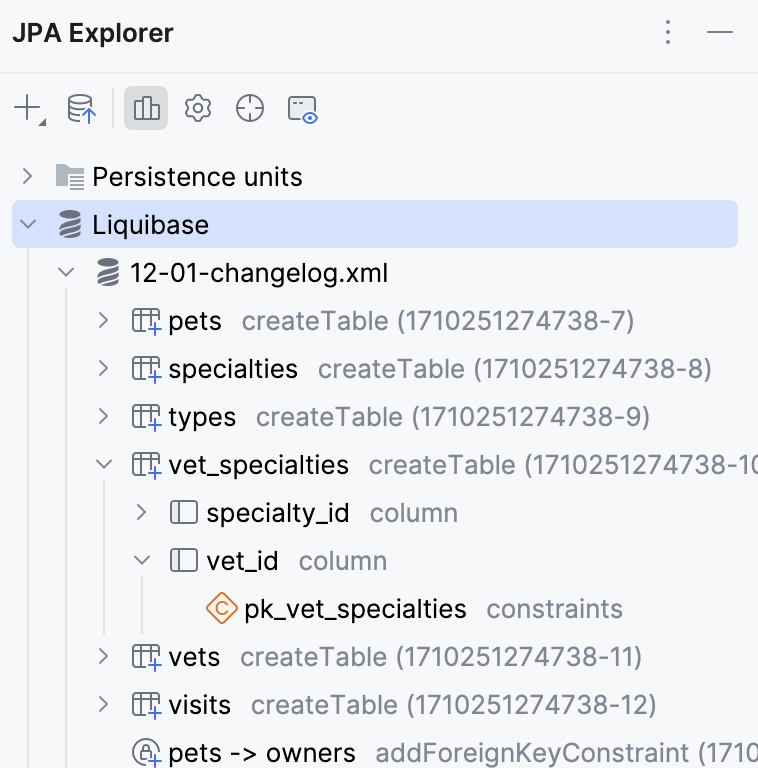
To create a new changelog, right-click the desired folder in the project tree and select New | Liquibase | Empty Changelog. Or click in the top-left corner of the JPA Structure tab:
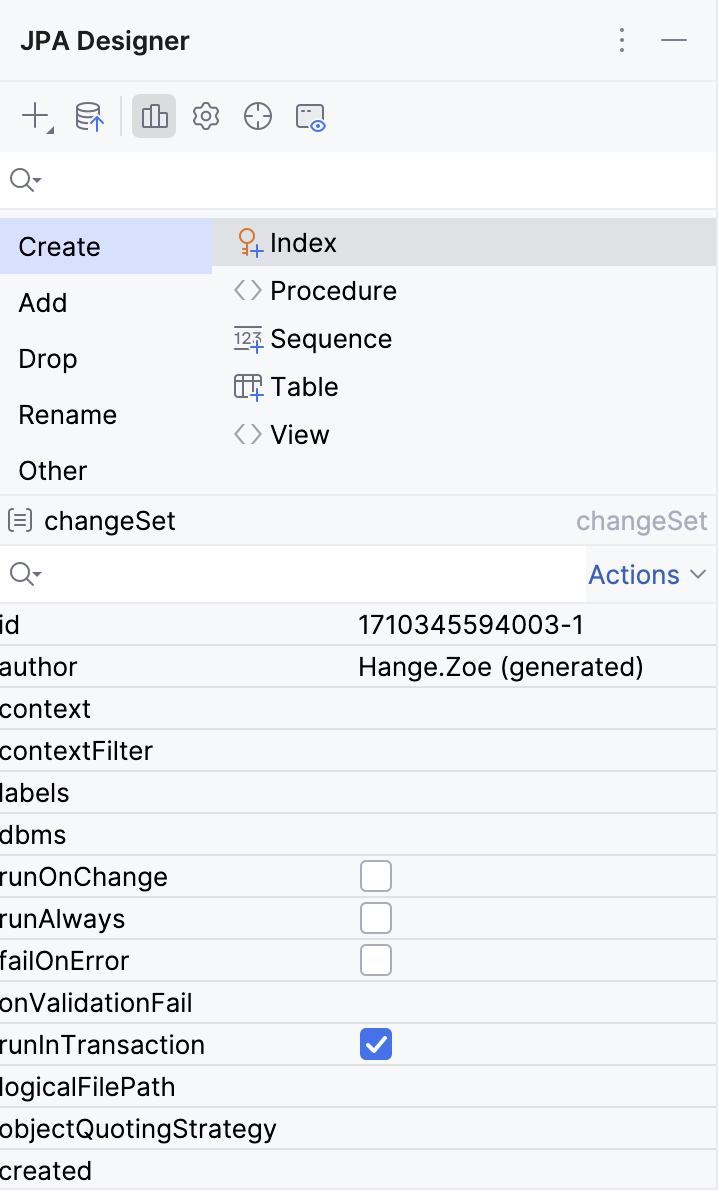
The JPA Designer tool window lets you generate and modify code.
note
JPA Designer can also be shown as a tab in the JPA Buddy tool window depending on the visual designer settings.
In the upper part of the tool window (JPA Palette), select an action for example, Create, and then double-click an element, for example, Table.
The lower part of the tool window (JPA Inspector) adapts to the selected element of the changelog, for example, a changeSet, and allows you to modify its attributes.
To learn more about JPA Designer, refer to Entity Designer.
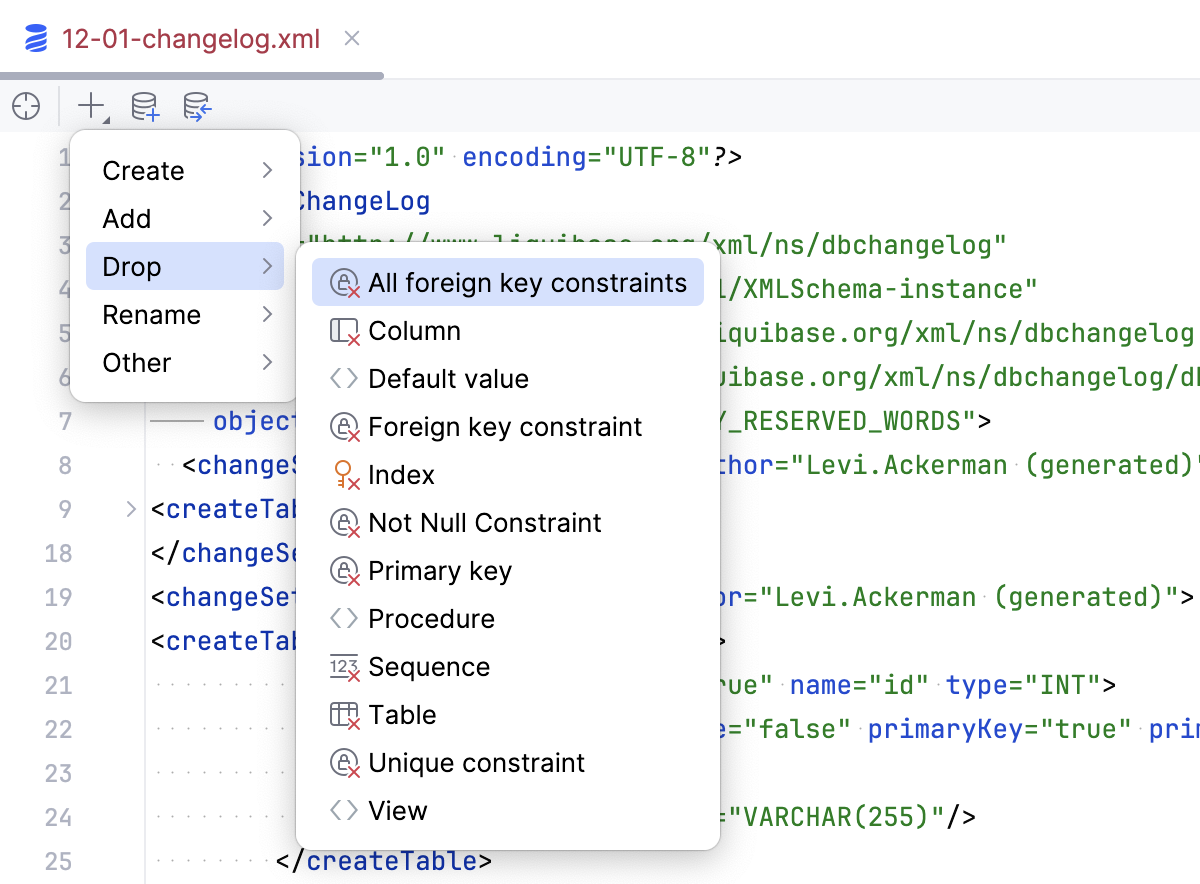
The Editor Toolbar provides fast access to relevant actions. It includes:
An action to select the opened file in JPA Structure
All actions from JPA Palette
Init Schema Changelog action
Diff Changelog action
JPA Buddy understands your data model and prefills the changesets as much as possible. And with the help of JPA Inspector you can explore the attributes of each changelog element:
Thanks for your feedback!