Quick start guide: building a theme plugin in Fleet
Here's a quick start guide on how to build your own plugin in Fleet using the JetBrains Fleet SDK. This guide will help you set up your environment and walk you through the steps necessary to create, configure, and publish your plugin.
The JetBrains Fleet SDK is a set of tools and plugins for the Gradle build system. It assists in configuring your environment to build and publish plugins for JetBrains Fleet.
Git – try to use the latest version
Fleet 1.38.39 and later
JDK 17
To get started, clone the JetBrains Fleet Theme Plugin Template from the Git repository. This template helps you set up a custom theme for JetBrains Fleet.
In the welcome dialog, click Clone from Git.
In the Source URL field, paste the following URL: https://github.com/JetBrains/fleet-theme-plugin-template.git.
tip
If you plan to continue developing your plugin in a version control system (VCS), consider creating a repository from a template. To use this functionality, you must be logged into your GitHub account. This feature allows you to create a new repository from a template, which is similar to forking but offers some advantages. Unlike forking, using a template lets you start with a clean repository history without retaining the original commit history. For more information about this feature, refer to Creating a repository from a template on the GitHub documentation site.
After cloning the repository, wait for Smart Mode to process the Gradle configuration in the project. Once processing is complete, run the following Gradle command to verify that everything is configured correctly:
./gradlew tasksThis command will display all available tasks in your workspace, including those added by the plugin. If all files are processed correctly, you will see the BUILD SUCCESSFUL notification in the terminal.
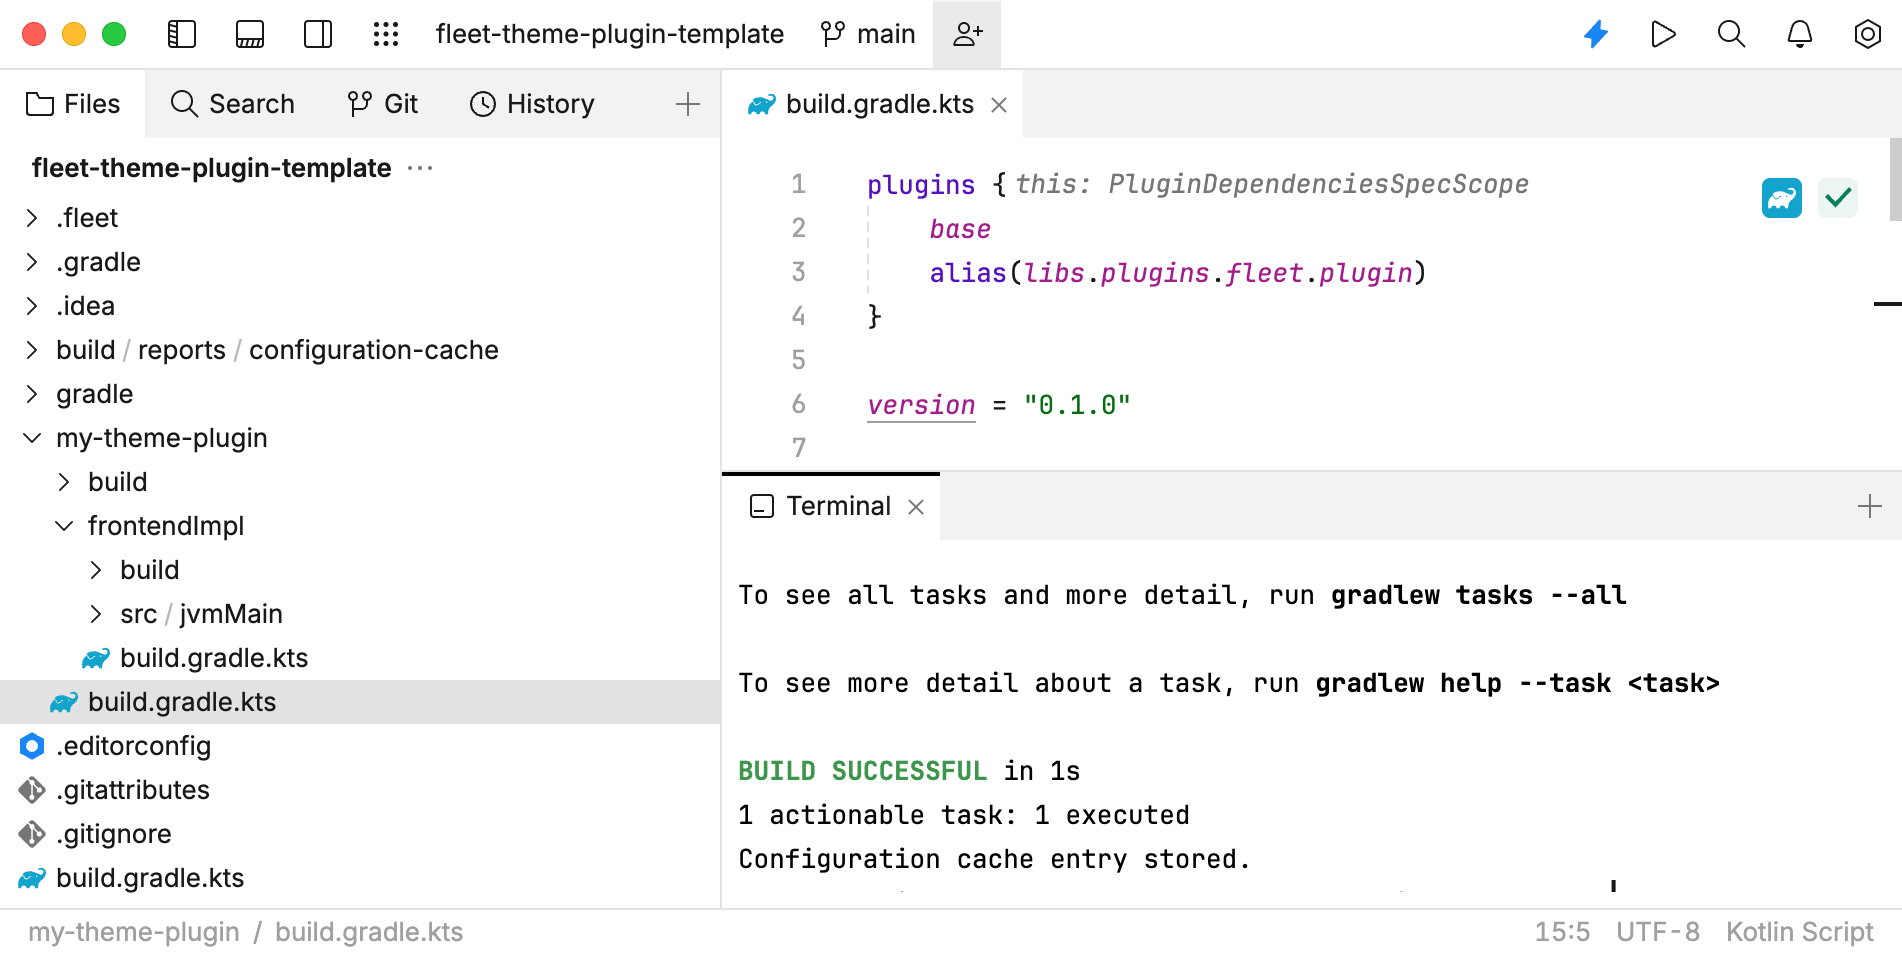
Now you can continue configuring the plugin.
Navigate to the my-theme-plugin folder and open build.gradle.kts in the editor.
Specify the following values:
id: your plugin's unique identifier. Use any identifier that will make your plugin unique.readableName: a readable name for your plugin.description: a short description of what your plugin does.
You can uncomment the corresponding lines for the properties mentioned above. For
readableNameanddescription, make sure to uncomment the entiremetadatasection.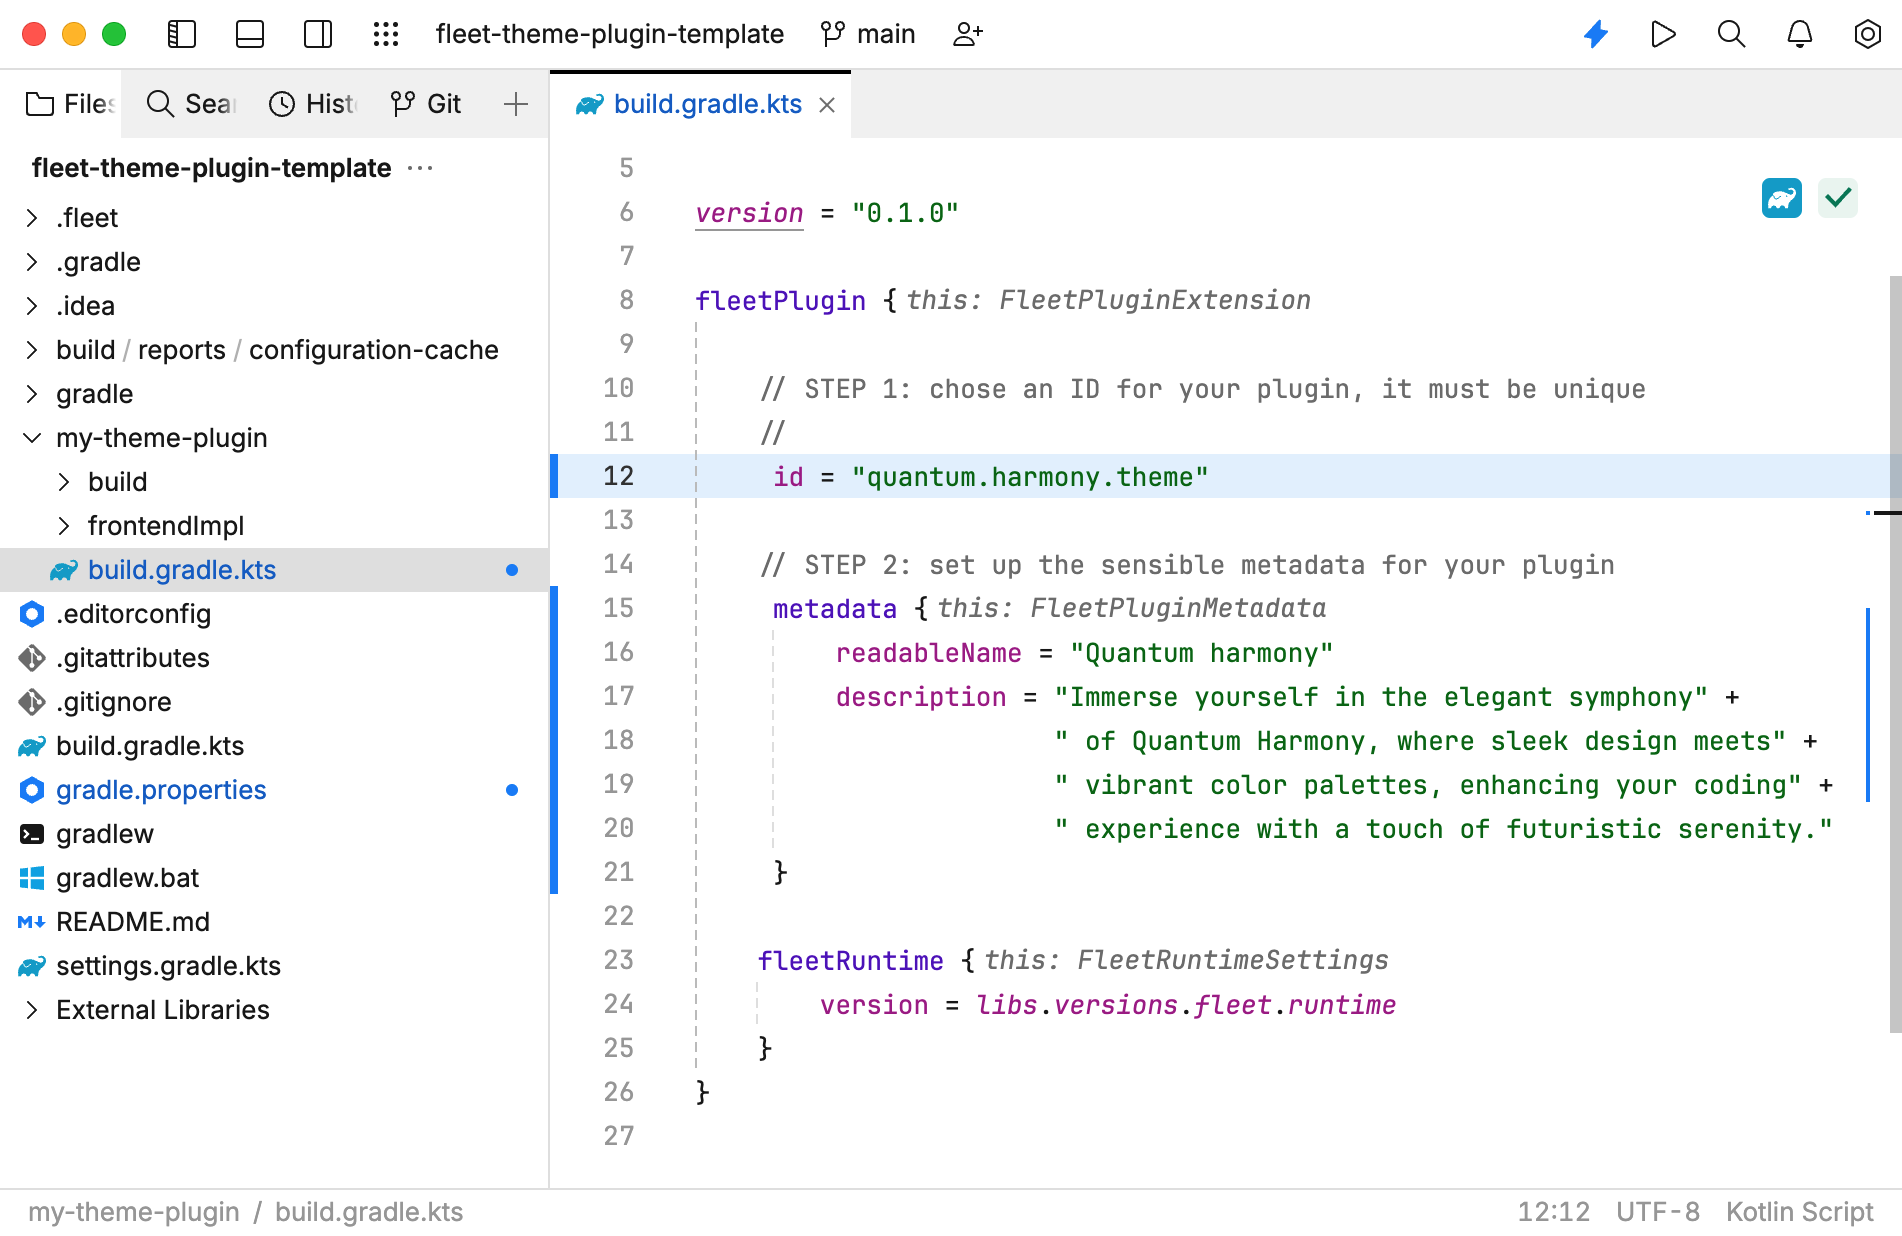
Navigate to the MyThemePlugin.kt file in the my-theme-plugin
/frontendImpl directory and open it in the editor./src /jvmMain /kotlin /fleet /sample /frontendImpl/ Replace the value of the
idparameter. The default value isyour-theme-id-here.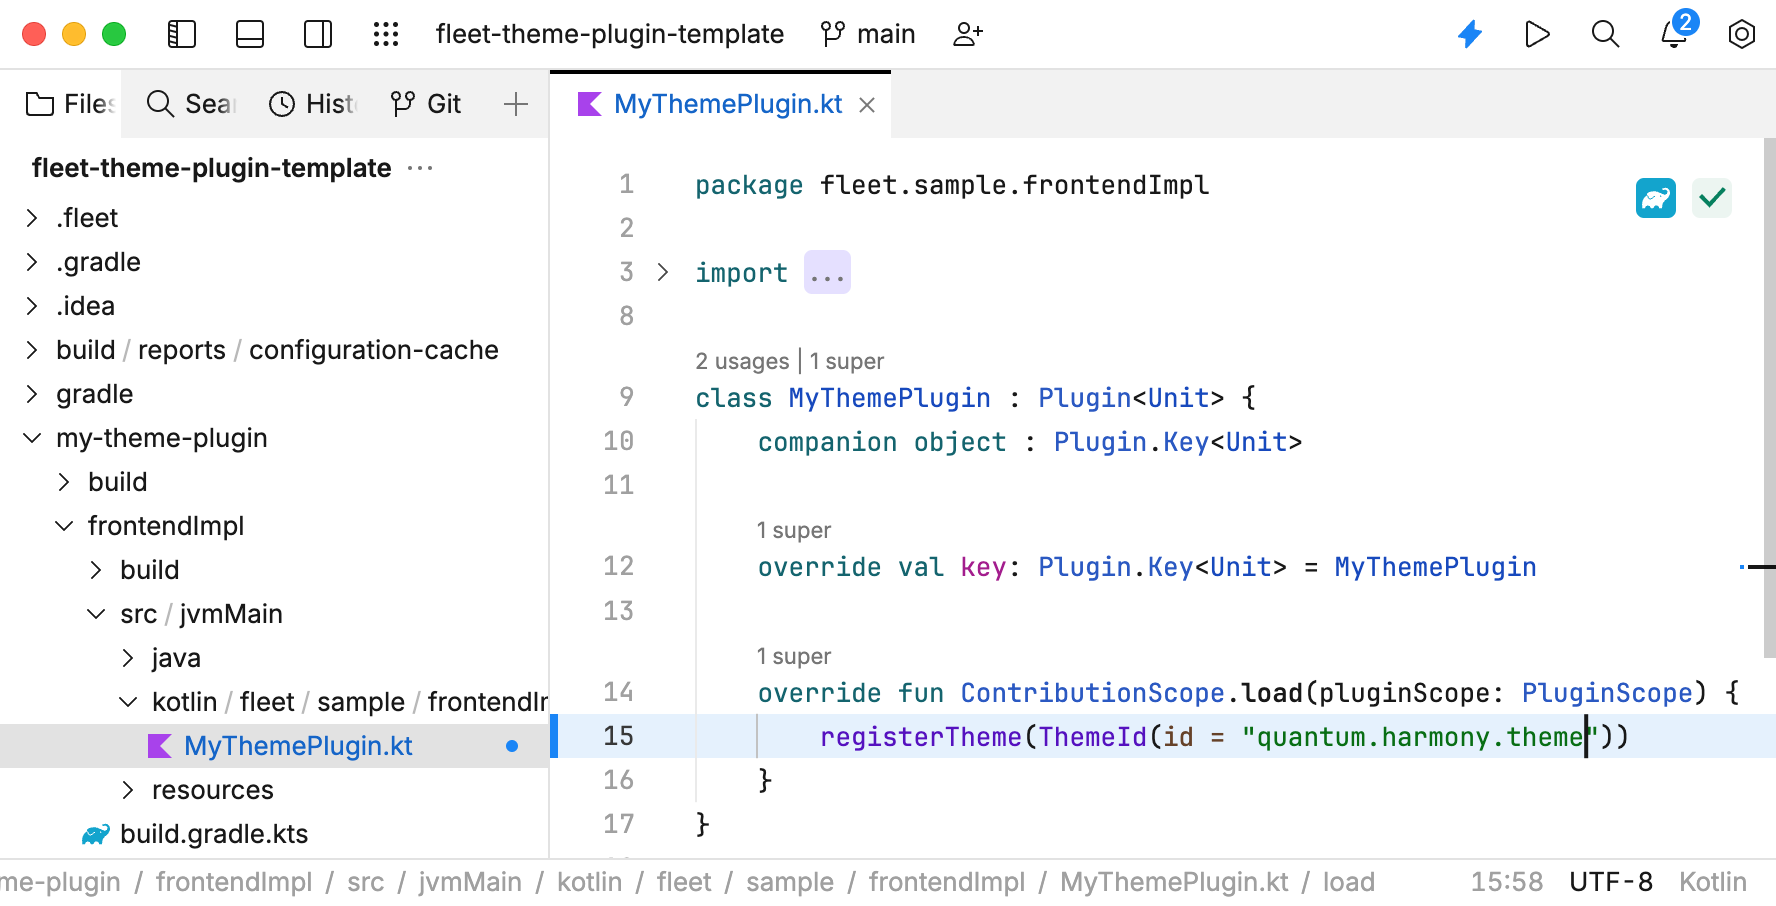
Navigate to my-theme-plugin
/frontendImpl and rename the JSON file using your plugin ID. In our example, the file name is quantum.harmony.theme.json./src /jvmMain /resources /your-theme-id-here.json In this file, you will define the colors of the UI elements in your theme. For more information about the structure and values of the JSON theme file, refer to the Structure of the JSON format for themes topic.
Once you have cloned the plugin template repository and configured the plugin, you can begin customizing the colors for your theme.
In the cloned the plugin template repository, navigate to my-theme-plugin
/frontendImpl ./src /jvmMain /resources /quantum.harmony.theme.json note
Note that the name of this file must be the ID of your plugin. In our case, the ID is
quantum.harmony.theme, so the your-theme-id-here.json was renamed to quantum.harmony.theme.json.Replace the current JSON code in this file with the following JSON code snippet:
Example of a theme plugin{...}For more information about the file structure and possible values, refer to Structure of the JSON format for themes.
Save the JSON theme file.
To test color mapping in your theme, you can run the JetBrains Fleet instance with your plugin.
Select View | Terminal from the main menu.
In the Terminal window, run the following command:
./gradlew runFleetWait until JetBrains Fleet starts and open any project.
Navigate to View | Color Theme and select the theme with the name that you defined. In this quick-start guide, we used Quantum harmony.
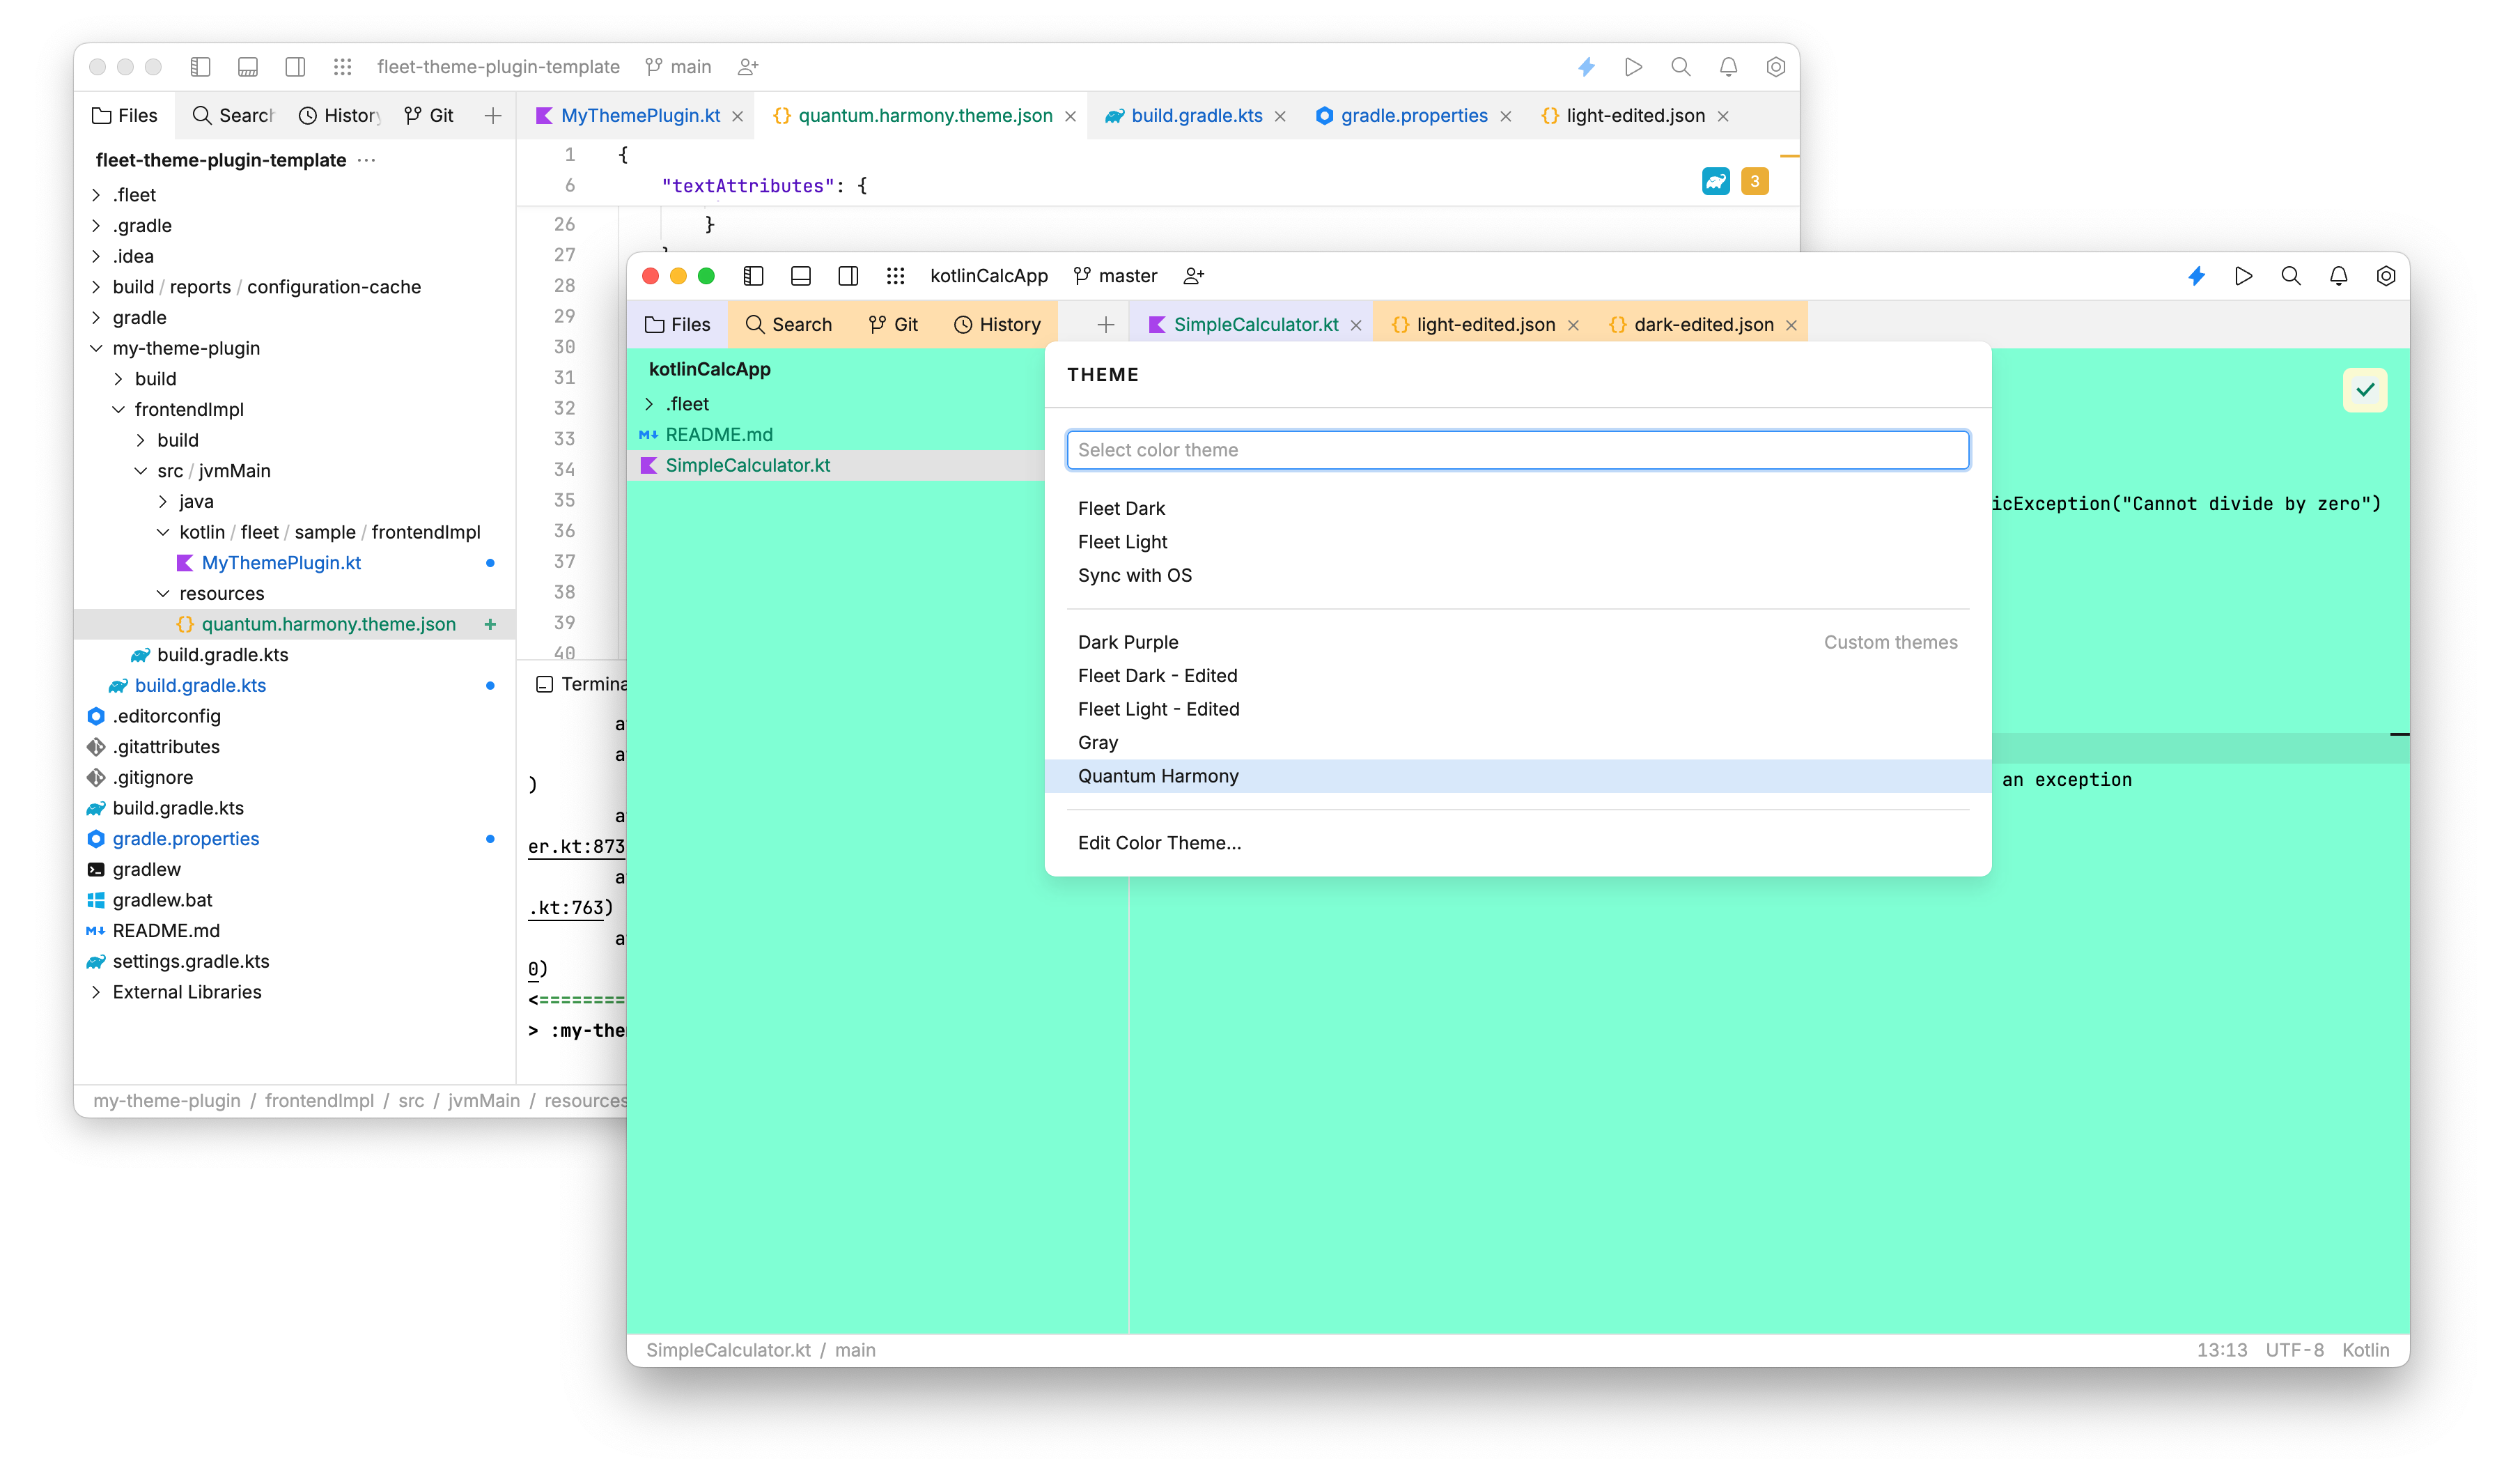
Rename the directory: you can rename the
my-theme-plugindirectory to something more descriptive for your project. If you do, updateinclude()functions insettings.gradle.ktsaccordingly.Explore example plugins: to get more ideas and best practices, check out example plugins provided by JetBrains.
To distribute and publish your Fleet plugin, you must create a Marketplace vendor account and generate a Marketplace token.
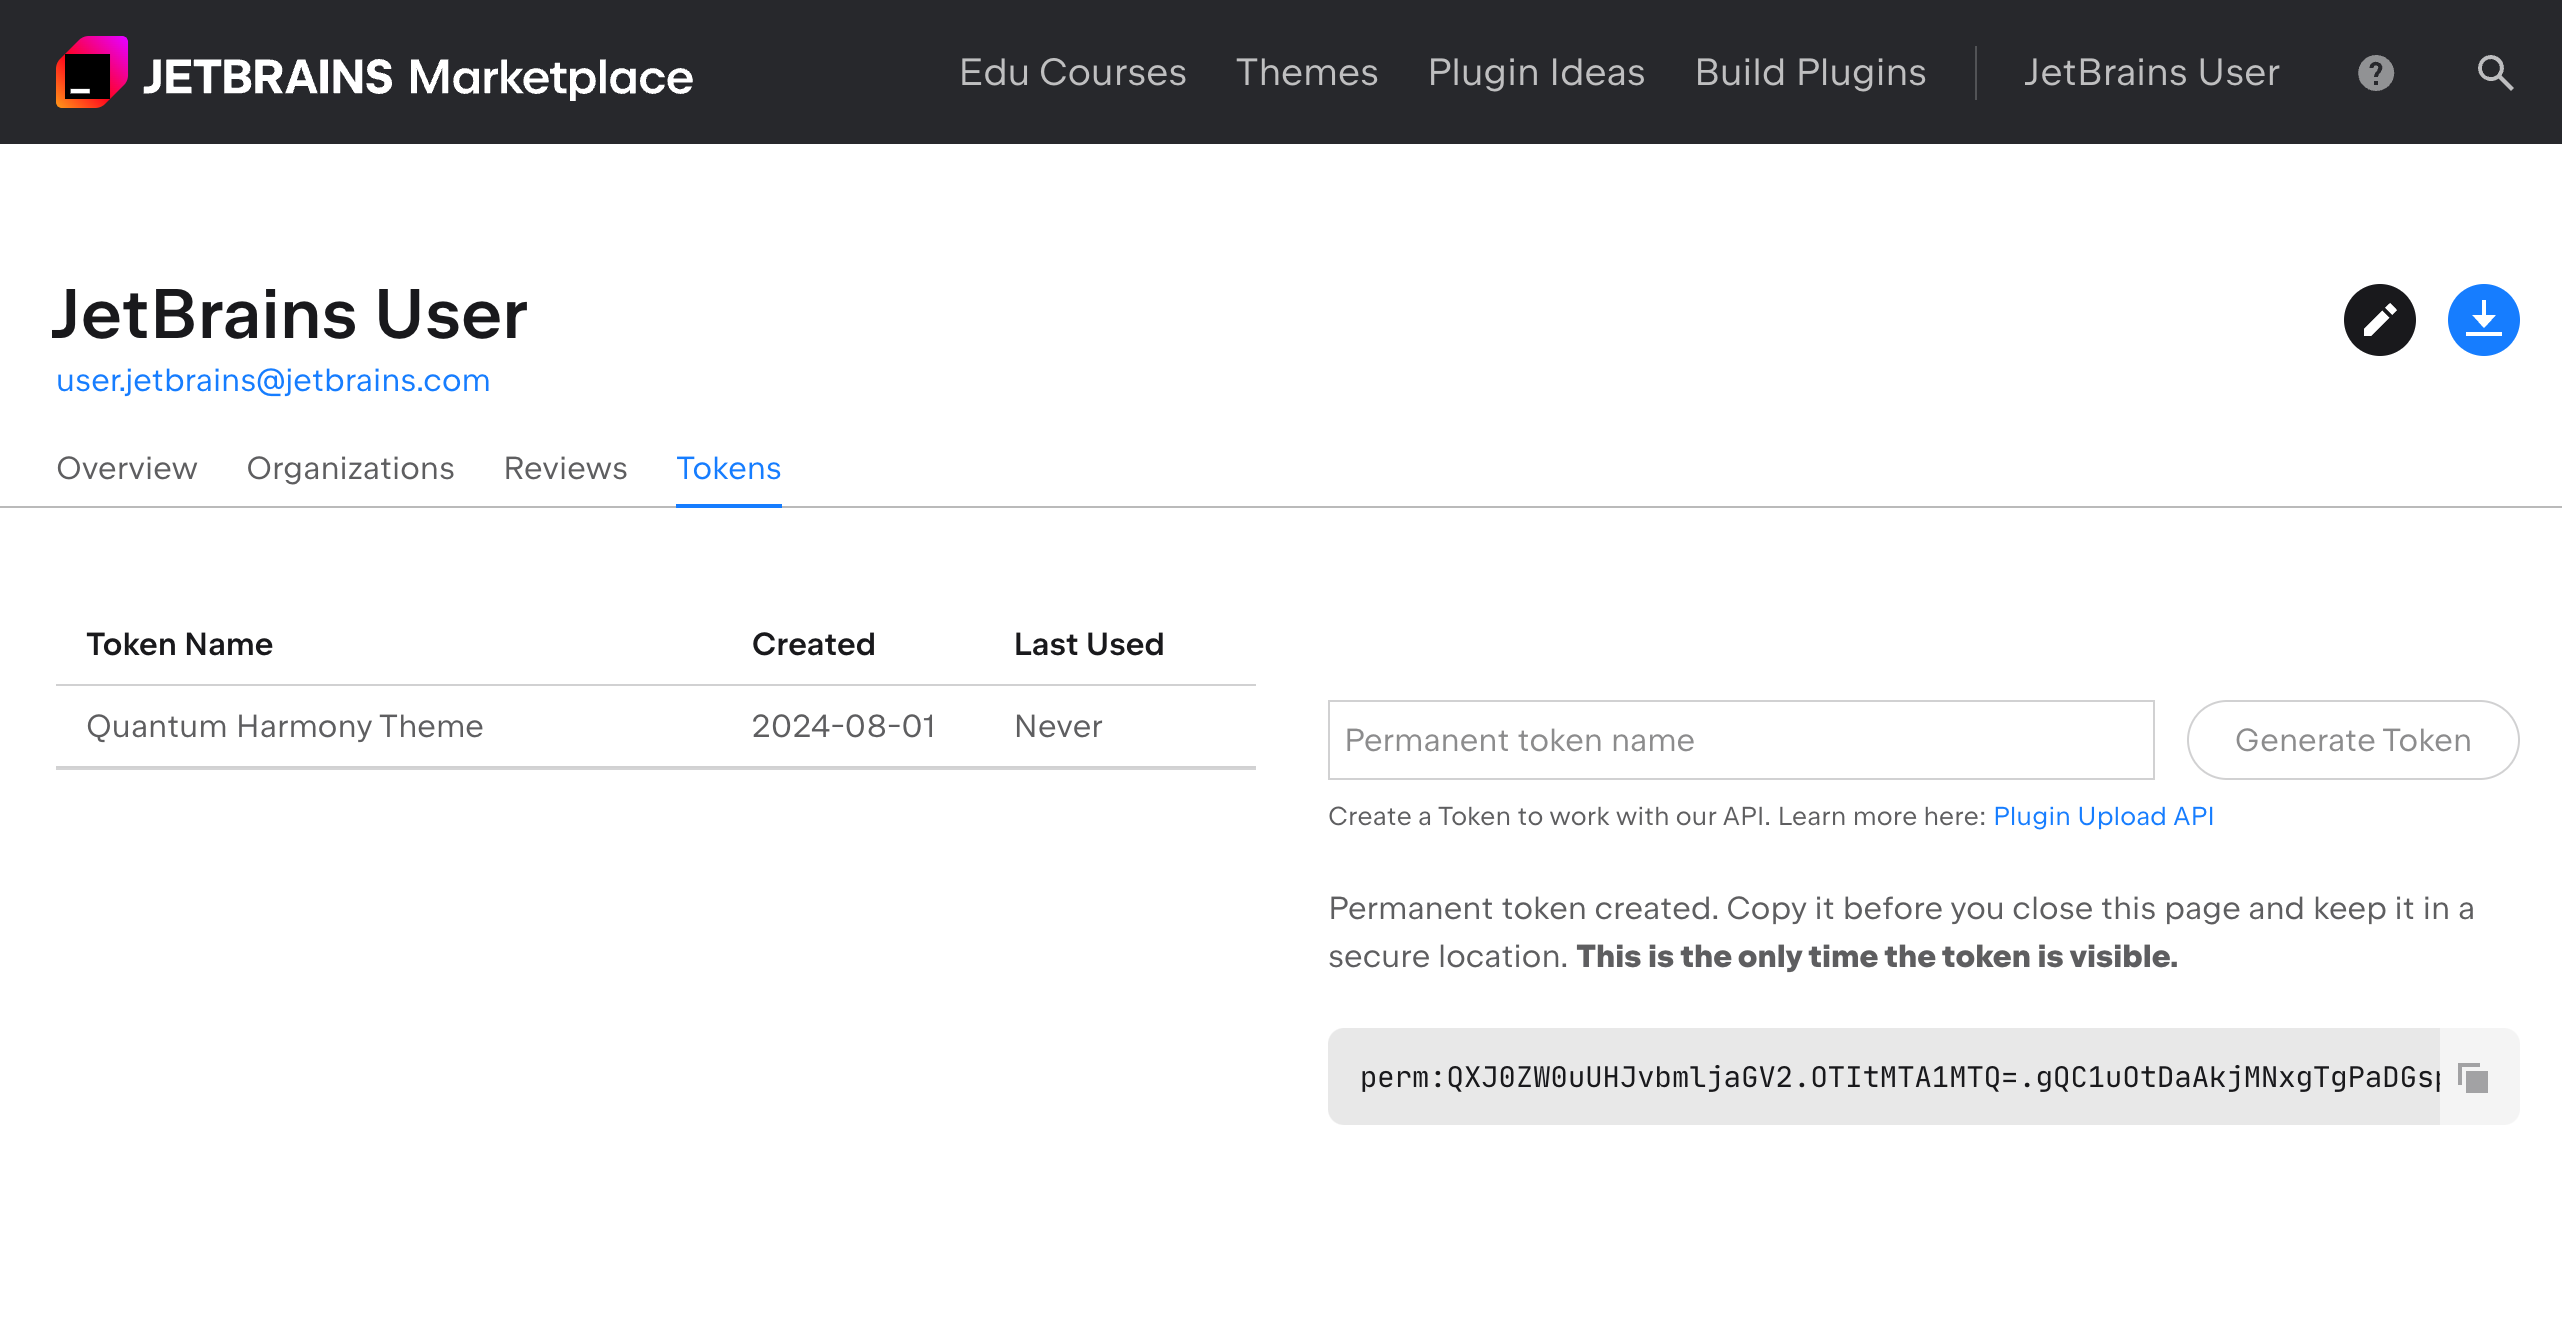
Register or use your current account on the JetBrains Marketplace. Your account should be a vendor account.
On the Token tab, type the token name in the Permanent token name field.
Click Generate Token.
Click the Copy icon to copy the token. Save it to use it later in your Gradle configuration.
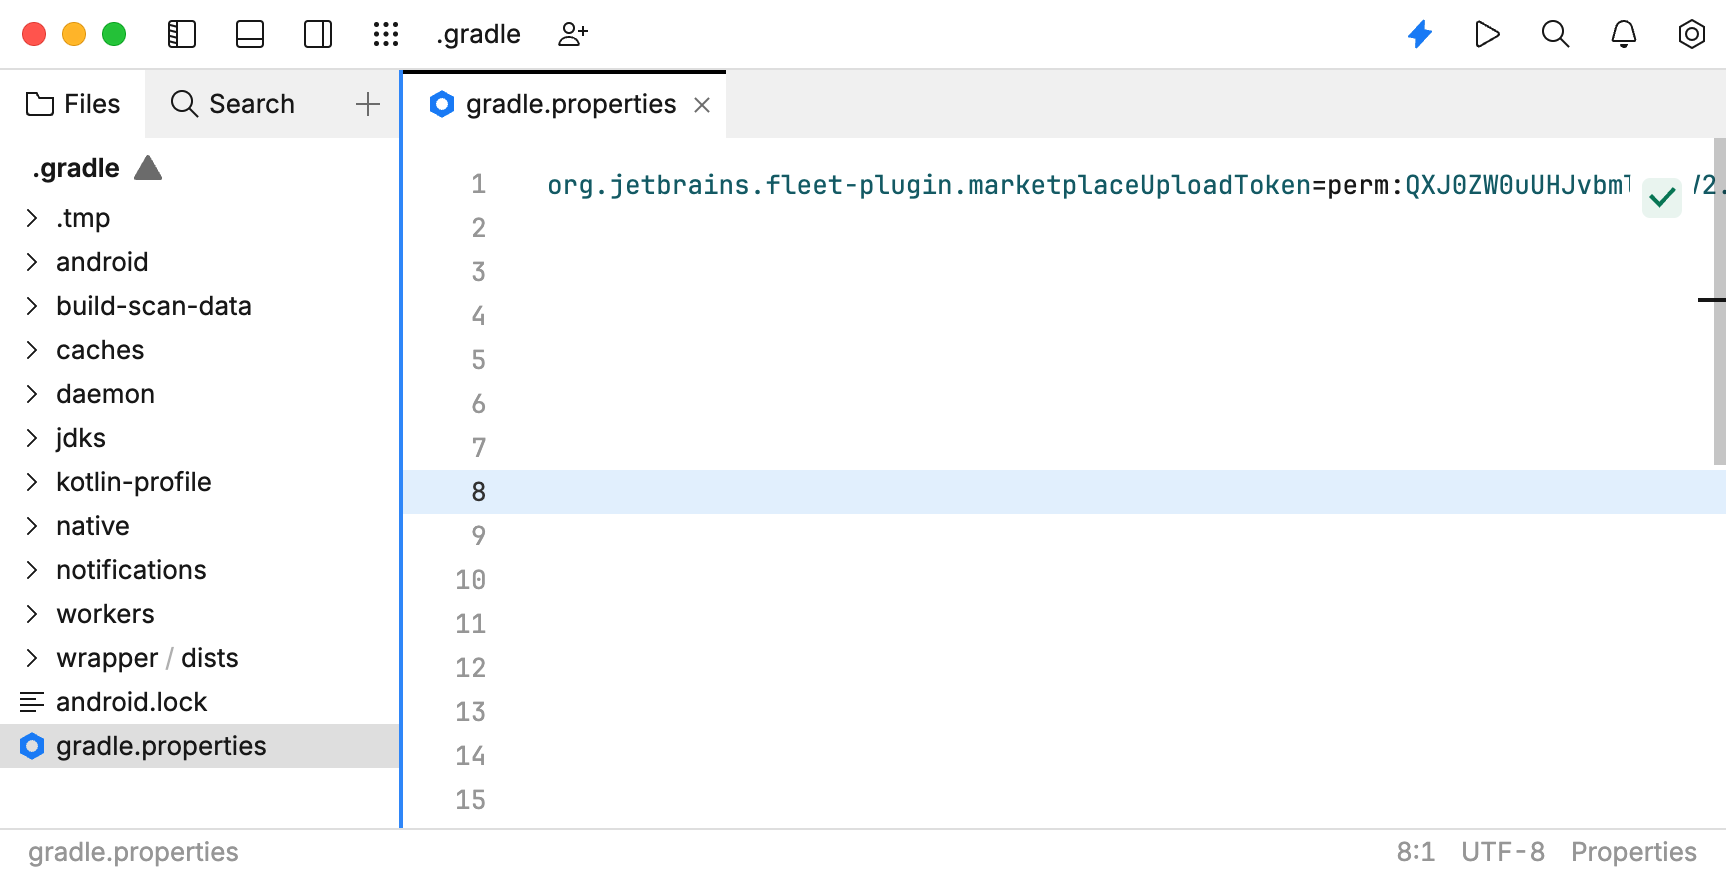
Choose one of the following methods to set the token:
Open or create the gradle.properties file in the ~
/.gradle/ folder in your home directory and add the following line:org.jetbrains.fleet-plugin.marketplaceUploadToken=perm:QXJ0ZW0uUHJvbmljaGV2.OTItMTA1MDk=.kCRZbSAtlRfTf8WkOgcpPGCQ27TWRMExport an environment variable:
export ORG_GRADLE_PROJECT_org.jetbrains.fleet-plugin.marketplaceUploadToken=perm:QXJ0ZW0uUHJvbmljaGV2.OTItMTA1MDk=.kCRZbSAtlRfTf8WkOgcpPGCQ27TWRMPass the token as a parameter when running Gradle tasks:
./gradlew <task_name> -Porg.jetbrains.fleet-plugin.marketplaceUploadToken=perm:QXJ0ZW0uUHJvbmljaGV2.OTItMTA1MDk=.kCRZbSAtlRfTf8WkOgcpPGCQ27TWRM
Select View | Terminal from the main menu.
In the Terminal window, run the following command:
./gradlew distZipWait until the ZIP archive is ready. The built plugin should be located in the my-theme-plugin
/build directory./pluginDistribution Open the Upload plugin page. Ensure that you are logged in to your JetBrains Marketplace account.
Fill in the form and attach your ZIP archive with a plugin in the Plugin file field.
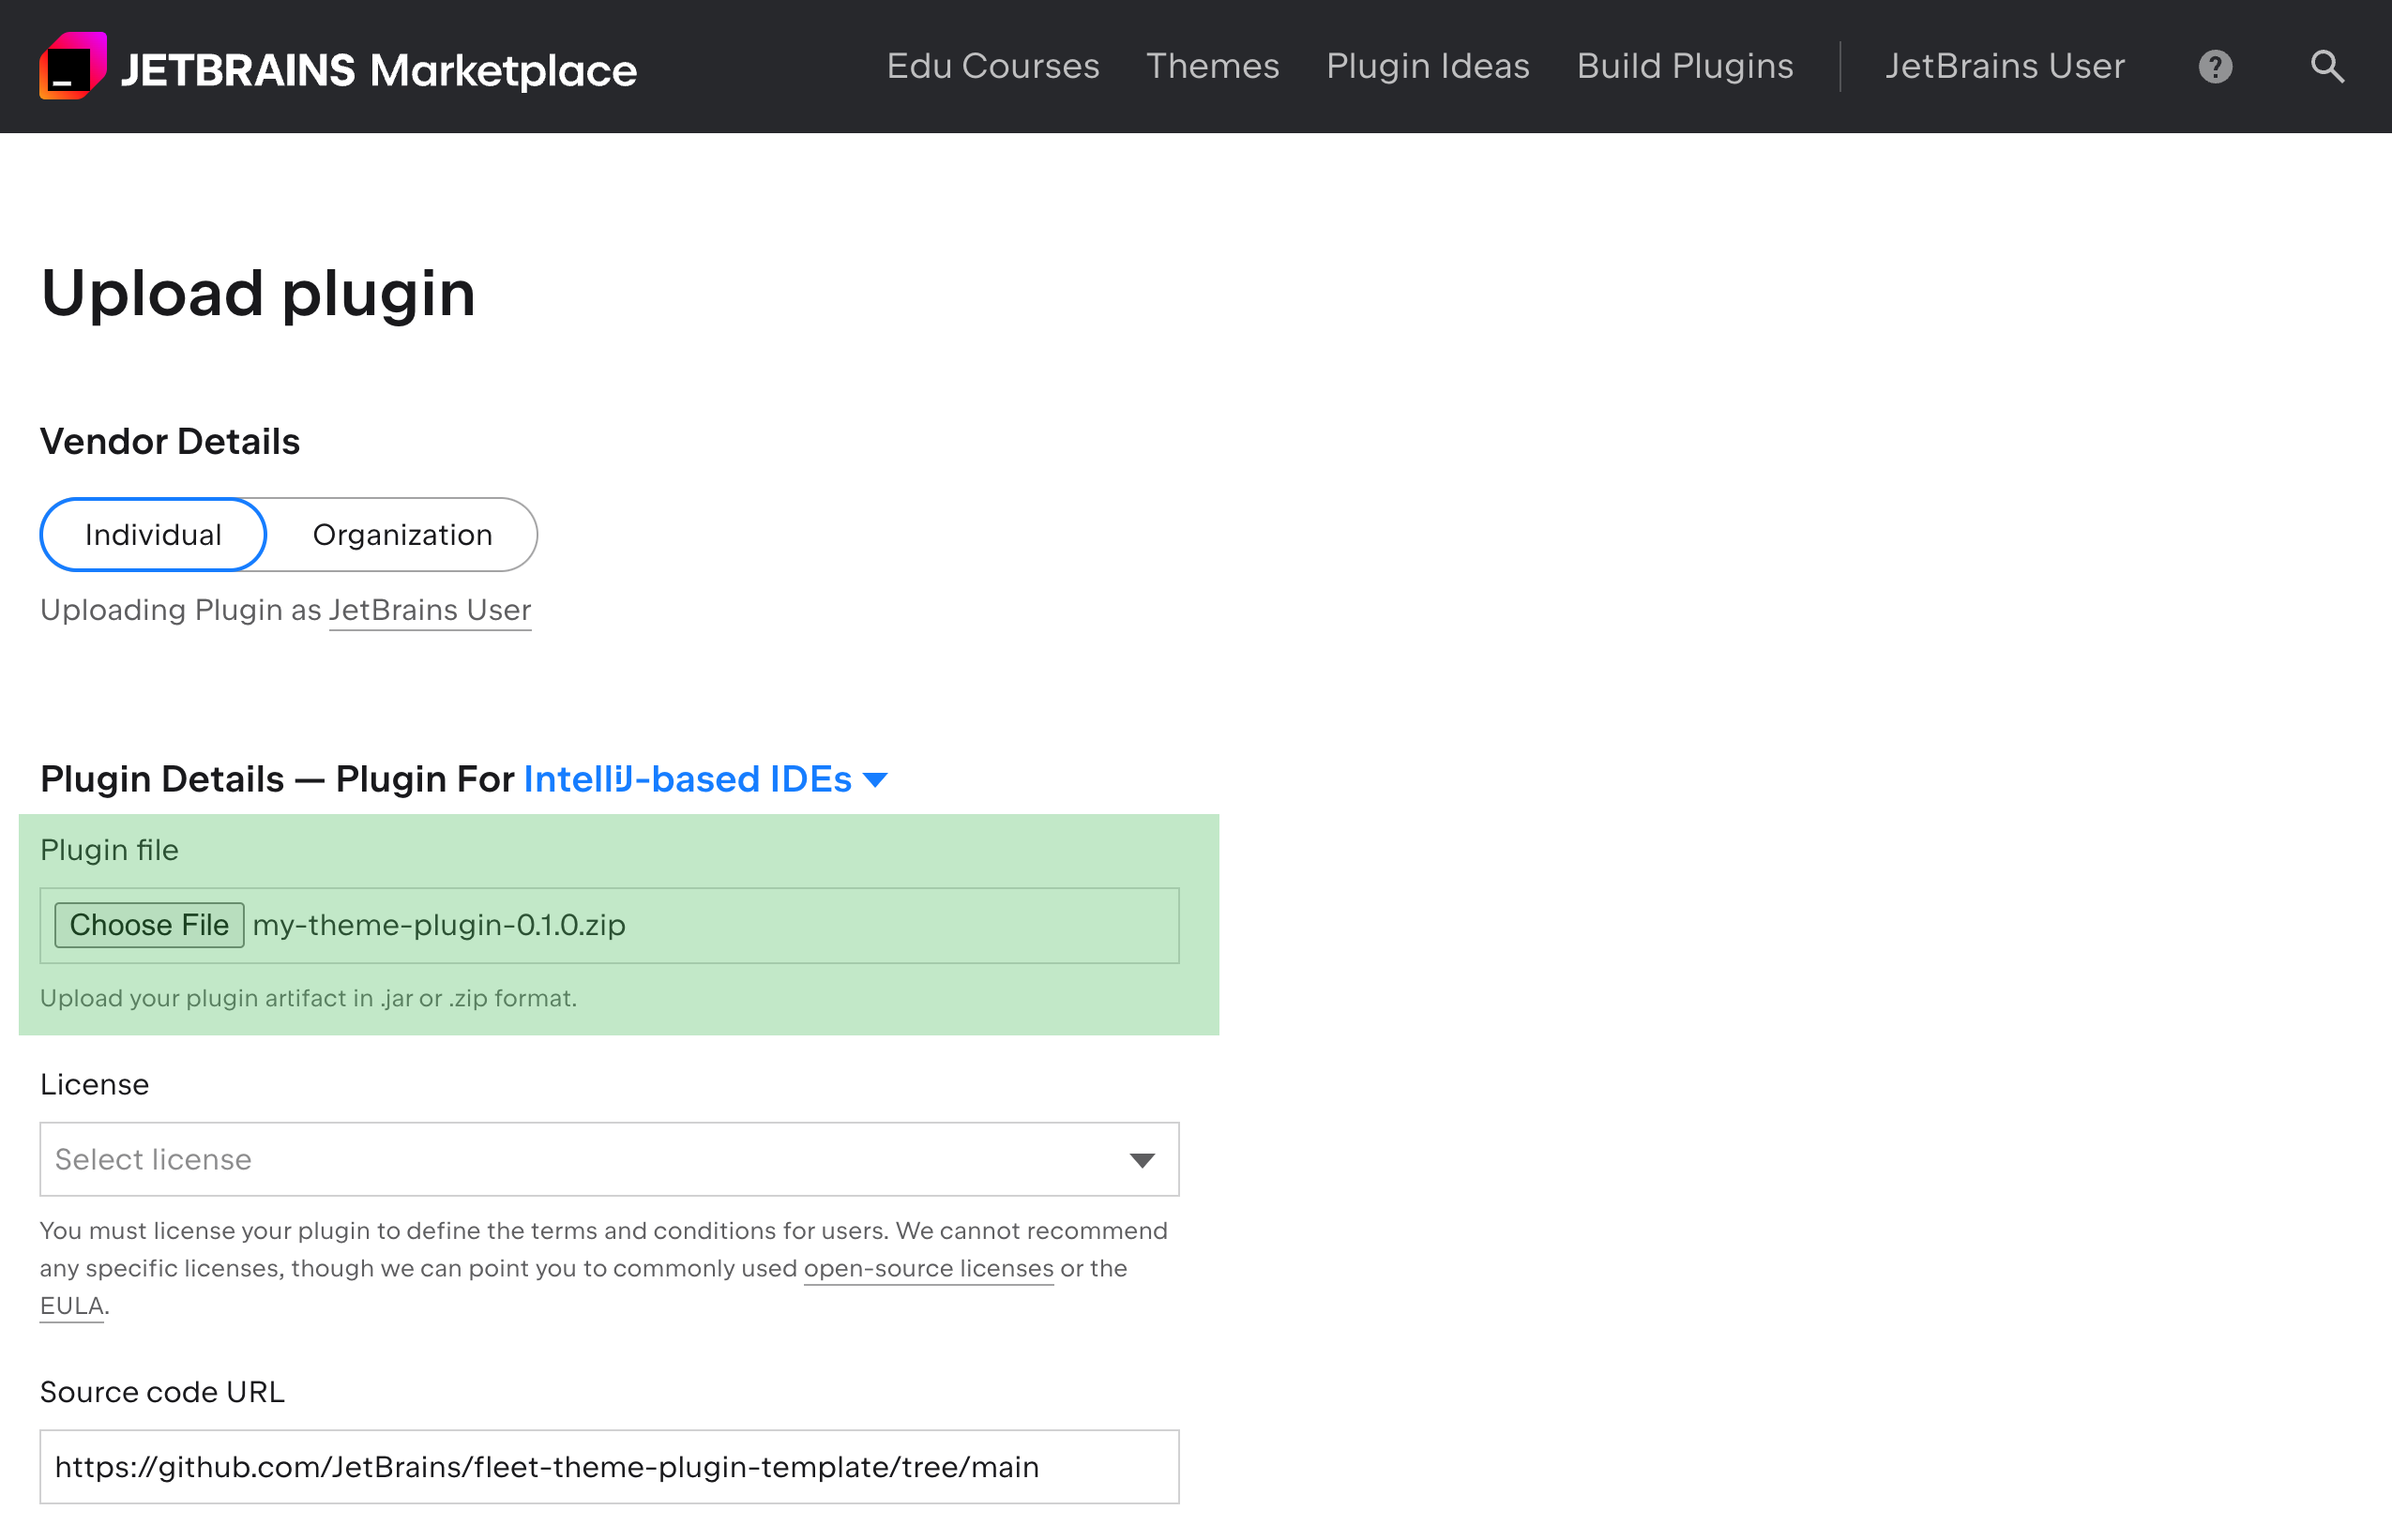
Click the Upload plugin button.
For more information about the uploading process, refer to the Uploading a new plugin article in the JetBrains Marketplace documentation.
note
If you attempt to use the
./gradlew uploadPlugincommand for the first upload, you might encounter an error message indicating that the plugin does not exist. To resolve this issue, you need to upload the plugin ZIP distribution manually by filling out the form on the Upload plugin page. For subsequent uploads, theuploadPlugincommand will work correctly.
This table provides an overview of the essential Gradle tasks available in the JetBrains Fleet SDK, detailing commands, descriptions, and whether a Marketplace token is required for each task.
Task Name | Command | Description | Requires Marketplace Token |
|---|---|---|---|
|
| Runs Fleet locally with your plugin and its dependencies automatically loaded. | No |
|
| Assembles a | Yes |
|
| Uploads the distribution built by | Yes |
|
| Deletes all caches downloaded by the org.jetbrains.fleet-plugin. Note that this command affects all Gradle projects. | No |
Thanks for your feedback!