Deno
WebStorm integrates with Deno, a runtime for JavaScript and TypeScript, providing you with all coding assistance features, such as code completion, navigation across your codebase, refactoring, Quick Documentation lookup as well as running, debugging, and testing.
Before you start
Install and enable the Deno plugin on the Settings | Plugins page, tab Marketplace, as described in Installing plugins from JetBrains Marketplace.
Install Deno
Open your command-line shell or the embedded Terminal (Alt+F12) and type one of the following commands depending on your operating system:
curl -fsSL https://deno.land/install.sh | shfor macOSirm https://deno.land/install.ps1 | iexfor Windowscurl -fsSL https://deno.land/install.sh | shfor Linux
Learn more from the Deno official website.
Create a new Deno project
Click New Project on the Welcome screen or select from the main menu. The New Project dialog opens.
In the left-hand pane, choose Deno.
In the right-hand pane:
Specify the path to the folder where the project-related files will be stored.
In the Deno field, specify the location of the Deno executable to use. If you followed the standard installation procedure, WebStorm detects the executable and fills in the field automatically.

When you click Create, WebStorm runs the
deno init <project_name>command under the hood. As a result, a Deno project with the files deno.json, main.ts, and main_test.ts is generated. Learn more from the Deno official website.
Check out the application sources from your version control
Click Clone Repository on the Welcome screen.
Alternatively, select or or from the main menu.
Instead of Git in the main menu, you may see any other Version Control System that is associated with your project. For example, Mercurial or Perforce.
In the dialog that opens, select your version control system from the list and specify the repository to check out the application sources from. For more information, refer to Check out a project (clone).
Configure Deno in WebStorm
By default, Deno is enabled and configured in WebStorm automatically based on configuration files from the project folder or from one of its parent folders. You can customize this behavior and configure Deno in the current project manually or even disable Deno in the current project.
Open the Settings dialog (Ctrl+Alt+S) , go to .
From the Preferred runtime list, select Deno.
In the Deno area, specify the following:
The path to the Deno executable file.
The Deno cache where all the cached files from Deno will be stored.
The Init command with the settings that WebStorm will use to set up the Deno LSP service.

Specify whether you want TypeScript and TSX code formatted using the Deno language Server or according to the WebStorm internal formatting settings for .ts and .tsx files.
Write and edit your code
All coding assistance features, such as code completion, navigation across your codebase, quick documentation look-up, auto-import, and others, work in Deno projects the same was as in any TypeScript project, see Edit TypeScript code for details.
Format your code
By default, when formatting your code in a Deno project, WebStorm relies on its built-in formatter.
To reformat your code using the Deno Language Server, open the Settings dialog (Ctrl+Alt+S) , go to , and select the Format .ts and .tsx files using Deno Language Server checkbox in the Deno area.
To restart the Deno Language Server, click the Language Services widget on the Status bar and then click
next to Deno <version>.

Run your application
You can run your app right from the editor, or from the Project tool window, or using a dedicated run/debug configuration.
Open the file to start your application with (by default, it is main.ts or main.tsx), right-click anywhere in the editor, and select Run 'Deno: <file_name>' from the context menu.
Alternatively, in the Project tool window, select the file to start your application with i and then select Run 'Deno: <file_name>' from the context menu.
In either case, WebStorm generates a temporary run/debug configuration that you can save and reuse later if needed.
Create a Deno run/debug configuration

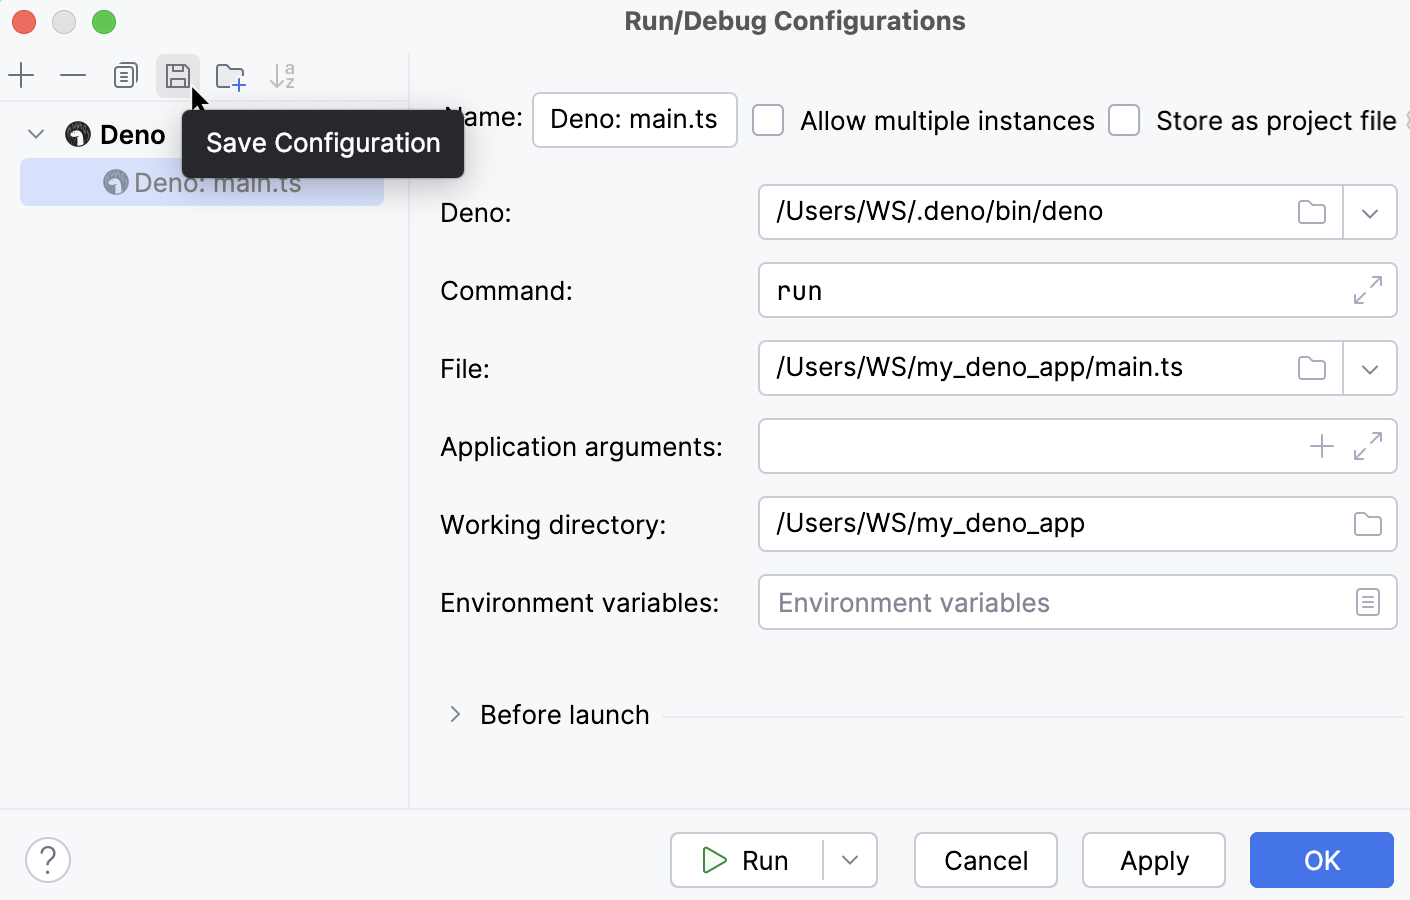
Go to . Alternatively, select Edit Configurations from the Run widget on the toolbar.
In the Edit Configurations dialog that opens, click the Add button (
) on the toolbar and select Deno from the list.
Alternatively, select an autogenerated temporary configuration and click
on the toolbar.
The Run/debug configuration: Deno dialog opens.
In the Deno field, specify the path to the Deno executable file. If you followed the standard installation procedure, WebStorm detects the executable and fills in the field automatically.
In the Command field, type
run.In the File field, specify the file to start your application from. By default, it is main.ts or main.tsx.
In the Working directory field, specify the working directory of the application. By default, the field shows the project root folder.
Debug your application
Set breakpoints as necessary.
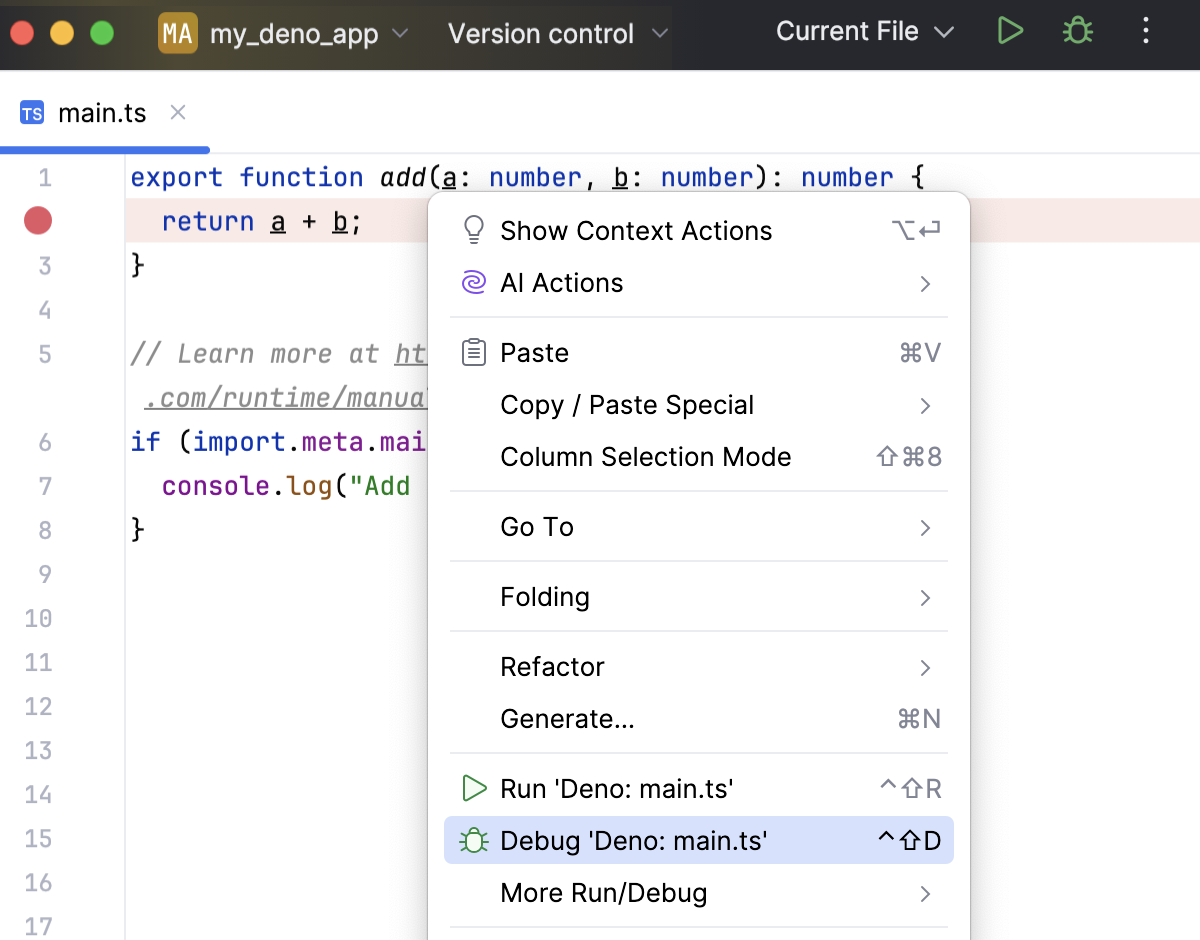
Open the file to start your application with (by default, it is main.ts or main.tsx) or select it in the Project tool window. Then select Debug 'Deno: < file_name>' from the context menu.

Debug with a Deno run/debug configuration
Create a run/debug configuration or save a temporary autogenerated run/debug configuration.
From the Run widget list on the toolbar, select the newly created or saved Deno configuration and click
next to it.
When the app execution suspends at the first breakpoint, switch to the Debug tool window and proceed as usual: step through the program, stop and resume program execution, examine it when suspended, explore the call stack and variables, set watches, evaluate variables, view actual HTML DOM, and so on.