Import from Markdown
If you have existing documentation authored in Markdown, you can import it as a new Writerside project, as a documentation module to your development project, or manually add specific Markdown files as topics to your current Writerside project.
From the main menu, select File | New | Project.
In the New Project wizard, select Writerside on the left, then select Import from MD, and then click Next.
Select the location of your Markdown sources.
The wizard will show you a list of Markdown files in the selected location. You can choose which files you want to import.
If you do not want to import images and videos, clear the Copy all media files used in selected Markdown files checkbox.
Click Next.
Specify the name and location for your new project and click Create.
Open your existing development project.
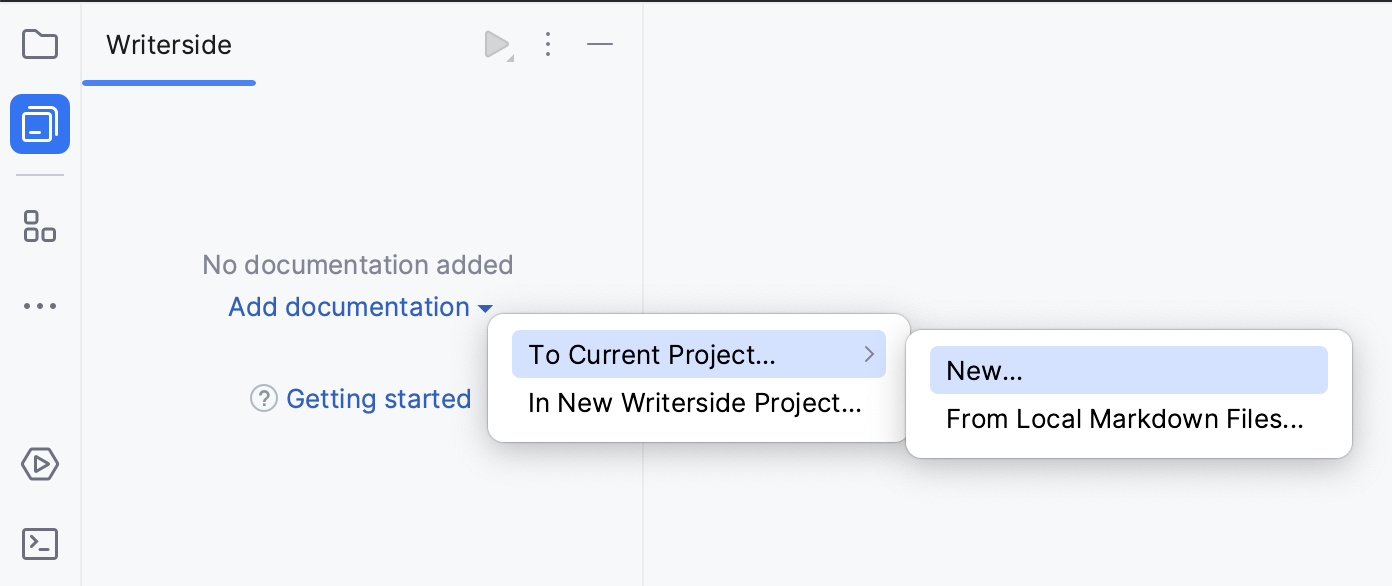
In the Writerside tool window, click Add documentation, select To Current Project, and then click From Local Markdown Files.

Select the location of your Markdown sources.
The wizard will show you a list of Markdown files in the selected location. You can choose which files you want to import.
If you do not want to import images and videos, clear the Copy all media files used in selected Markdown files checkbox.
Click Next.
Specify the first help instance name and click Create.
If you have some content as Markdown files, you can add them as topics to your existing Writerside project.
In the Table of Contents pane of the Writerside tool window, click
 New Topic and select Add Local Markdown Files.
Select the directory with Markdown files.
In the Add Local Markdown Files dialog, select the files that you want to import as topics and click OK.
note
By default, Writerside uses the first top-level
#heading as the topic title and ignores other#headings. Use##and lower-level headings for chapters. For more information, see Topic title and TOC title and Chapters.
Once Markdown files are in your Writerside project, you can use semantic elements and attributes to enhance your topics with Tabs, TLDR blocks, Collapsible elements, and other markup not available in generic Markdown. For more information, see Markup.
Thanks for your feedback!
