Link Issues
In YouTrack, you can link issues to show the relationship between them. When you add a link from one issue to another, links are added to both issues.
Issue link types have a property that determines their direction. The direction determines how issues relate to one another. Issue link types can have one of the following link directions:
Direction | Description |
|---|---|
Directed | This direction means that there is a subordinate relationship between the issues. For example, the Depend link type indicates that issue A is required for issue B. Inversely, issue B depends on issue A. In this case, the link type indicates that issue A must be resolved first. When you add the is required for link to issue A, a depends on link is automatically added to issue B. |
Undirected | These link types merely demonstrate that the two issues are related to each other. |
Aggregation | This direction means that the issues can be combined in some way. These links indicate that the issues duplicate each other or are parts of the same task. |
Directed and aggregation links use different inward and outward names that indicate the direction of the relationship between the linked issues. YouTrack provides the following default links for issues:
Name | Direction | Description |
|---|---|---|
depends on | Directed | The inward name for the Depend issue link type. Indicates that the target issue must be resolved before the linked issue. |
is required for | Directed | The outward name for the Depend issue link type. Indicates that the linked issue must be resolved before the target issue. |
duplicates | Aggregation | The inward name for the Duplicate issue link type. Indicates that the target issue describes the same condition. Resolving the target issue also resolves the linked issue. |
is duplicated by | Aggregation | The outward name for the Duplicate issue link type. Indicates that the linked issue describes the same condition as the target issue. Resolving the linked issue also resolves the target issue. |
relates to | Undirected | The inward and outward name for the Relates issue link type. Indicates that the two issues are related to one another, but are not dependent. |
subtask of | Aggregation | The inward name for the Subtask issue link type. Indicates that the effort represented by the linked issue contributes to the resolution of the target issue. |
parent for | Aggregation | The outward name for the Subtask issue link type. Indicates that the effort represented by the target issue contributes to the resolution of the linked issue. |
An administrator can add other issue link types to YouTrack with different names, however, the behavior of these links is determined by their direction. All link types that use the same direction setting behave similarly. For more information, see Issue Link Types.
note
The steps for performing the actions described on this page vary based on whether you are working with YouTrack Lite or YouTrack Classic. Before you start, make sure you have selected the tab that corresponds with the interface you currently use.
You can see issue links in a few different locations.
On the Issues list, expand the issue detail to see the list of linked issues. Linked issues are grouped by issue link type.
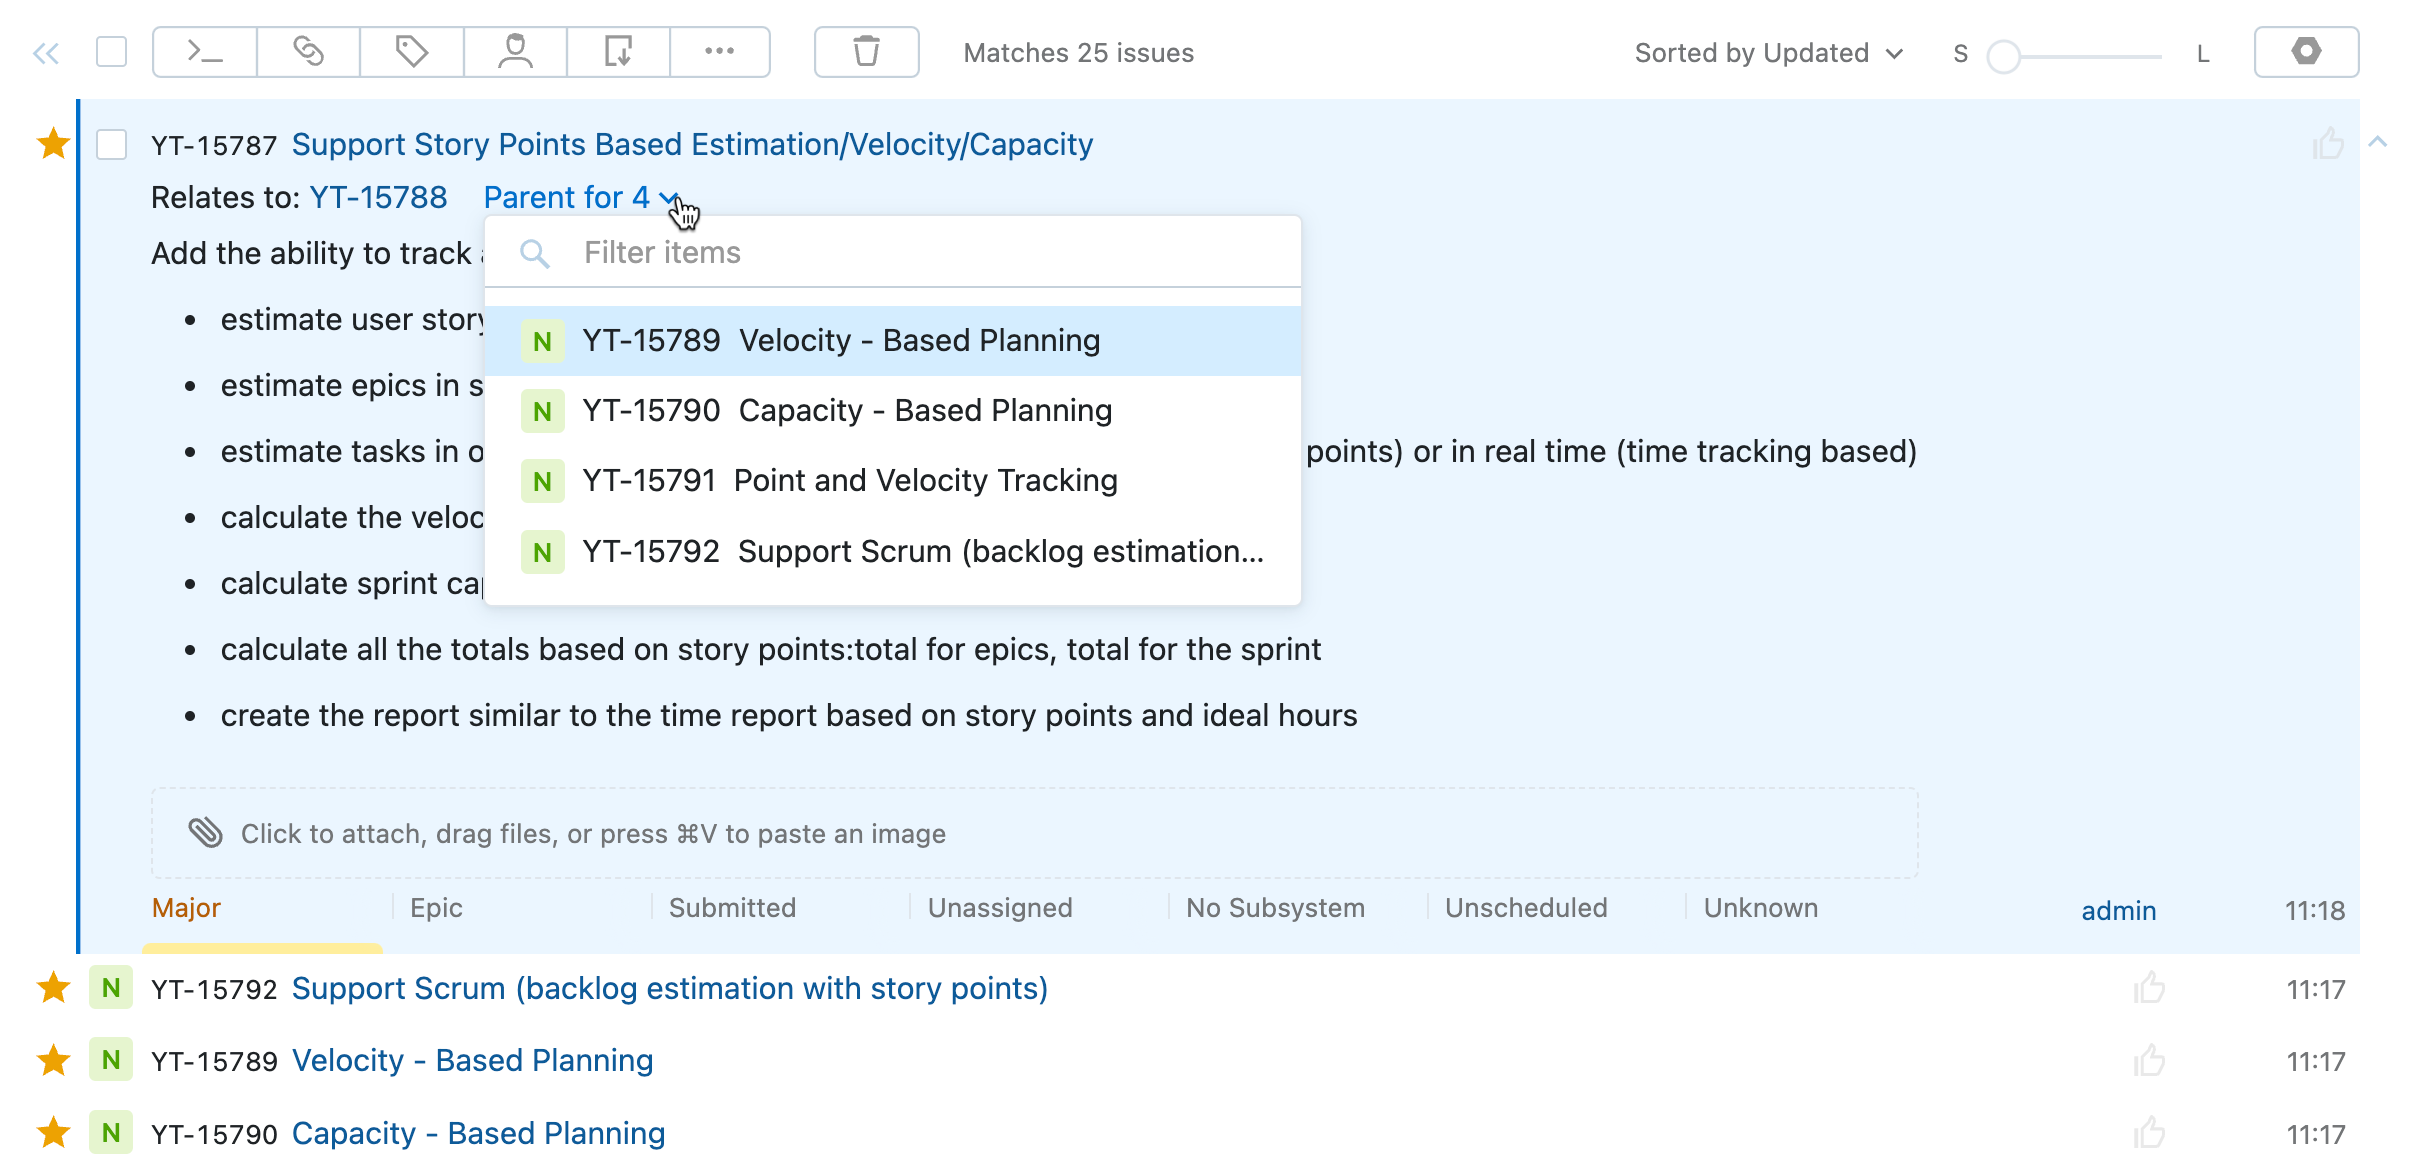
Move the pointer over a link to display the issue summary and key custom fields.
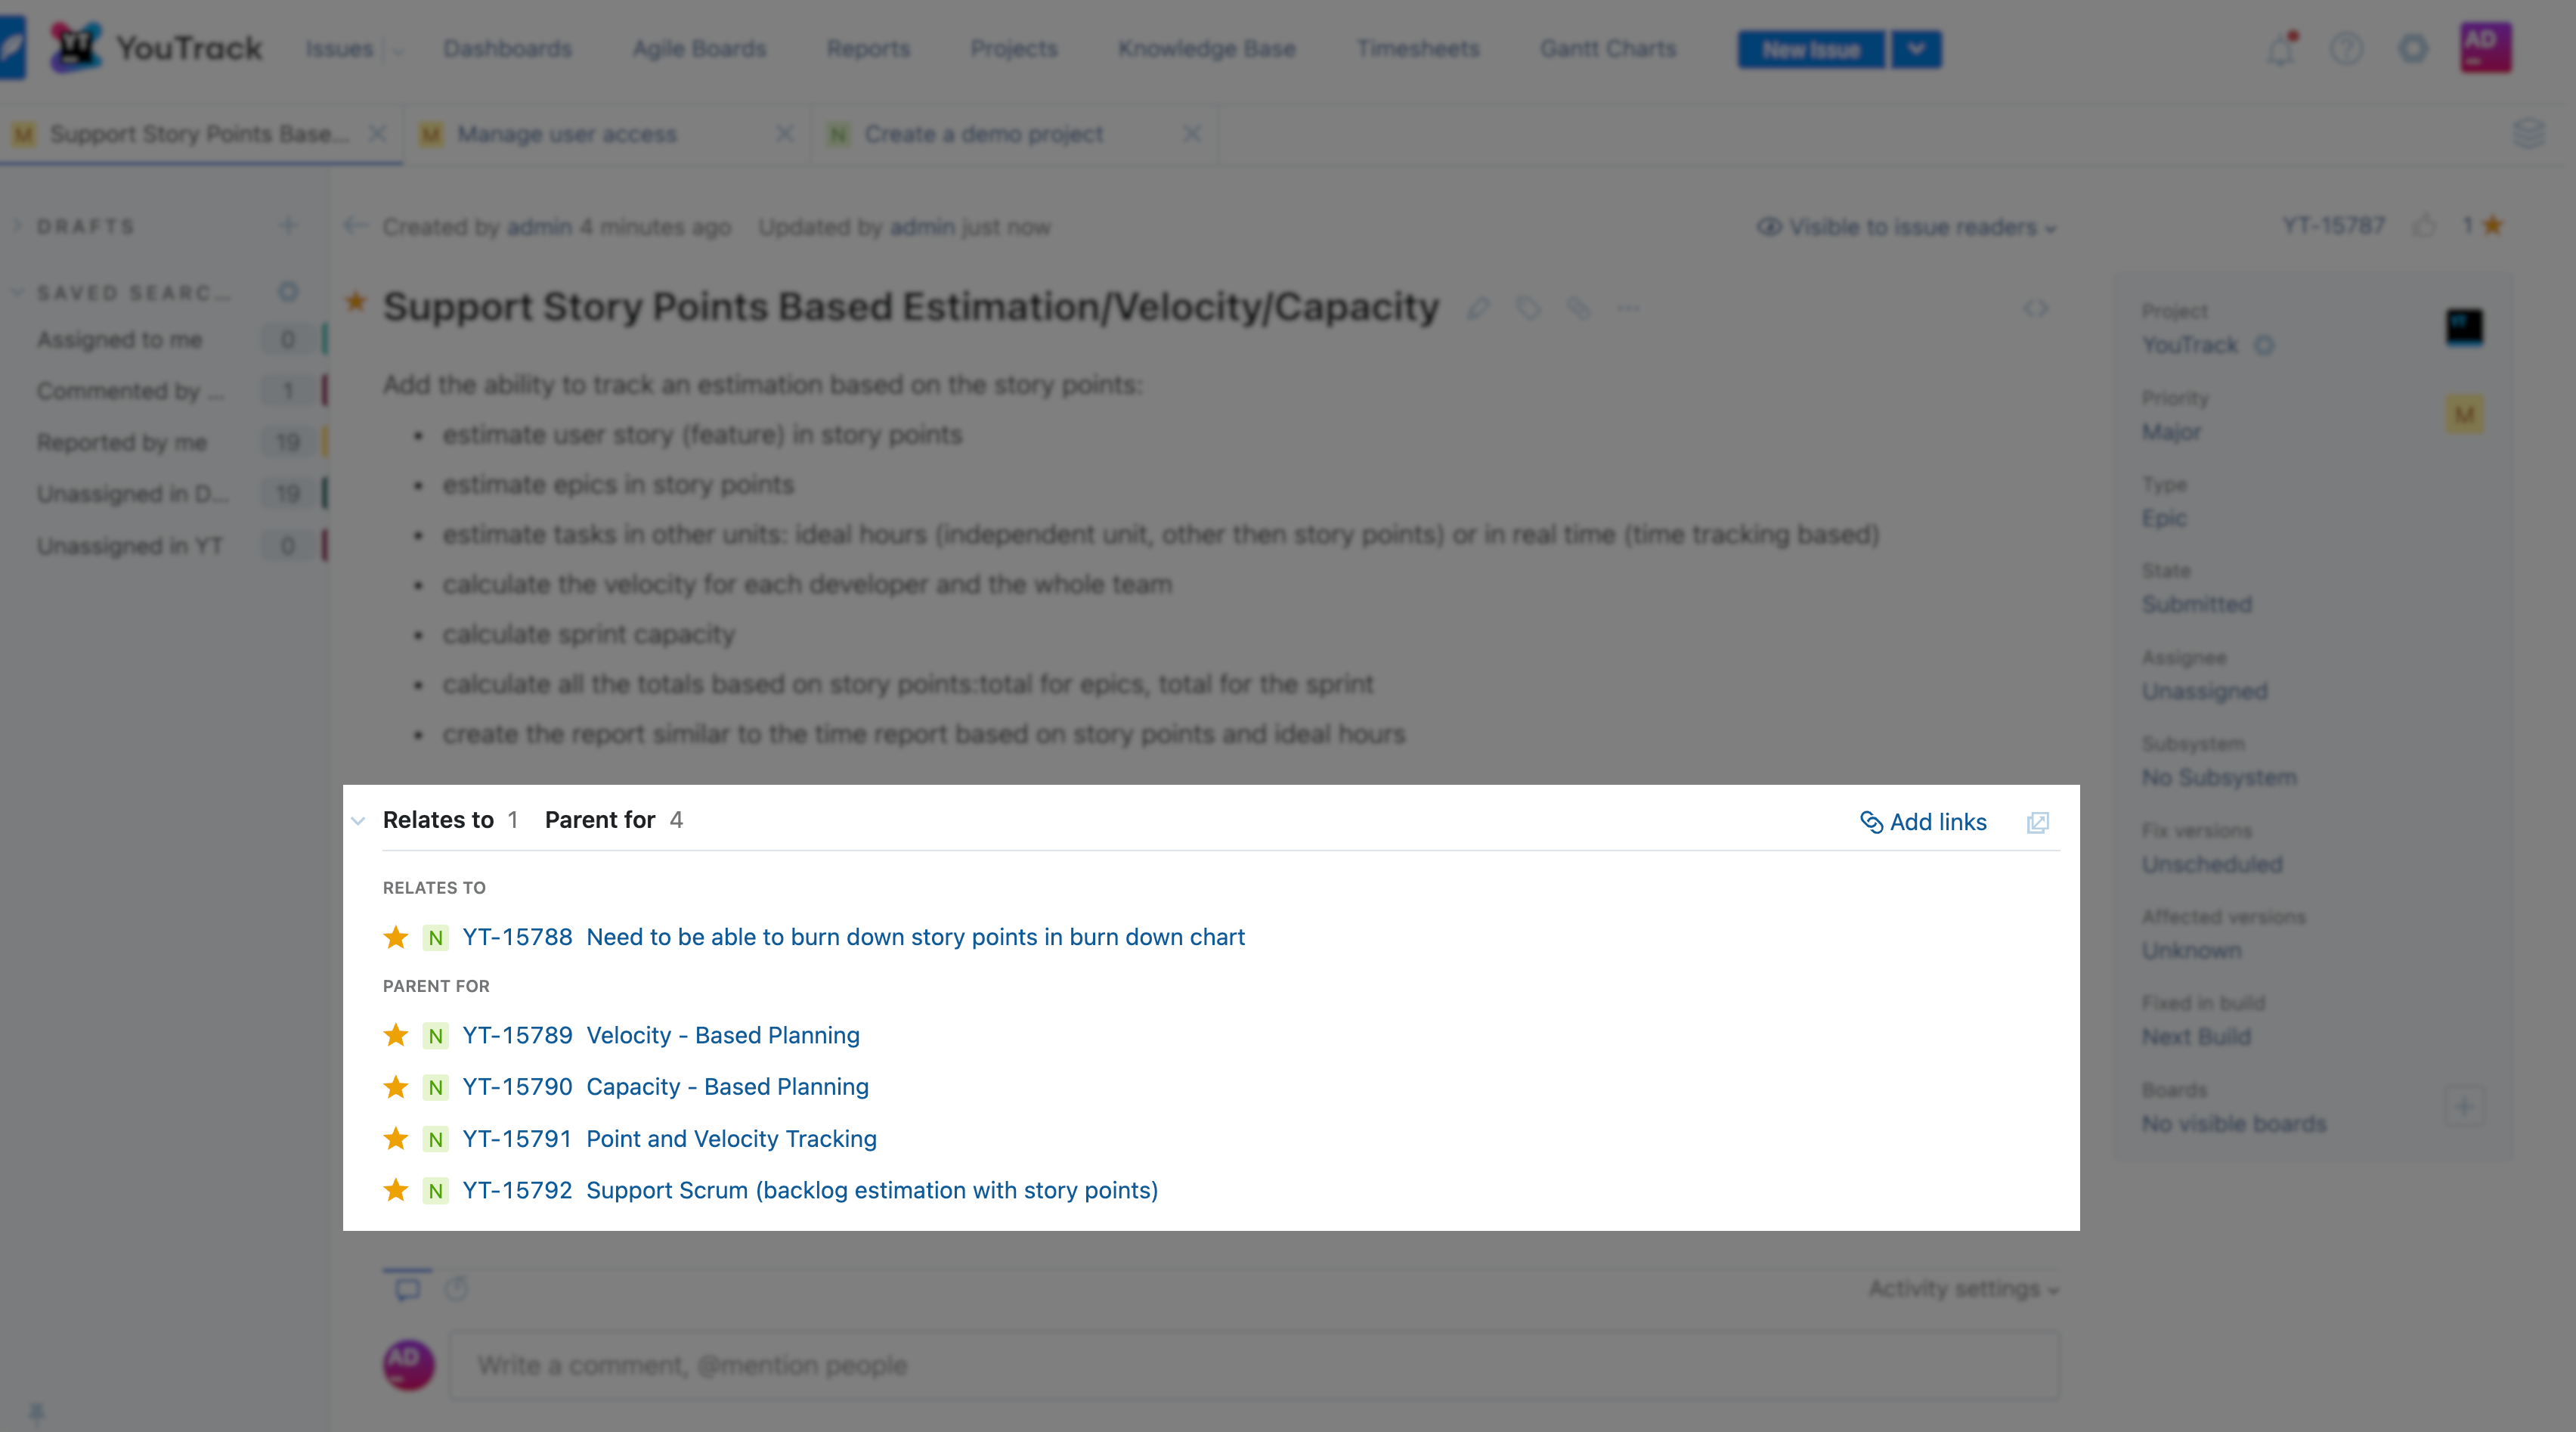
In single issue view, the list of linked issues is displayed just below the issue description.
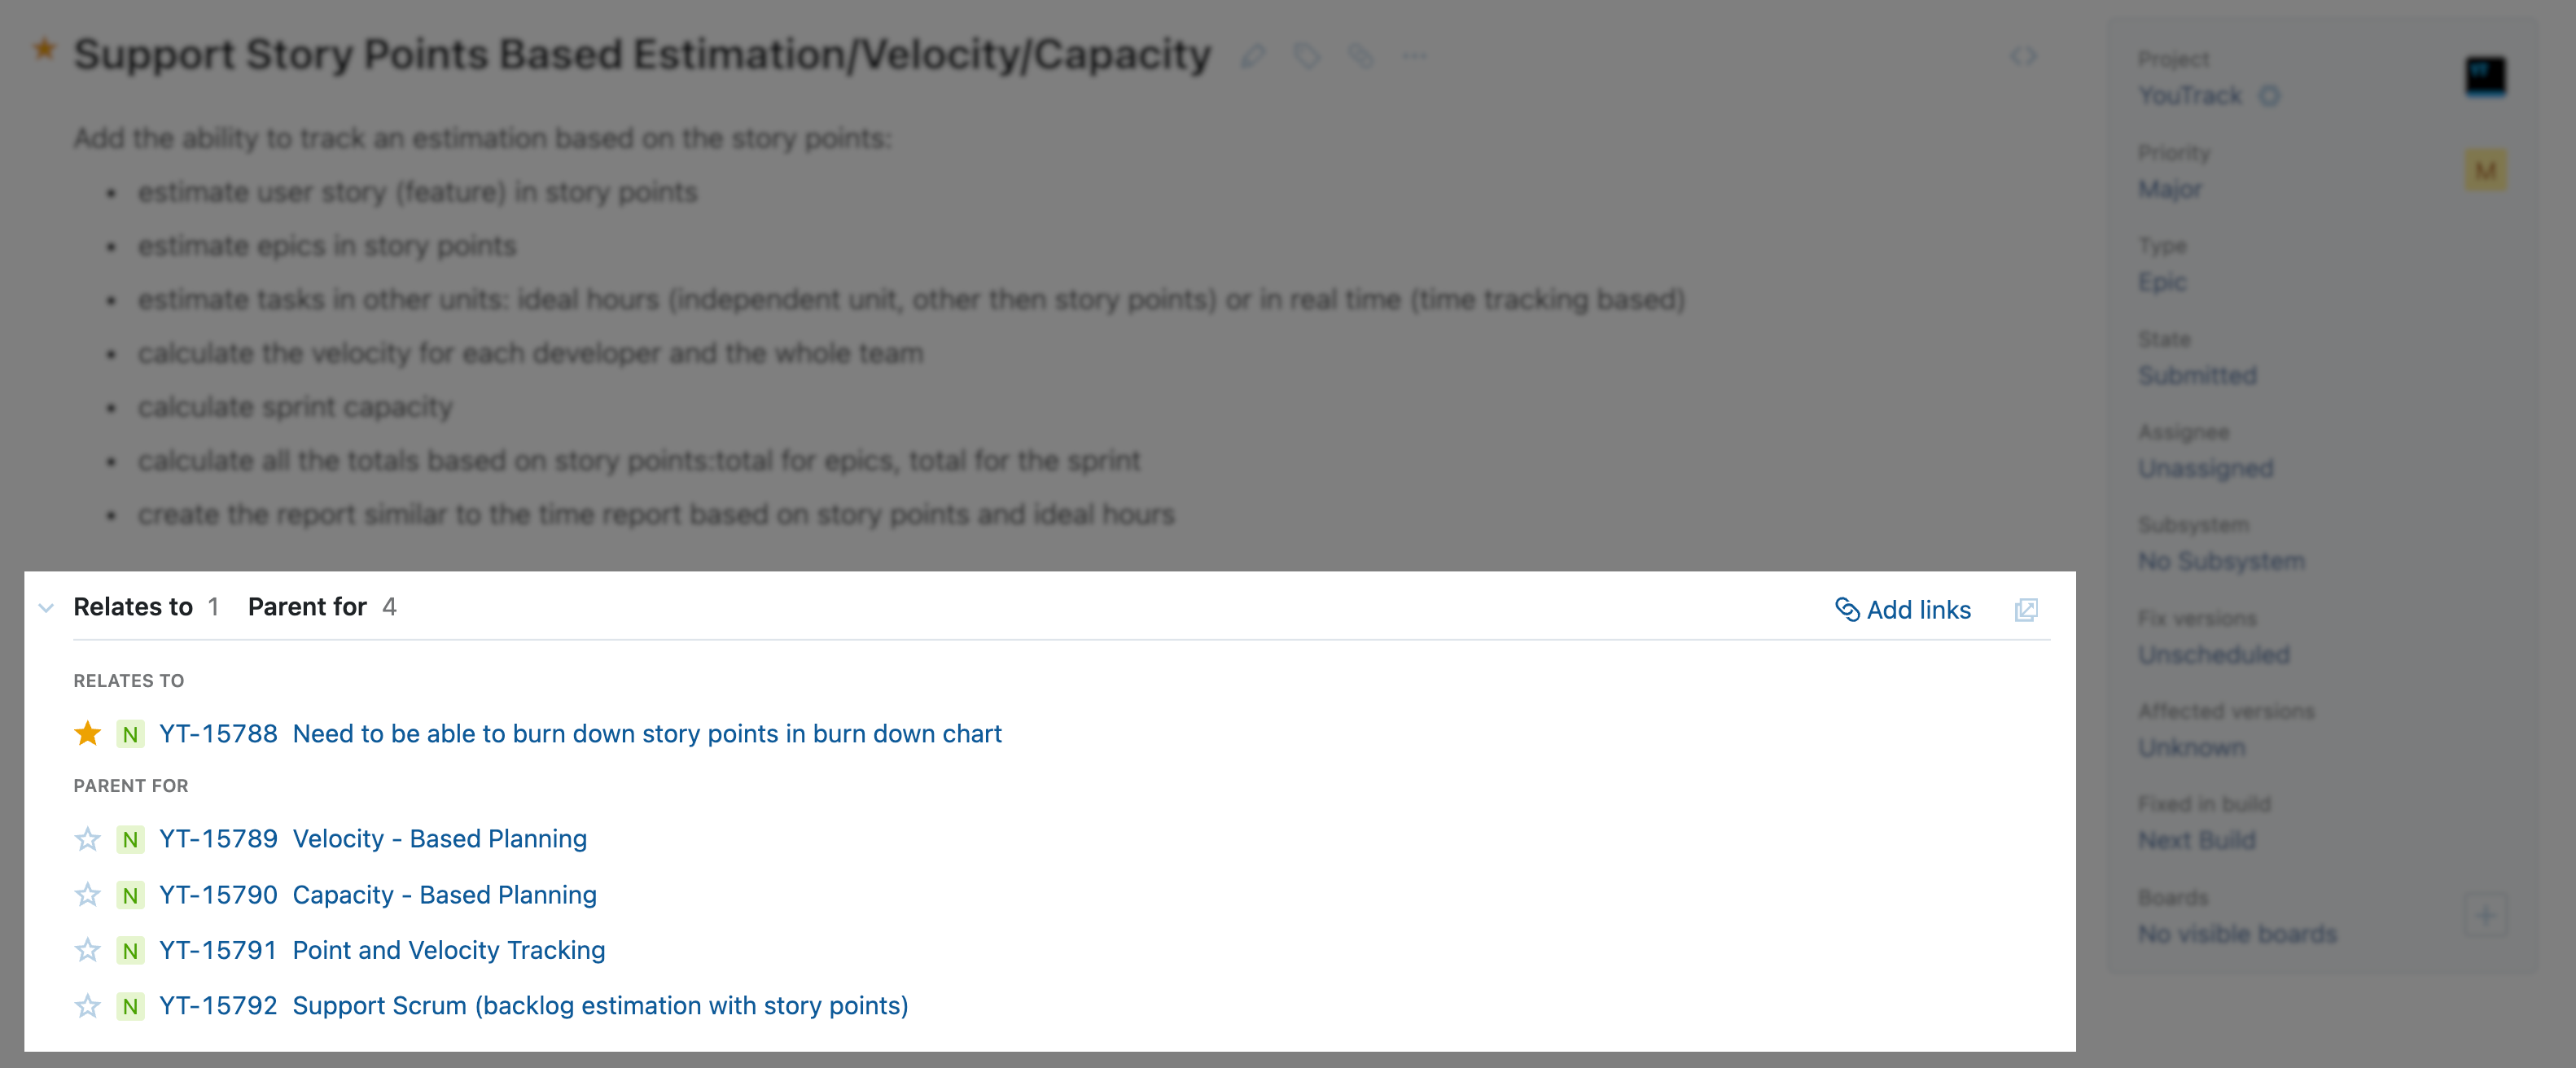
This presentation is also used when you open a card in view mode on an agile board.
Issue links help you track the relationships between the issues that you are responsible for and the issues that influence your work in some way. You can also link issues to indicate that they can be resolved as part of a larger task.
tip
Requires permissions: Read Issue, Update Issue, Link Issues
Open an issue in quick view or single issue view.
Click the Add links icon in the toolbar.
The controls for linking issues are displayed below the issue description.
Select an issue link type from the list.
Click the Add link button for each issue to create the link.
Link multiple issues at once by selecting each issue to link and clicking the Add button.
Link without notice creates links without sending update notifications to users who subscribe to the changes.
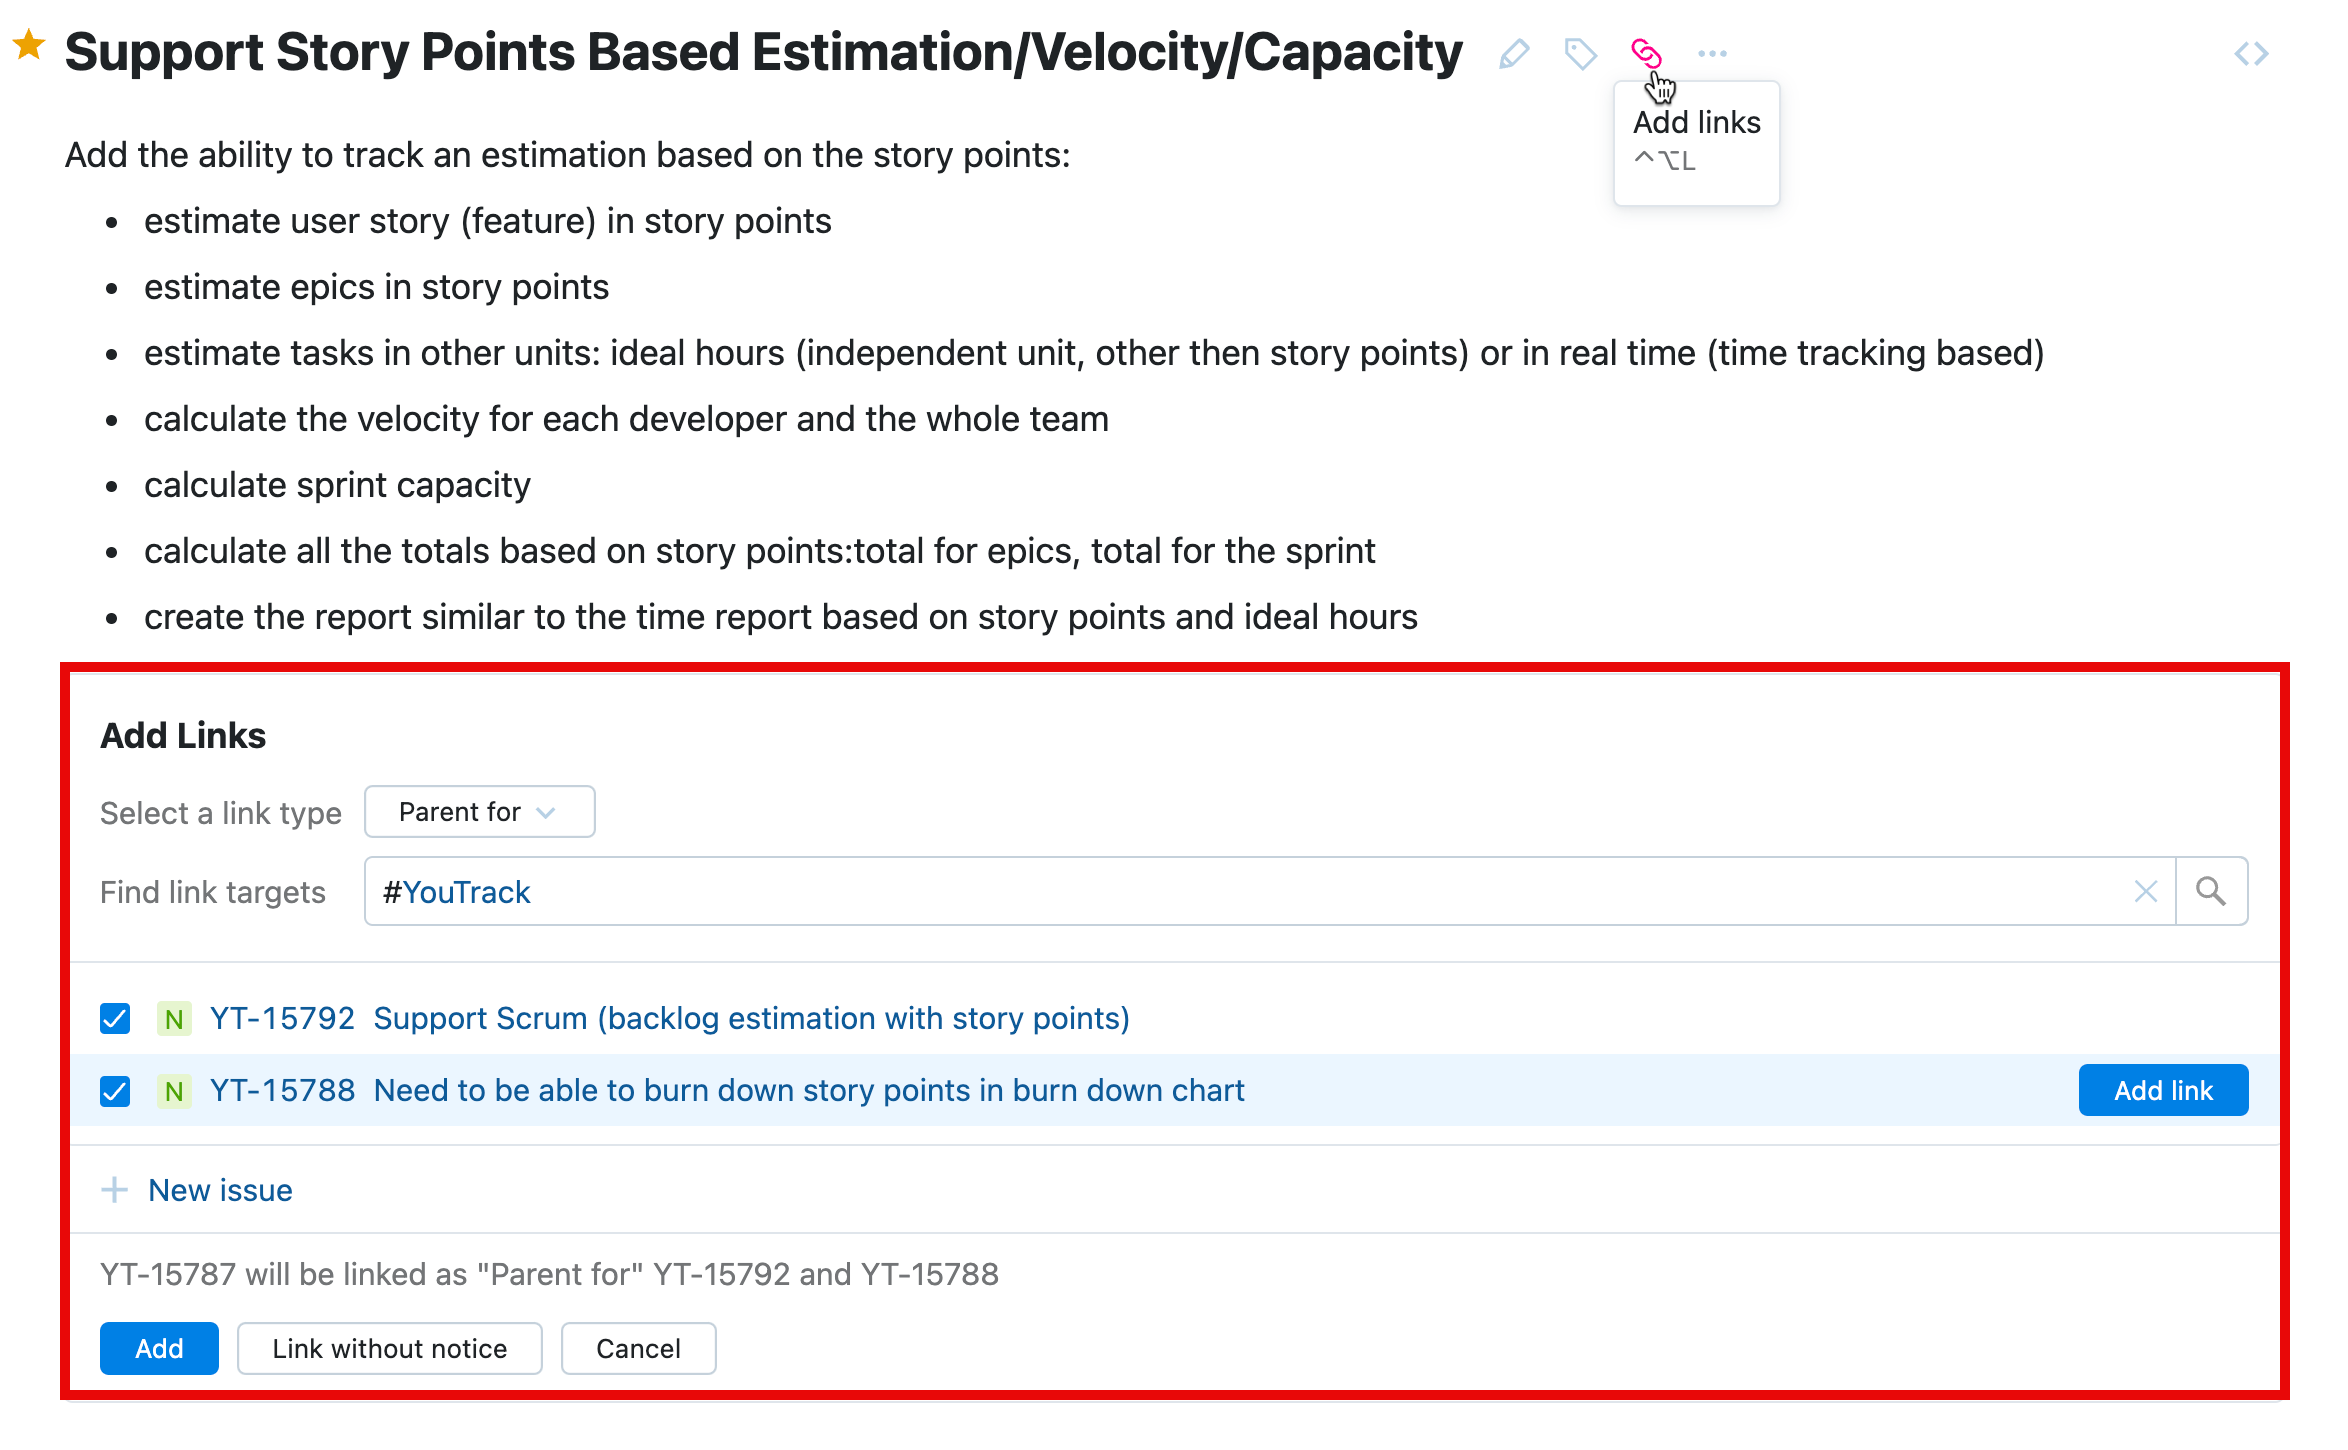
Use the search box at the top of the list to filter the list of issues.
tip
Requires permissions: Read Issue, Update Issue, Link Issues
In the Issues list, select one or more issues that you want to add links to.
Click the Add Link button in the toolbar and select a link type.

The link issue dialog opens. The ID for the selected issue or issues is displayed in the header. Click Add link for each issue to create the link.
Link multiple issues at once by selecting each issue to link and clicking the Link issue button.
Apply without notice creates links without sending update notifications to users who subscribe to the changes.
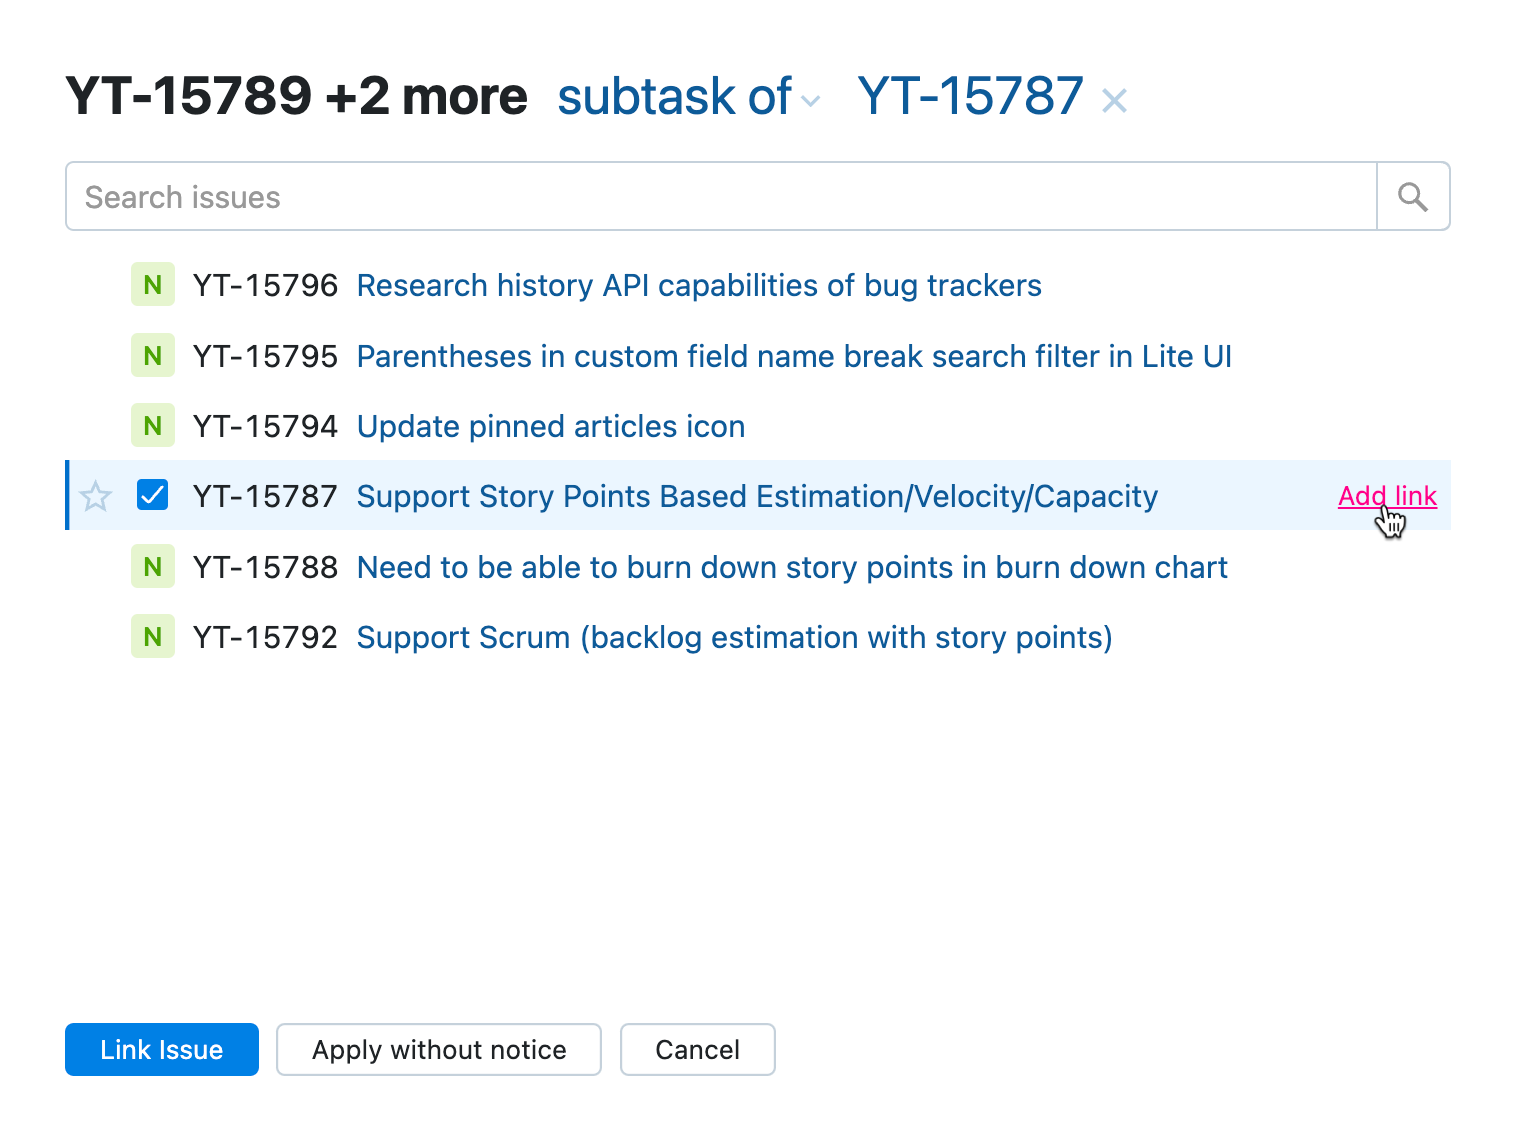
Use the search box at the top of the list to filter the list of issues.
tip
Requires permissions: Read Issue, Update Issue, Link Issues
Open an issue in Single issue view.
Click the Add links icon in the toolbar.
The controls for linking issues are displayed below the issue description.
Select an issue link type from the list.
Click the Add link button for each issue to create the link.
Link multiple issues at once by selecting each issue to link and clicking the Add button.
Link without notice creates links without sending update notifications to users who subscribe to the changes.

Use the search box at the top of the list to filter the list of issues.
If you're currently viewing an issue and want to create another issue that is somehow connected to the issue you're currently working with, you can create and link an issue in a single operation.
This approach can be useful for creating issues that are linked as subtasks to a parent issue. Just open the parent issue and use parent for as the link type. Any issue that you create using this method is automatically linked as a subtask of the current issue.
tip
Requires permissions: Read Issue, Update Issue, Link Issues, Create Issue
Open an issue in quick view or single issue view.
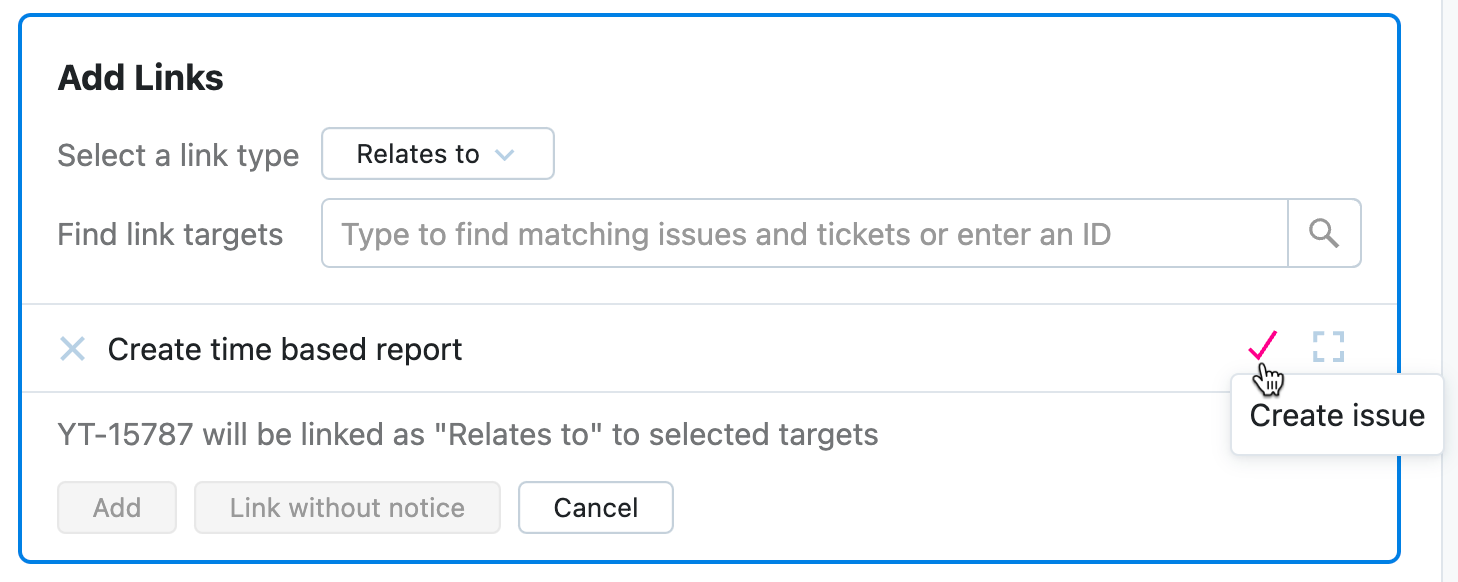
Click the Add links icon in the toolbar or the Add links link above any existing linked issues.
The controls for linking issues are displayed.
Click New issue.
Enter the summary for the new issue in the search box.
Click the check icon to create the linked issue immediately or the dotted square icon to open the new issue.
If you're currently viewing an issue and want to create another issue that is somehow connected to the issue you're currently working with, you can create and link an issue in a single operation.
To create an issue that is automatically linked to the current issue, use the drop-down menu next to the New Issue button in the header. Just choose which link type you want to use to associate the new issue with the original.

This approach can be useful for creating issues that are linked as subtasks to a parent issue. Just open the parent issue and use subtask of as the link type. Any issue that you create using this method is automatically linked as a subtask of the current issue.
When you use the option, a link to the original issue is automatically added to the New Issue page. Continue reporting the issue as described in the previous section and click the Create button when done.
You can also create a new issue automatically linked to the current issue from the single issue view.
tip
Requires permissions: Read Issue, Update Issue, Link Issues, Create Issue
Open an issue in single issue view.
Click the Add links icon in the toolbar or the Add links link above any existing linked issues.
The controls for linking issues are displayed.
Click New issue.
Enter the summary for the new issue in the search box.
Click the check icon to create the linked issue immediately or the dotted square icon to open the new issue.

To remove a dependency between issues, delete the issue link.
tip
Requires permissions: Read Issue, Update Issue, Link Issues
Locate the issue that you want to remove a link from and open the issue in quick view or single issue view.
If the list of linked issues is hidden, click the control to show the list of linked issues.
Click the Remove link button for the issue link that you want to delete.
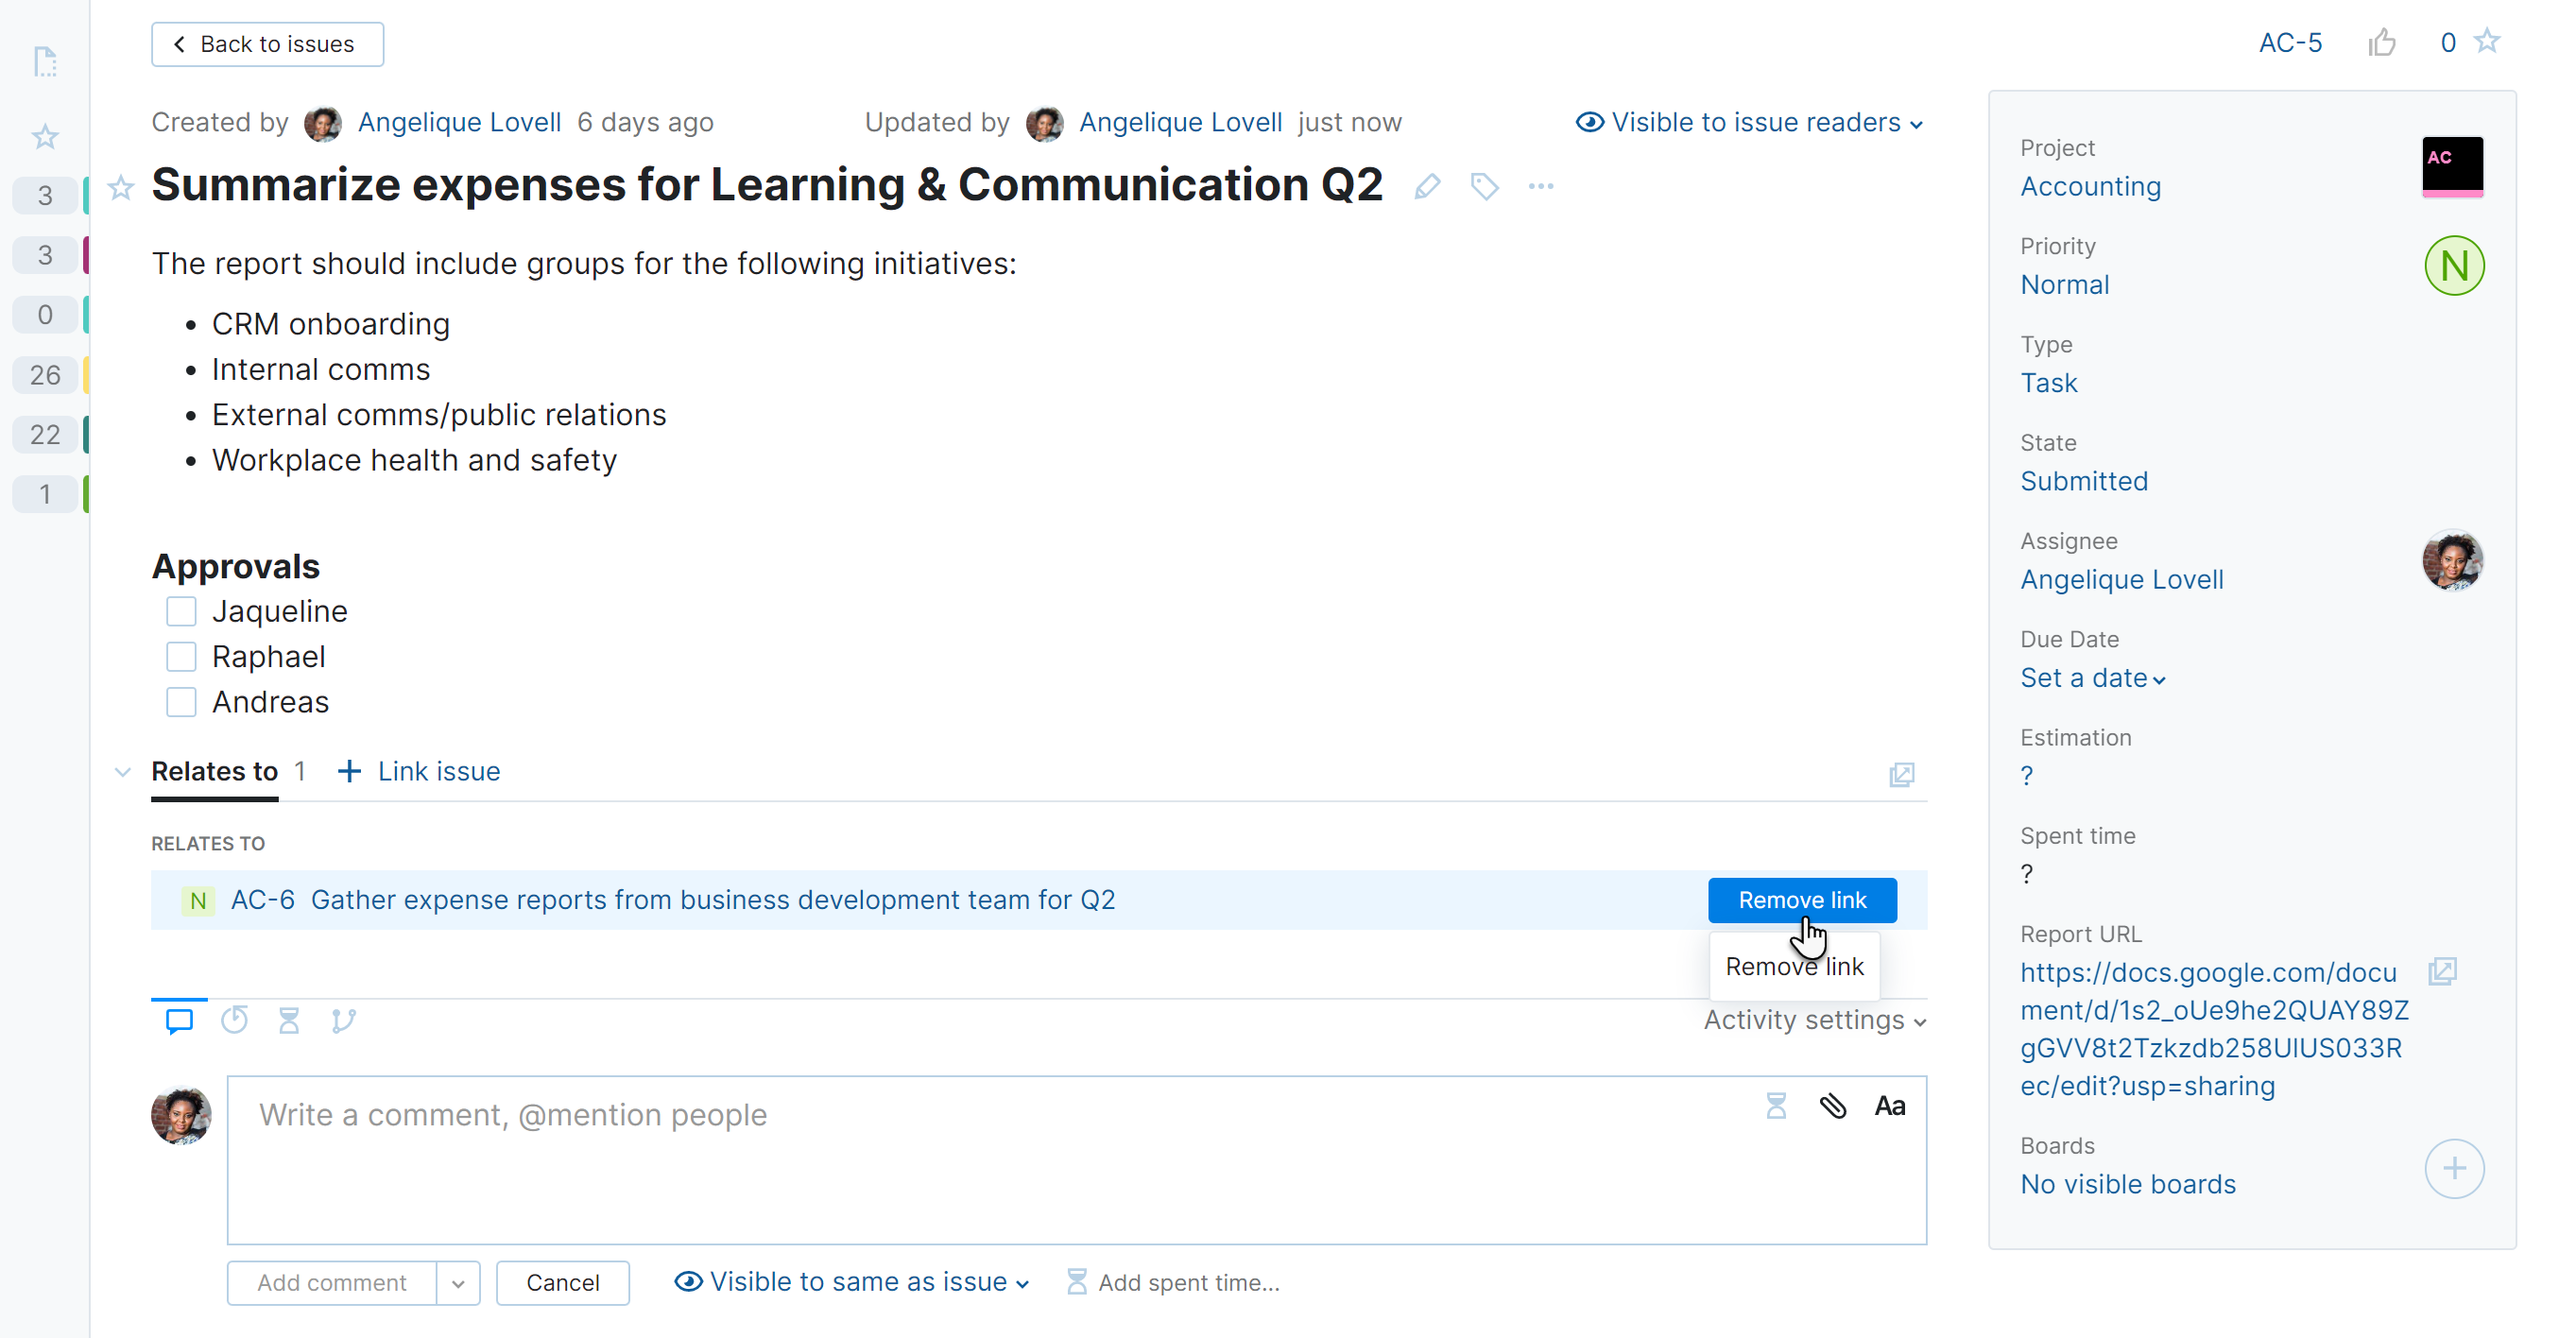
The link is removed from the current issue.
The link to the current issue is removed from the target issue.
tip
Requires permissions: Read Issue, Update Issue, Link Issues
Locate the issue that you want to remove a link from and open the issue in single issue view.
If the list of linked issues is hidden, click the control to show the list of linked issues.
Click the Remove link button for the issue link that you want to delete.

The link is removed from the current issue.
The link to the current issue is removed from the target issue.
You can search for issues with specific link types or find issues that are linked to a specific issue. To find issues with links, use the following search attributes:
Search Attribute | Value | Description |
|---|---|---|
<link name> | <issue ID> | Returns issues that are linked to the specified issue with the specified issue link type. For example, to find all issues that depend on issue TST-1234, enter: |
has | links | Returns all issues that have links of any type. |
has | <link name> | Returns issues that have links with the specified link type. For example, to find all issues which are duplicated by other issues, enter: |
links | <issue ID> | Returns all issues that contain links to the specified issue. |
Thanks for your feedback!
