Query data with SQL cells
Use SQL cells to query the following data sources:
Attached databases
DataFrames
Attached .csv files
Query a database in an SQL cell
Add an SQL cell:
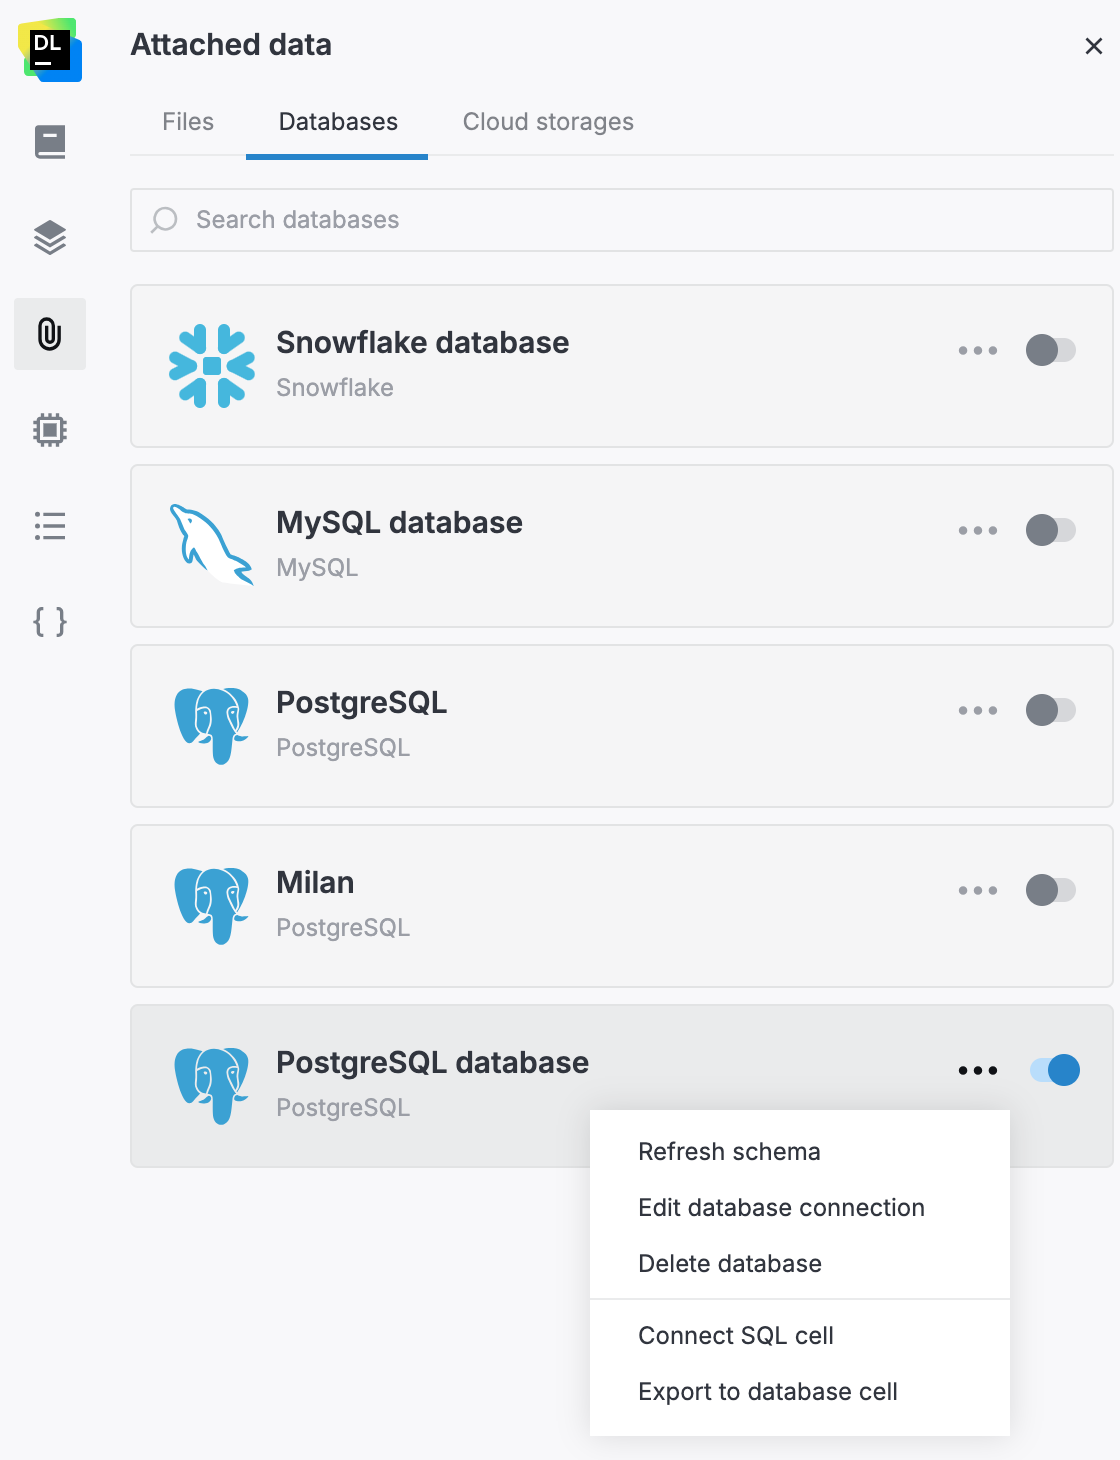
From Attached data
Go to .
Switch to the Databases tab.
In the card of the database you want to query, click
(More) and select Connect SQL cell.
In the editor:
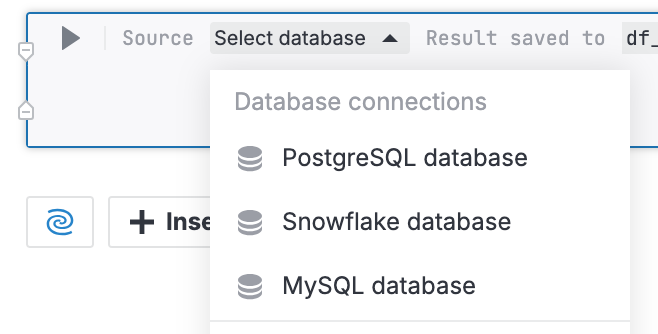
Hover over the bottom border of a cell and select . If there are several attached databases, in the cell, click Select database and select the required data source.
Enter an SQL statement.
(Optional) You can also use the following options on the cell toolbar:
Browse schema: to view the queried database schema, which will be shown in the Attached data tool.
Limit 500: to set the limit of returned rows to 500.
Run the query (Run icon or Ctrl+Enter shortcut). The result set will be shown in the output and saved to a DataFrame. The resulting DataFrame name is shown in the cell toolbar.
(Optional) You may be required to log in to the database you're querying if the connection was created without providing credentials:
In the authorization request box, click Log in.
In the Log in to [database_name] dialog, provide a login and a password. Then, click the Authorization button.
(Optional) To rename the data object, click the object name next to Result saved to on the SQL toolbar.
Example 1
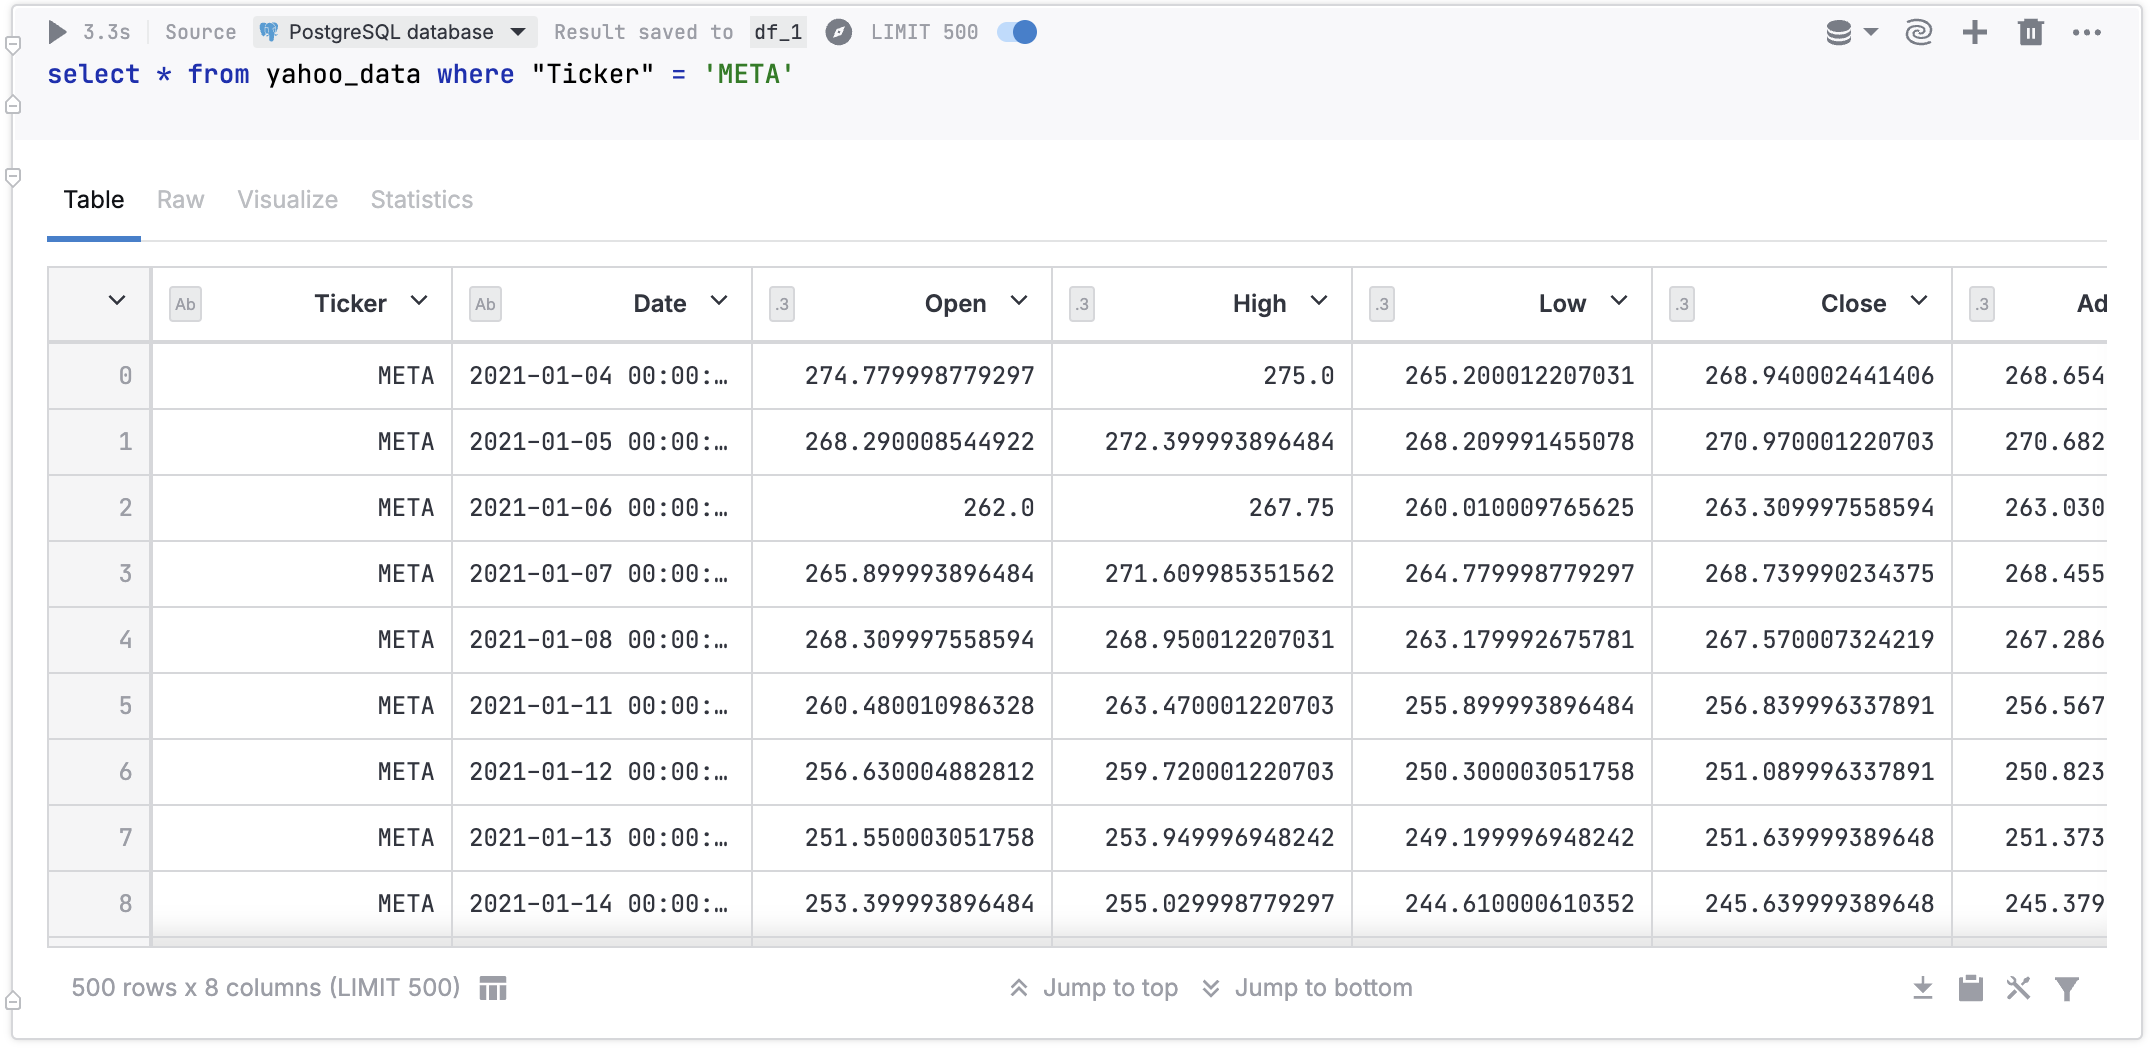
The image below shows an SQL cell querying a PostgreSQL database, 500 row limit enabled.
Query a DataFrame or .csv file in an SQL cell
The procedure queries a DataFrame or a .csv file from notebook or workspace files and saves the result set to a DataFrame.
Hover over the bottom border of a cell and select .
In the added SQL cell, click Select database and select Dataframes.
(Optional) To rename the resulting DataFrame:
Click the name next to Result saved to on the SQL cell toolbar.
Enter a new name and press Enter.
Enter an SQL statement. Run the query. The result set will be shown in the output and saved to a new DataFrame under the name shown on the SQL cell toolbar.
(Optional) To get a visual representation of the retrieved data, switch to the Visualize tab. Find more details in Use automatic plotting.
Example 2
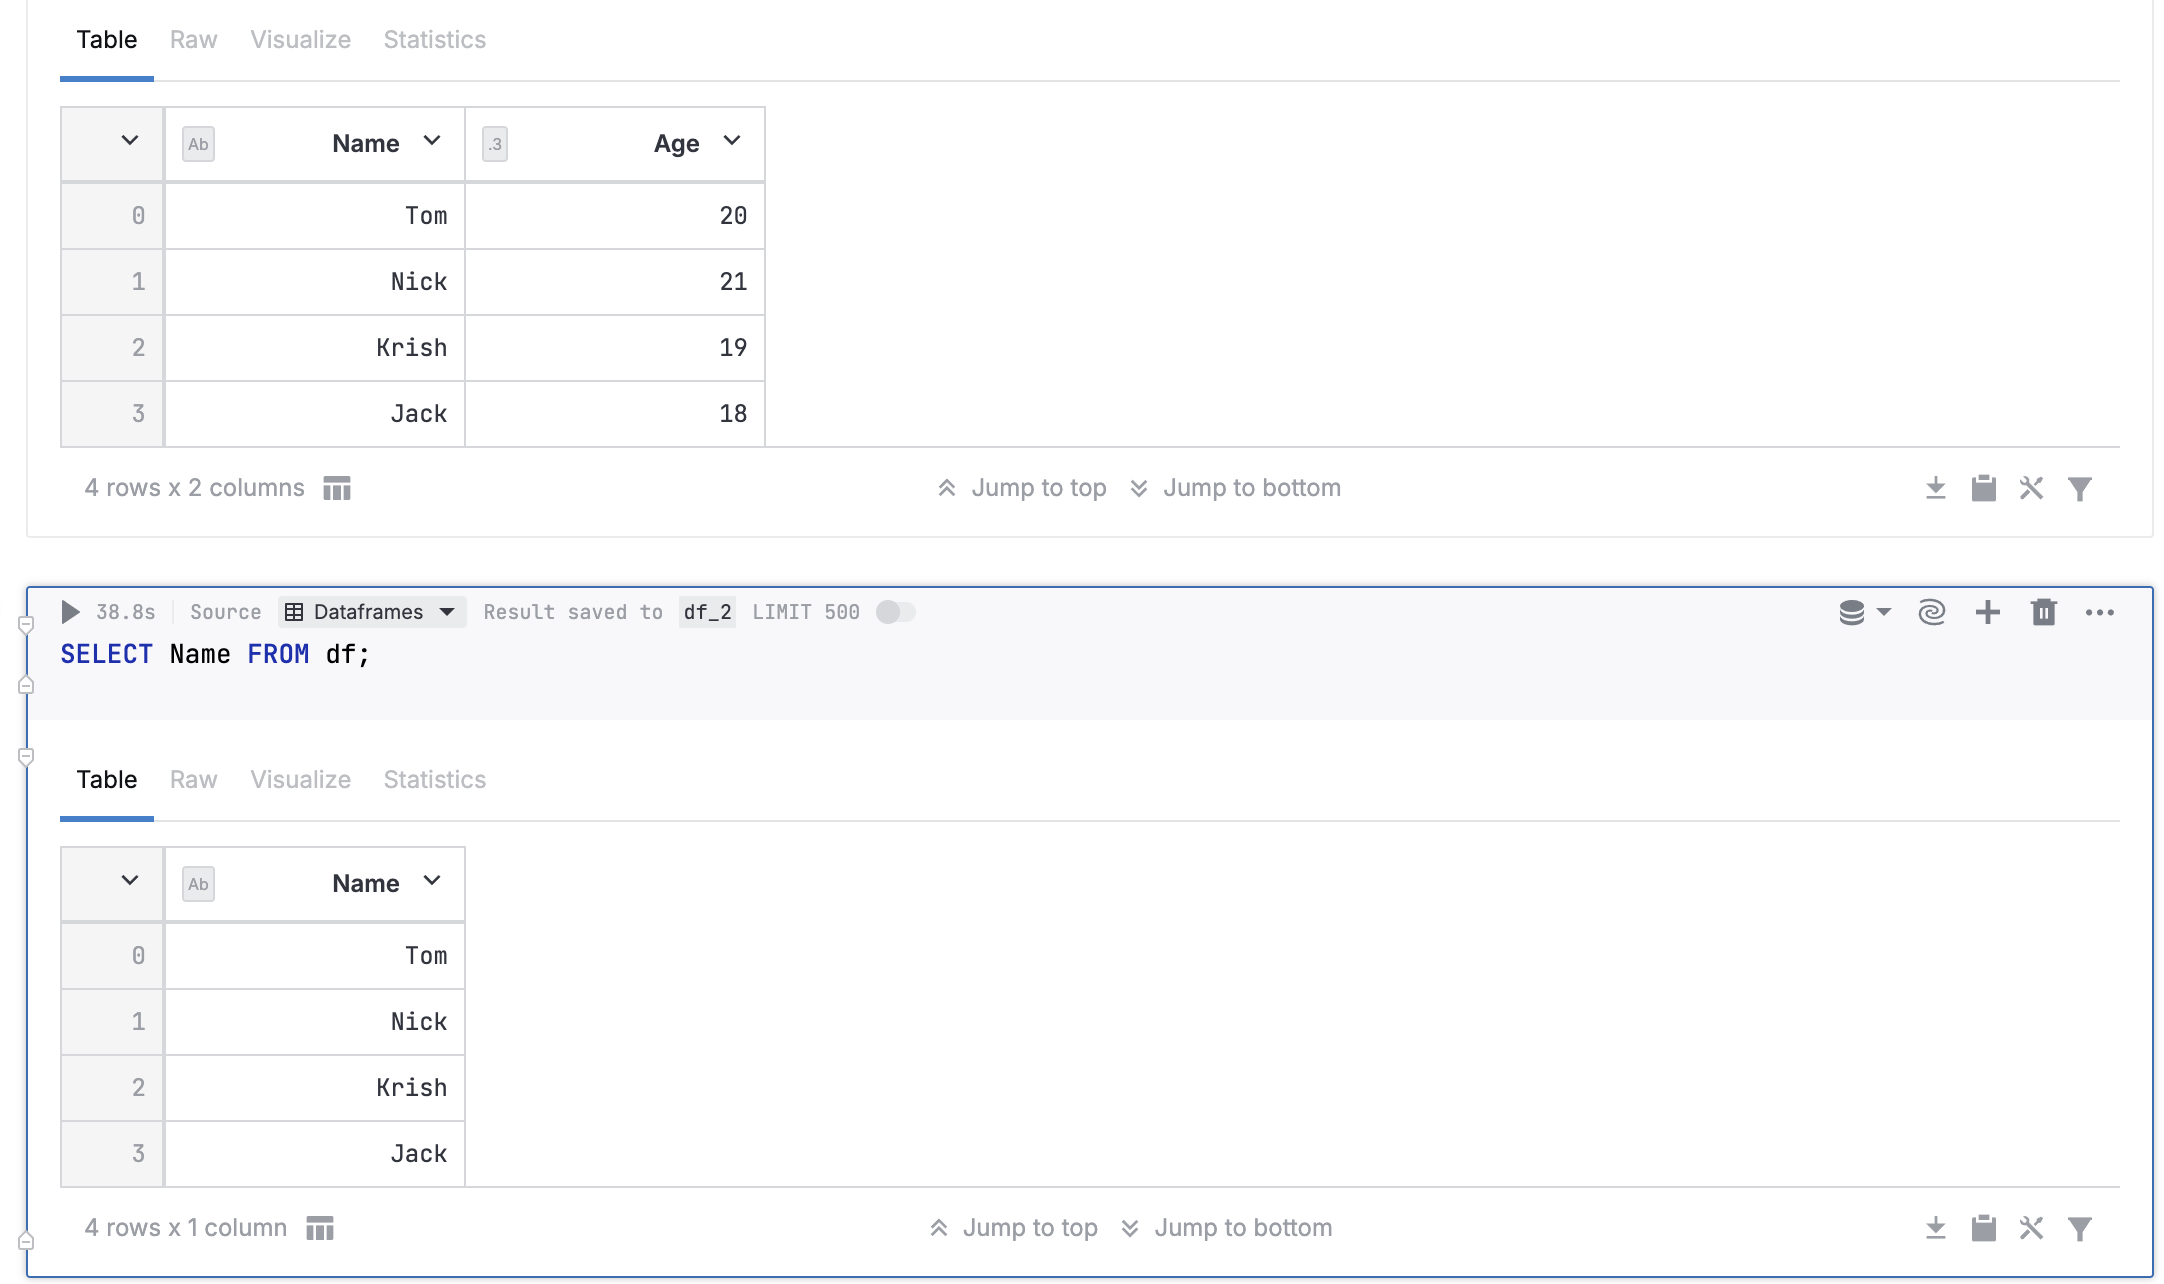
The image below shows a code cell that generates a DataFrame, and an SQL cell that queries that DataFrame.
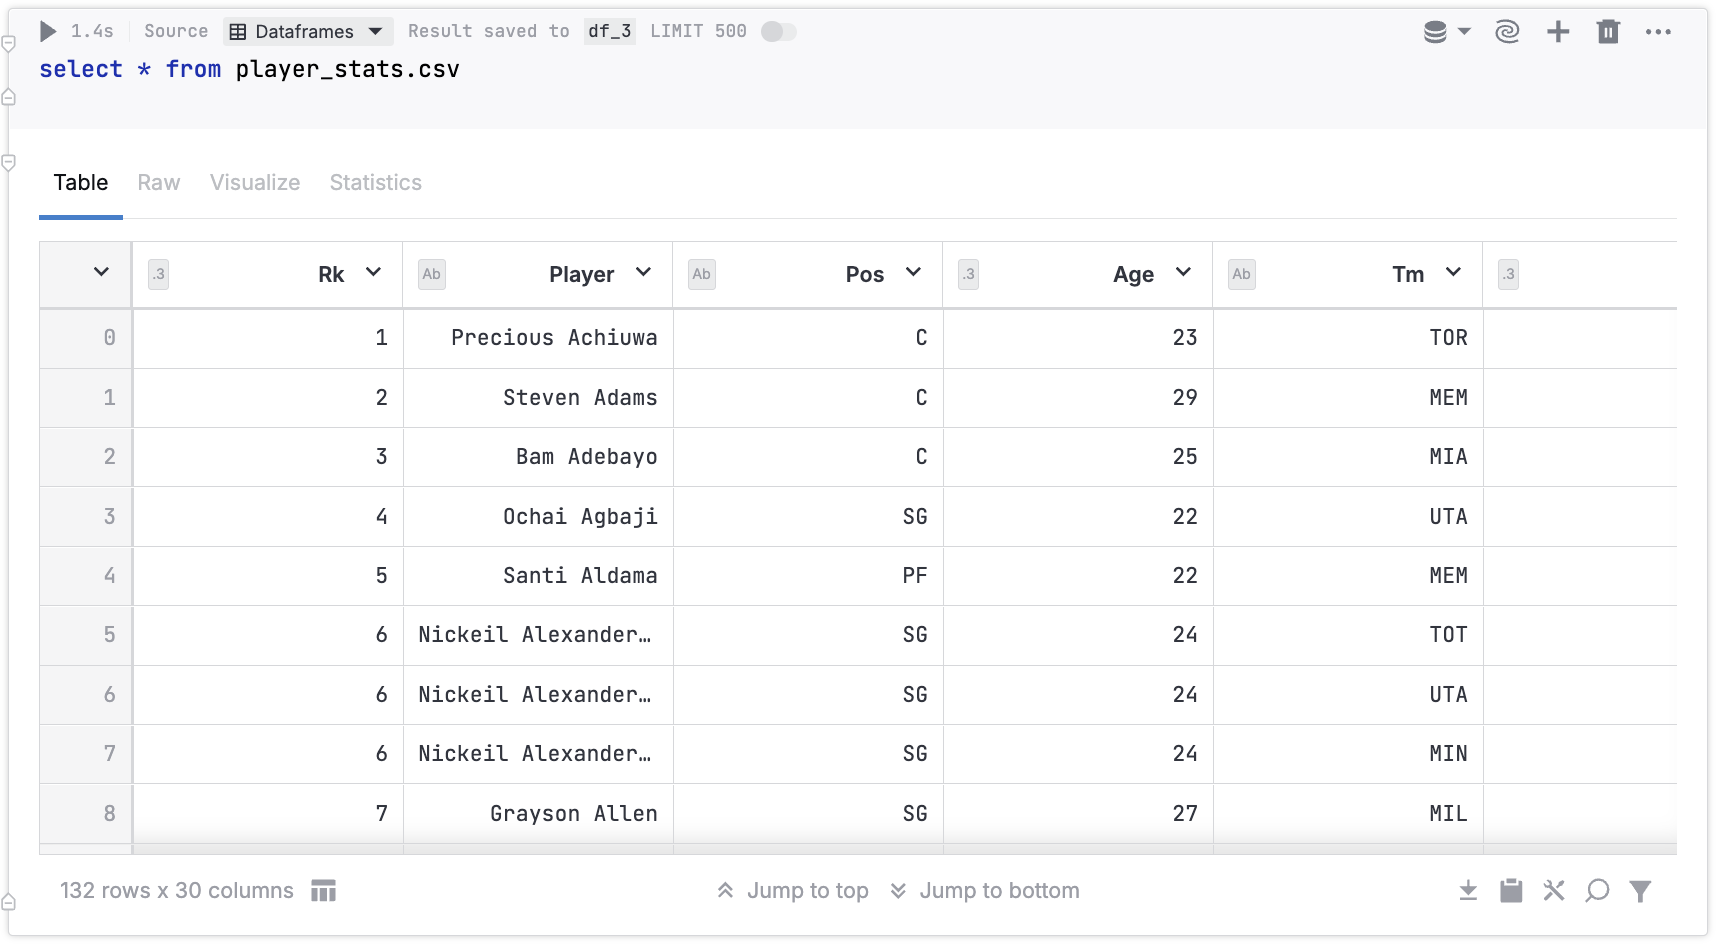
Example 3
The image below shows an SQL cell that queries a .csv file stored in Notebook files.
Query an SQLite database
The procedure describes how to query an SQLite database using an SQL cell.
Add an SQLite database to the notebook files. The simplest way is to drag the file into the editor.
Open the Attached data tool from the left-hand sidebar of the editor. The respective file will be available in the Notebook files category on the Files tab.
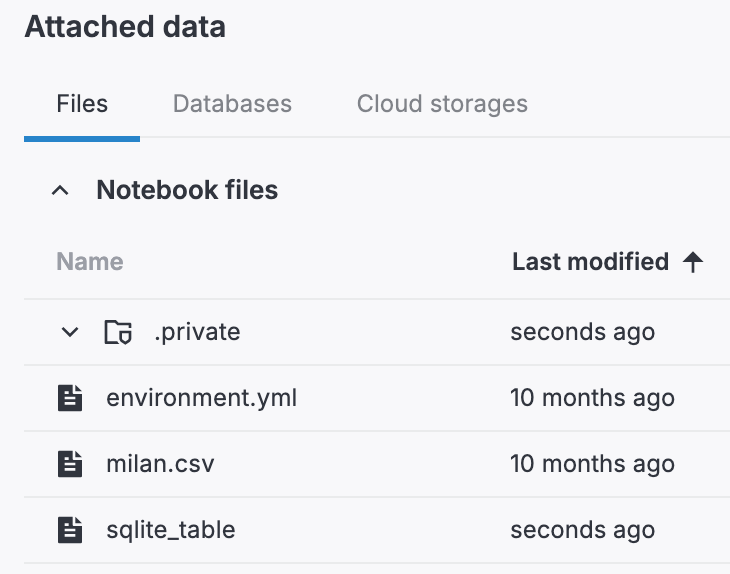
Right-click the file and select Copy file path.
Go back to the editor and add an SQL cell:
Hover over the bottom border of a cell.
Select .
In the added SQL cell, click Select database and select SQLite.
In the Path field, paste the copied path to the added SQLite database file. Instead of the full path, you can just use the file name.
(Optional) To rename the resulting DataFrame:
Click the name next to Result save to on the SQL cell toolbar.
Enter a new name and press Enter.
Enter an SQL statement. Run the query. The result set will be shown in the output and saved to a new DataFrame under the name shown on the SQL cell toolbar.
(Optional) To get a visual representation of the retrieved data, switch to the Visualize tab. Find more details in Use automatic plotting.
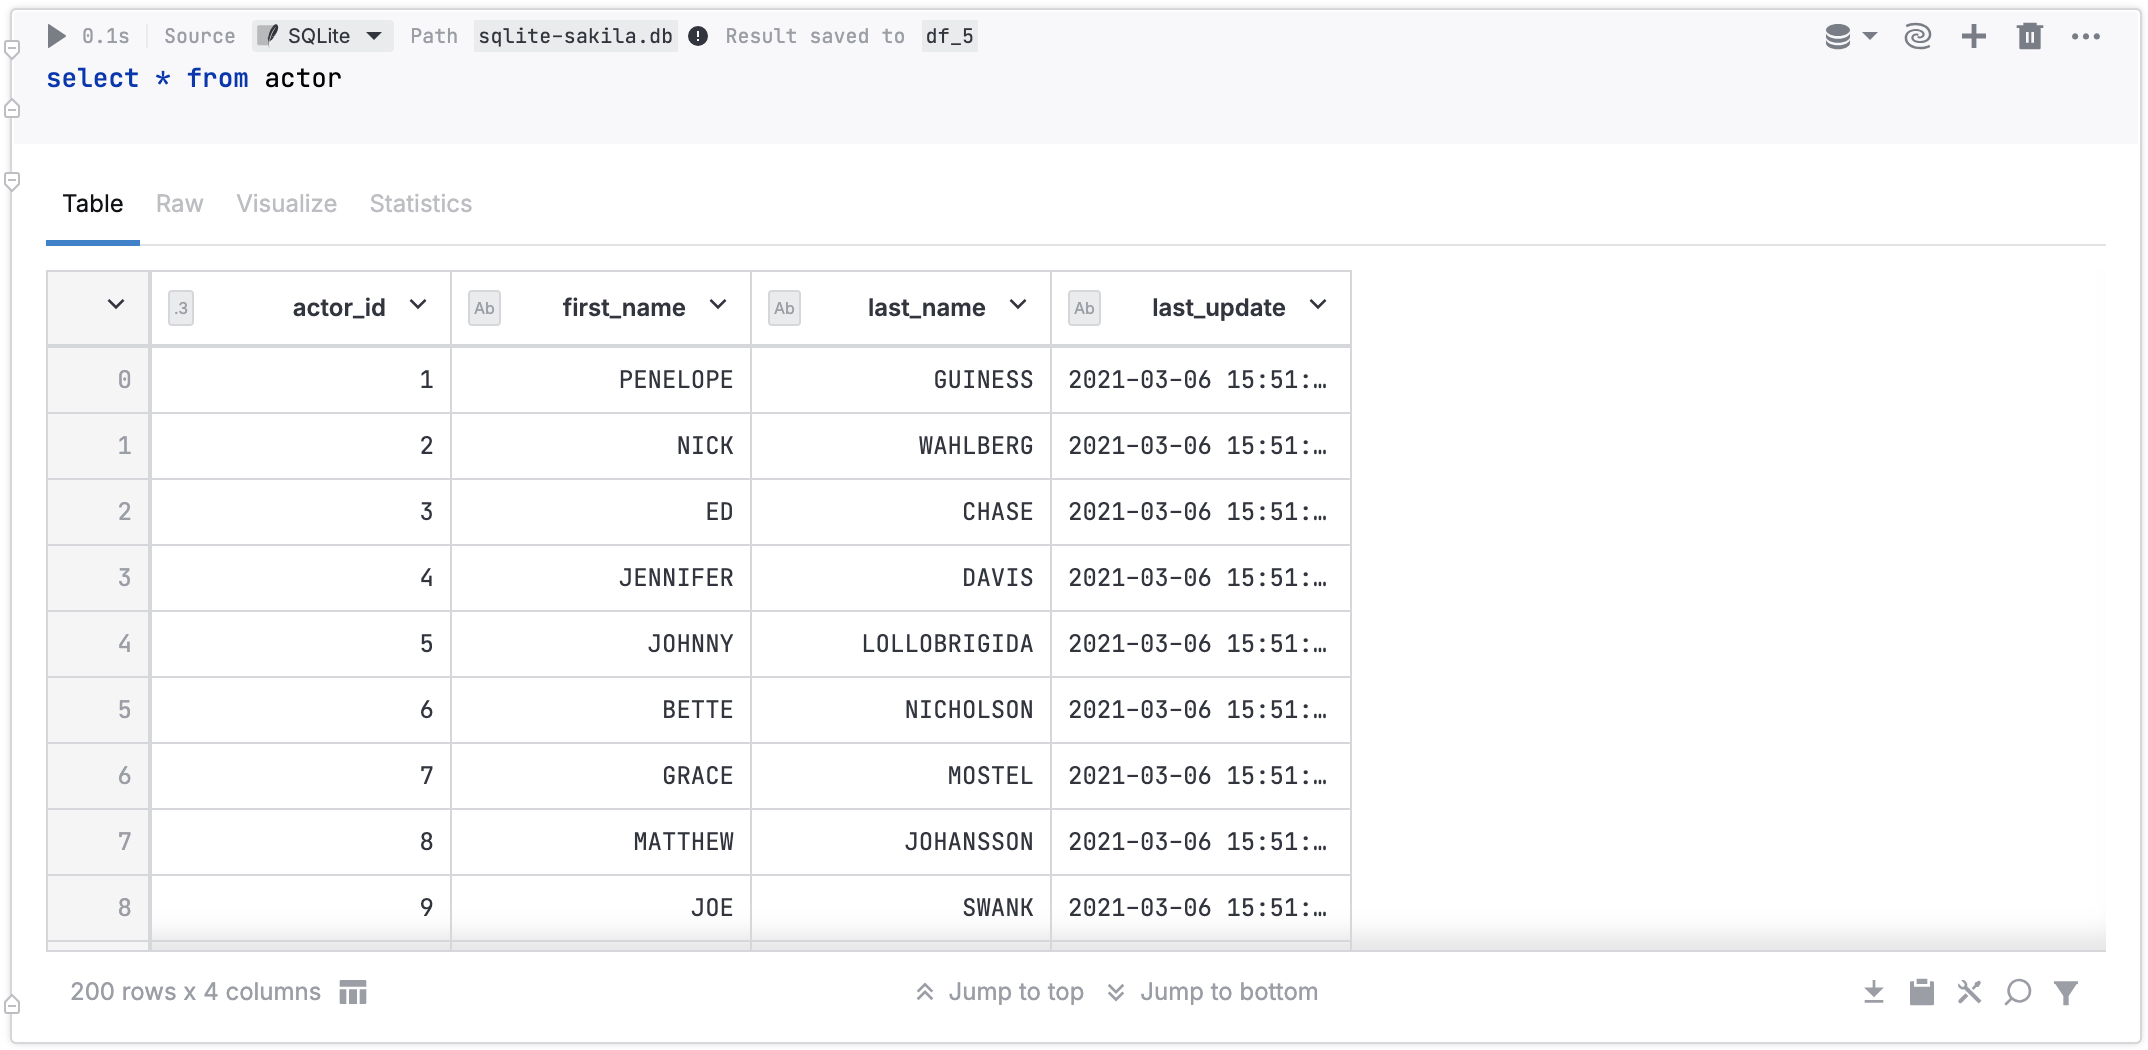
Example 4
The image below shows an SQL cell that queries an SQLite database file stored in Notebook files.
Create an SQLite table
You can create an SQLite table and save it to an SQLite database. This can be either one of the databases that you already added to the notebook files or a new table that will be created as a result of this procedure.
Hover over the bottom border of a cell and select .
In the added SQL cell, click Select database and select SQLite.
In the Path field, provide a name for the SQLite database where you want to create this table. If this step is skipped, the table will be added to the
datalore.sqlitedatabase.(Optional) To rename the resulting DataFrame:
Click the name next to Result save to on the SQL cell toolbar.
Enter a new name and press Enter.
Enter an SQLite statement to create a table. Run the query. The result set will be shown in the output and saved to a new DataFrame under the name shown on the SQL cell toolbar. The table will be added to the database file that you previously specified.
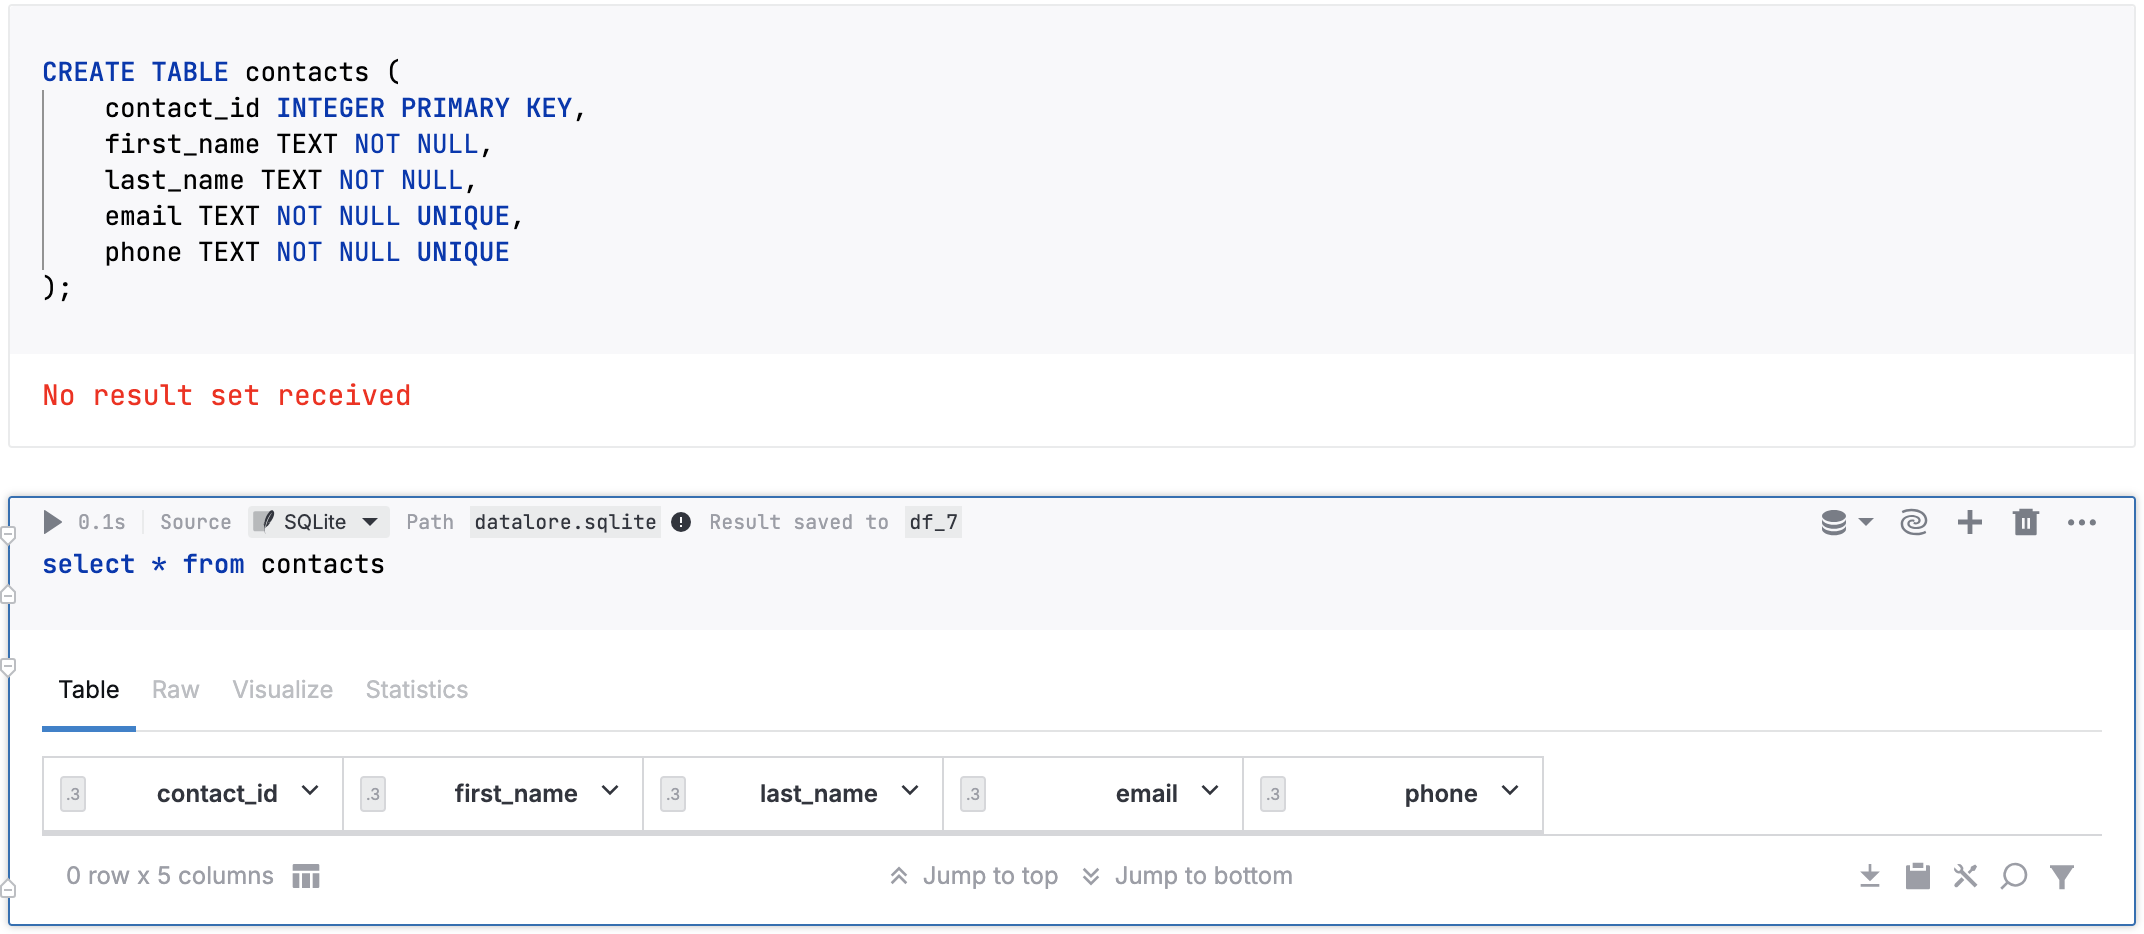
Example 5
The image below shows an SQL cell that creates an SQLite table for an SQLite database file stored in Notebook files and an SQL cell that queries this new table.
Parameterized SQL queries
You can use Python variables in your SQL queries in Datalore. Such queries can be reused repeatedly with different values, which helps make your reports more interactive.
Supported variable types are: strings, numbers, booleans, and lists. Make sure you place your variable inside {} brackets.
Parameterized SQL query example
In the image below, you can see two cells:
Dropdown interactive control cell using the
methodvariable.SQL cell where the value in payment column equals the
methodvariable value selected from the dropdown list.

Table parametrisation for SQL cells
Datalore allows for table parametrization by supporting unsafe parameters for SQL cell statements. The syntax is as follows:
In the code example above, the {table_name | unsafe} part will assume the value of the table_name variable.
String variables for unsafe parameters
To pass a string variable to an unsafe parameter, use quote escaping quotes. See the examples below:
- Unsafe parameter defined in a code cell
- product = "'Product'"
- Unsafe parameter referenced in an SQL cell
- SELECT * from releases where jb_product in ({product | unsafe})
- Resulting SQL query
- SELECT * from releases where jb_product in ('Product')
Run SQL cells as functions from other cells
Datalore allows you to wrap queries from SQL cells into Python code and use them as functions with parameters. The function with an SQL cell statement has the following syntax: execute_sql_cell_{DataFrame_name}, where {dataframe_name} is the name of the DataFrame that saves the result of the SQL cell you want to use.
Example
Cell 1, Python
Cell 2, SQL (result saved to a df_1 DataFrame)
Cell 3, Python (function using the df_1 DataFrame from Cell 2)
Override automatic header detection
The procedure below explains how to override automatic header detection (find more details here).
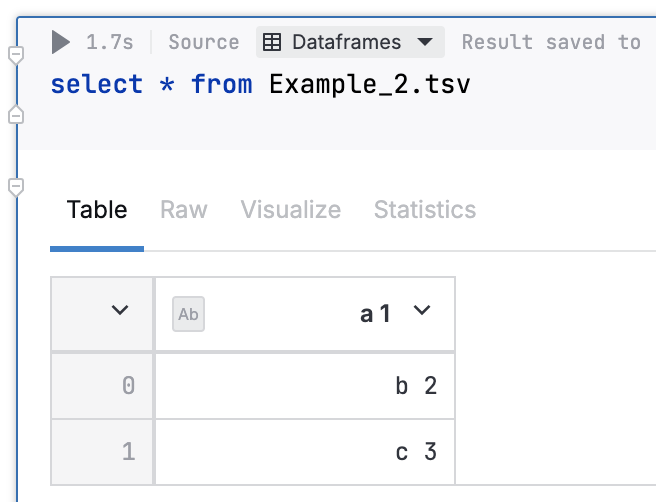
Consider the example in the image below. The first row contains string values, which is detected as the table header.
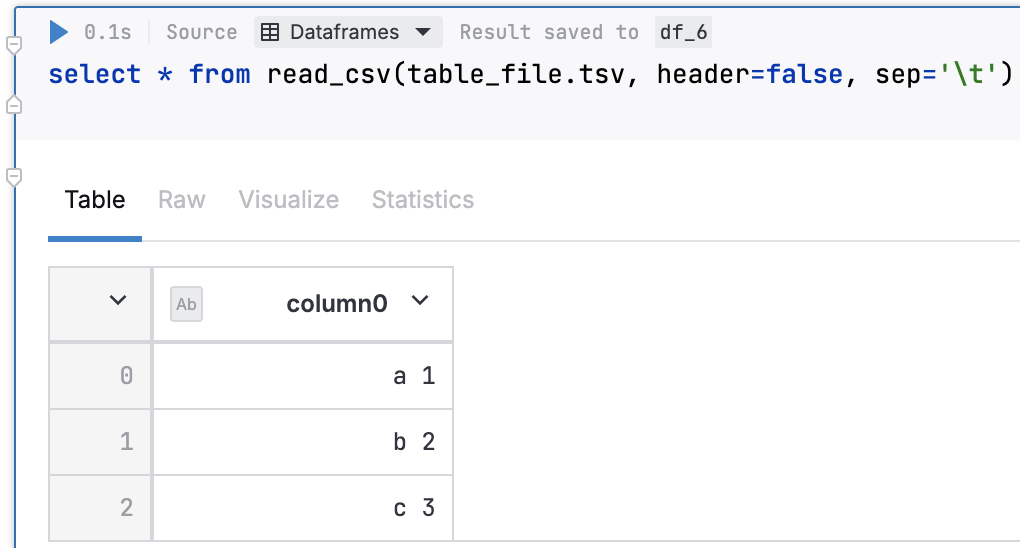
To disable automatic header detection, query the file using the read_csv function with the header parameter set to false. When querying .tsv files, the additional sep='\t' is also required.
Keywords
sql statement, sql query, retrieve data, query table, query database