Collect settings from IDEs
Last modified: 23 September 2024The JetBrains IDE Services plugin enables you to export modifications made to the IDE settings by using the dedicated action within your IDE. Once exported, these settings can be pasted into the Web UI. By doing so, the relevant forms in a profile will be automatically populated, eliminating the need to enter the data manually.
Export IDE settings
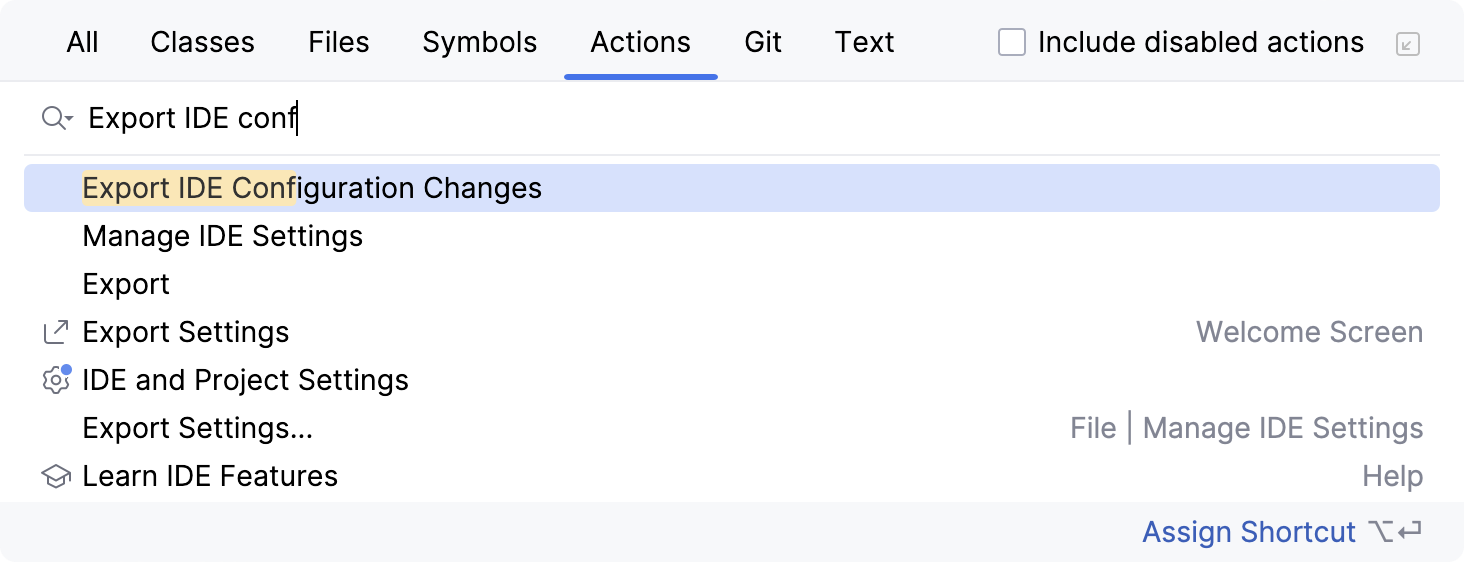
Open your preferred JetBrains IDE and press CtrlShift0A.
In the dialog that opens, start typing
Export IDE Configuration Changesand select the corresponding action, then press Enter.
IDE Services will launch the first step of the exporting process.

Click Open IDE Settings, make any necessary changes to the IDE settings, and apply them.
Click Review collected changes in the Export IDE configuration changes wizard. IDE Services will display all the changed values in the difference viewer.
Use the checkboxes to select the changes that you want to export and click OK.

Once the settings are collected, you can either copy them to the clipboard as they are or open a JSON file with the resulting changes in the editor.

Add settings to the profile
In the Web UI, go to the Profiles page and click the name of the profile you want to edit.
In the Settings section, click
and select IDE Setting.
In the Add IDE settings dialog, use filters to configure what IDEs will receive settings from the IDE Services Server.
Click Add filter and fill in the following details in the Add Filter dialog:
Type: select one of the filter types. Select the Include type if you want to apply settings only to the applications specified in the filter. If you want to apply settings to all applications except for the ones specified, use the Exclude type.
IDE: select one or multiple names of the IDEs to use in your filter. Click the field to see the dropdown with available options.
Build: select one or multiple IDE build versions to use in the filter.
OS: if necessary, select the operating systems to use in the filter.
Architecture: if necessary, select the architectures to use in the filter (All, x64 or arm64).
Dev Environment: choose whether the plugins will be only available for the IDE instances locally installed on developers' machines (Local) or for Remote Development setups (Remote). Leave the field empty to allow for all options.
Read more about the requirements and limitations of the Remote Development support.
Click OK to save the filter.
Copy and paste the generated JSON file contents into the Add IDE Settings dialog by pressing Ctrl0V. This will add the settings to the dialog.
Click Save to add settings.
Productivity tips
- Quickly test profile changes
By default, changes in profiles are delivered to developer machines within two hours. In case you need to quickly test how configurations from a particular profile work, you can speed up the process with the following actions:
To quickly receive new IDE settings, restart your IDE.
Alternatively, use the Refresh managed settings action in your IDE to update the list of propagated settings.

Thanks for your feedback!