Migrate to IDE Services
Once your IDE Services instance is up and running, you can migrate your existing users and licenses to it. On this page you will find instructions on migrating from the legacy License Server (also known as Floating License Server or FLS) and from other licensing tools.
Compare IDE Services and License Server
Due to the upcoming discontinuation of the legacy License Server, we highly recommend switching to IDE Services. It offers scalability, fully postpaid IDE licensing with the pay-as-you-go billing model, and the ability to share licenses between developers efficiently.
If you've already decided to switch to IDE Services, you can skip straight to the migration instructions.
The table below compares the key features of License Vault and License Server.
IDE Services with License Vault | License Server | |
|---|---|---|
Secure connection and user authentication | Yes, single sign-on You can set up any authentication module used in your company | No User authentication is not supported Reverse proxy is required to make connections secure |
License management interface | A user-friendly web application to manage licenses and configure access rules | Limited UI. Rule configuration via regexp and property files |
Upgrades | Possibility of non-disruptive upgrade | Manual upgrades with downtime |
Reliability | High With multi-node deployment providing redundancy and failover mechanisms | Low A single-machine installation is extremely vulnerable to hardware failures |
SLA and extended enterprise support | Yes Contact the IDE Services support team for more details | No |
Prerequisites for migration
Before migrating from any licensing tool to IDE Services, make sure to complete the steps below.
Get started with IDE Services: If you have not started using IDE Services yet, follow this guide to set up your instance.
Set up user authentication: Refer to these instructions on access management.
Customize the client machine configuration file: Update the organization title and logo and customize the data collection statement. Refer to Setting up the client machine configuration for instructions.
Set up License Vault: Configure your License Vault according to your organization’s needs.
Migrating from License Server
If you manage your licenses via the legacy License Server, you can use the automated migration tool in your JetBrains Account to migrate users and licenses to IDE Services.
When you start the migration, we'll add temporary licenses to IDE Services matching your active License Server ones. You'll have 30 days to move users from License Server to IDE Services.
- FAQ: How many temporary licenses will I get in IDE Services?
For IDE and .NET tool licenses:
We will match the number of active licenses for each product on License Server and add 10% to make sure there are no interruptions during migration. If you have True-Up enabled on your License Server, we will include your True-Up licenses in the temporary license count.
For example, if you have 100 active
CLionand 200 activeAll Products Packlicenses on your License Server with 150% True-Up enabled, you will get:100 + 10 (10%) + 150 (True-Up 150%) = 260 virtual CLion200 + 20 (10%) + 300 (True-Up 150%) = 520 virtual All Products Pack780 virtual licenses in totalFor plugin licenses:
We will match the exact number of active licenses on License Server. If you have 100 active plugin licenses, you will get 100 temporary licenses for the same plugins in IDE Services.
All your team members have to do is connect to IDE Services, and they will automatically get temporary licenses. Your License Server will continue distributing licenses during the migration period, so users can switch at their convenience.
Once the migration period ends, all active licenses will be automatically transferred from License Server to IDE Services.
- FAQ: If my company has more than one License Server, should I merge them into a single IDE Services instance?
We do recommend merging instances if all your users are connected through the same authentication provider and the granular access rules in IDE Services fully address your license policy requirements. This approach provides more convenient centralized management and billing.
However, merging is not obligatory. If your infrastructure limitations or policies require maintaining multiple separate License Server instances, you can replicate that setup using IDE Services. In this case, each IDE Services instance will be managed and billed separately.
In any case, you can begin by migrating one of your License Servers and test the setup to determine which approach works best.
Step 1: Start migration
Go to the IDE Services management page in your JetBrains Account.
In the License Vault section, click Start migration.
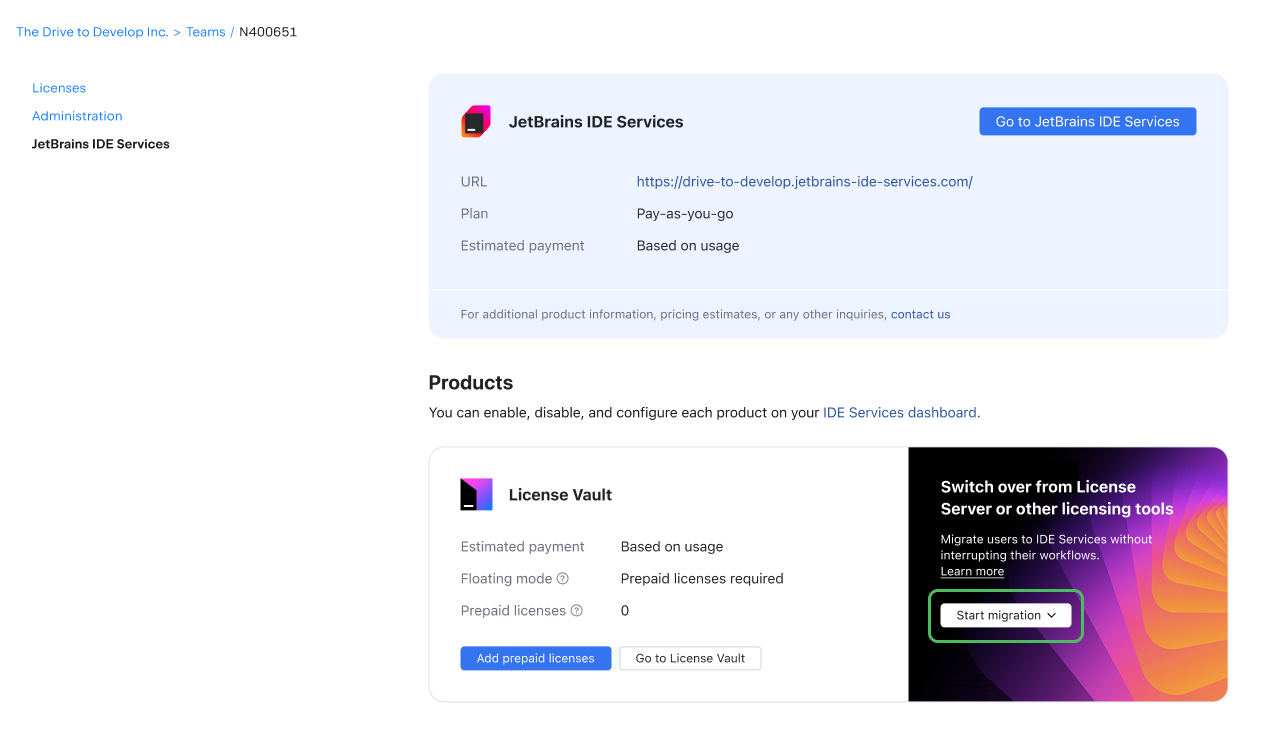
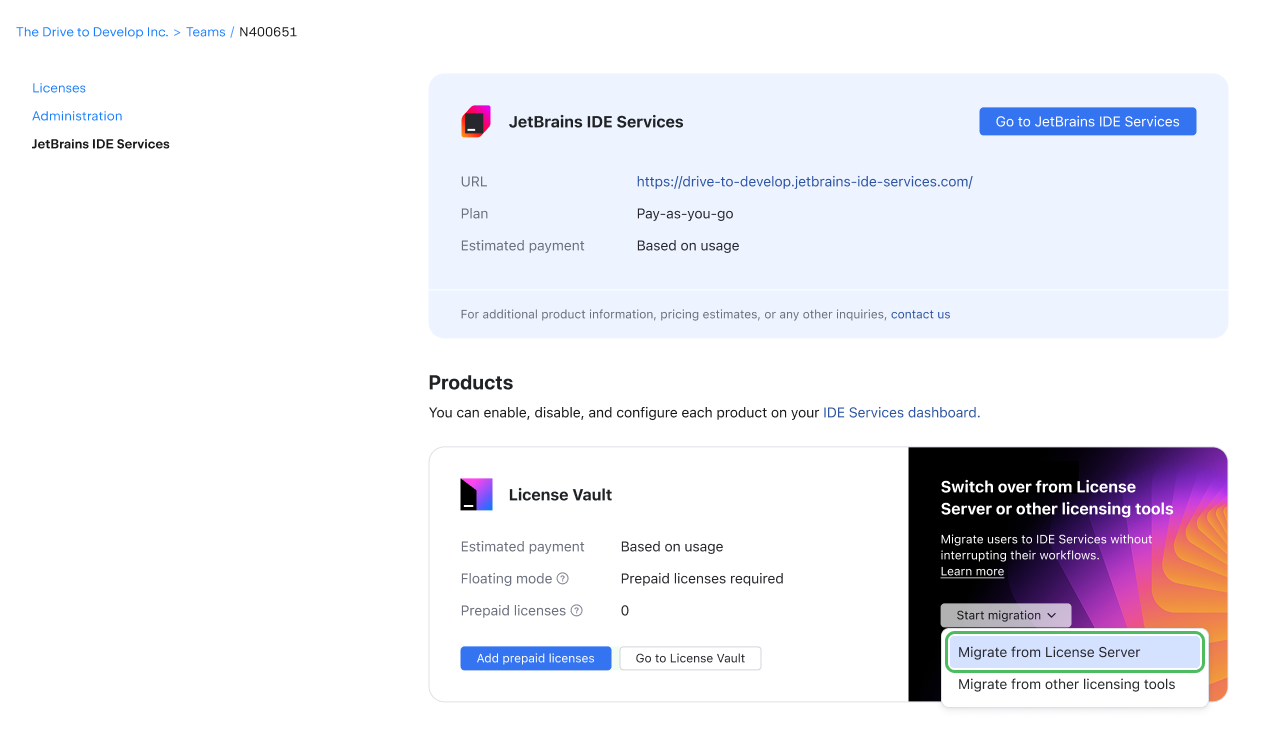
(Optional) If you use any other licensing tool, you will see a dropdown menu. Select Migrate from License Server there.
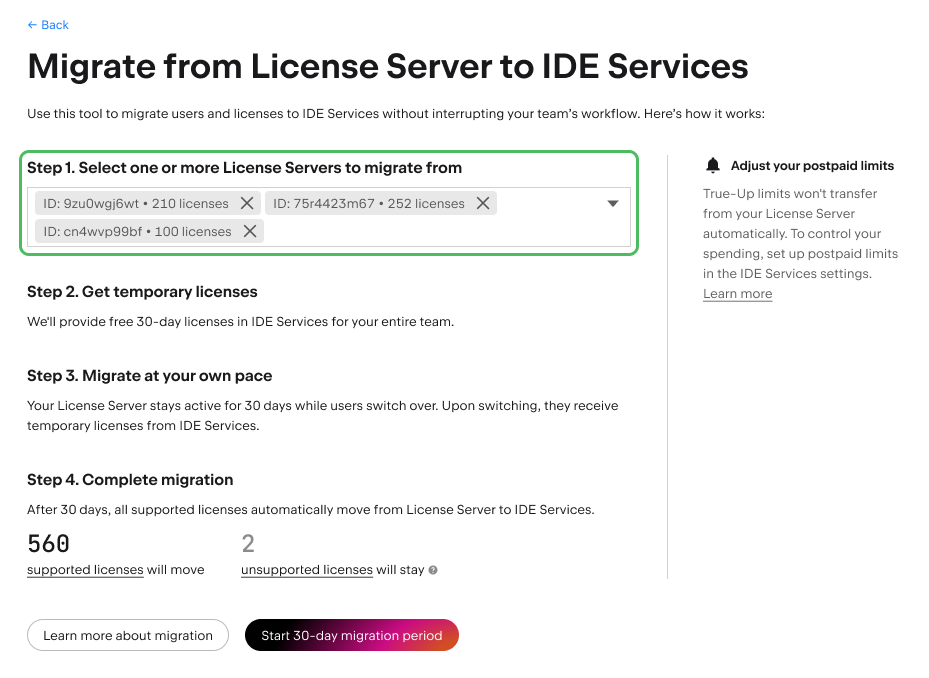
If you have more than one License Server, select the ones you want to replace with IDE Services.
Click Start 30-day migration period.
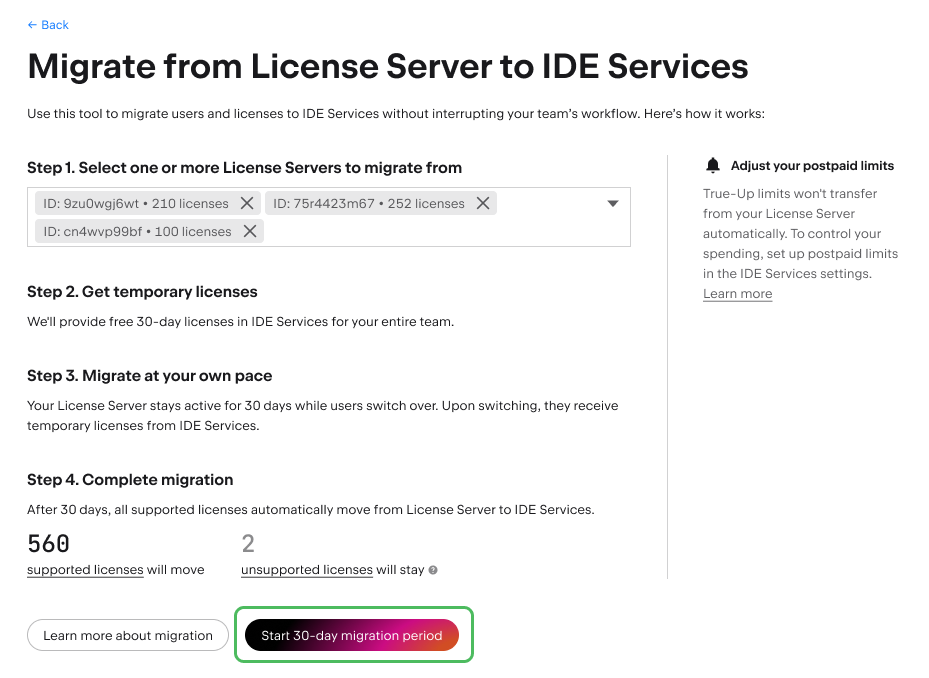
The 30-day migration period will then start immediately, and the free temporary licenses will be added to your IDE Services instance.
If your IDE Services Server is connected to the internet, the licenses will appear in your License Vault within 2 hours. To speed up the process, you can force-refresh your license.
If your IDE Services Server does not have an internet connection, you'll need to refresh your license manually.
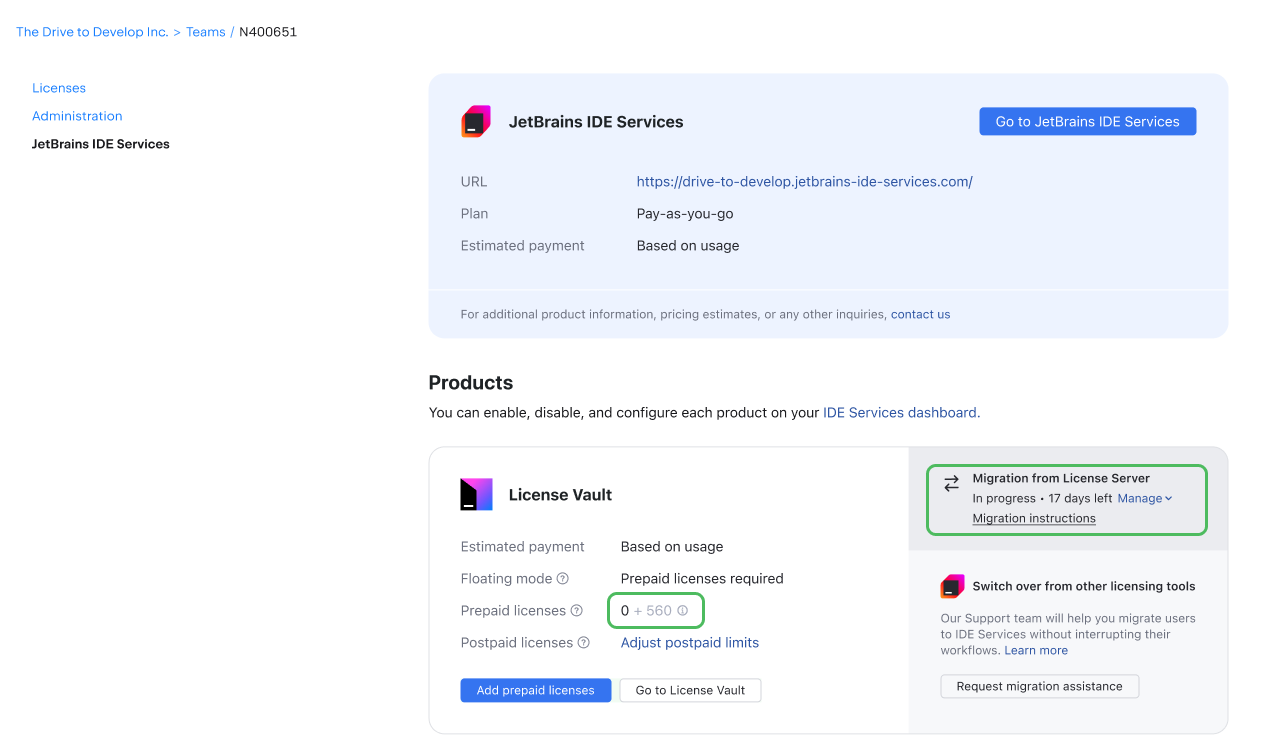
You can check the status of the started migration on the IDE Services management page in your JetBrains Account. In the License Vault section you'll find the remaining migration period and the number of licenses that will be migrated from your License Server to IDE Services at the end. The license count is constantly checked and updated, so it might change if you remove some of the licenses from License Server or if they expire during the migration period.
Step 2: Instruct your team
After starting the migration, coordinate with your team to make sure all License Server users switch to IDE Services activation within the 30-day migration period.
Ask your developers to install the Toolbox App and connect to IDE Services. Send them an invitation link for the Toolbox App, which can be generated according to the User management guide.
If you have several authentication modules, specify which one your users should log in with. If only one module is set as the default, users will be automatically directed to it upon clicking Log in.
Once a user connects to IDE Services via the Toolbox App or manually activates their IDE, they will obtain one of the free temporary licenses, which they can use until the migration is over.
Step 3 (Optional): Transfer True-Up settings
If you have been using the True-Up option for your License Server, True-Up limits won't be transferred to IDE Services automatically during migration. You can set up postpaid license limits in the IDE Services settings if necessary.
Like the True-Up option in License Server, postpaid IDE licensing in IDE Services allows you to use JetBrains IDEs without purchasing subscriptions up front. License Vault supplies additional IDE licenses automatically when your team needs them. At the end of each billing period, you pay for the exact number of licenses used.
You can change your postpaid limits at any time.
Step 4: Finalize migration
Once all of your developers switch to activating their JetBrains tools via IDE Services, you have two options: wait for the migration to be completed automatically after 30 days or complete it manually.
To complete the migration manually before the 30 days are over:
Go to the IDE Services management page in your JetBrains Account.
In the License Vault section, click Manage.
Select Complete migration and transfer licenses.
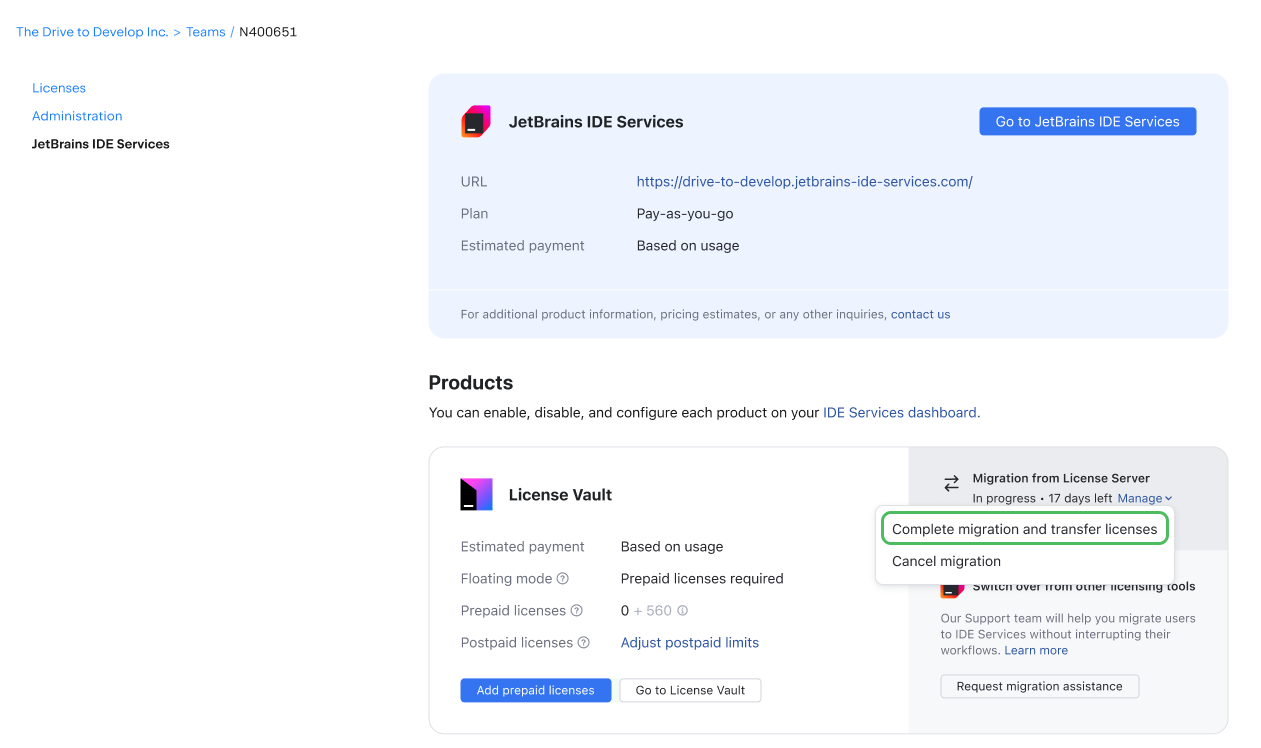
In the popup dialog, confirm your choice by clicking Complete migration and transfer licenses.
Cancel migration
You have the option to cancel the migration before it's completed. We do not recommend doing so, because in this case all temporary licenses are immediately removed from IDE Services, and anyone using them will lose access to their JetBrains products. Additionally, you won't be able to restart the migration later.
If you have any problems or questions, contact our support team before canceling a running migration.
If you still decide to cancel, do the following:
Go to the IDE Services management page in your JetBrains Account.
In the License Vault section, click Manage.
Select Cancel migration.
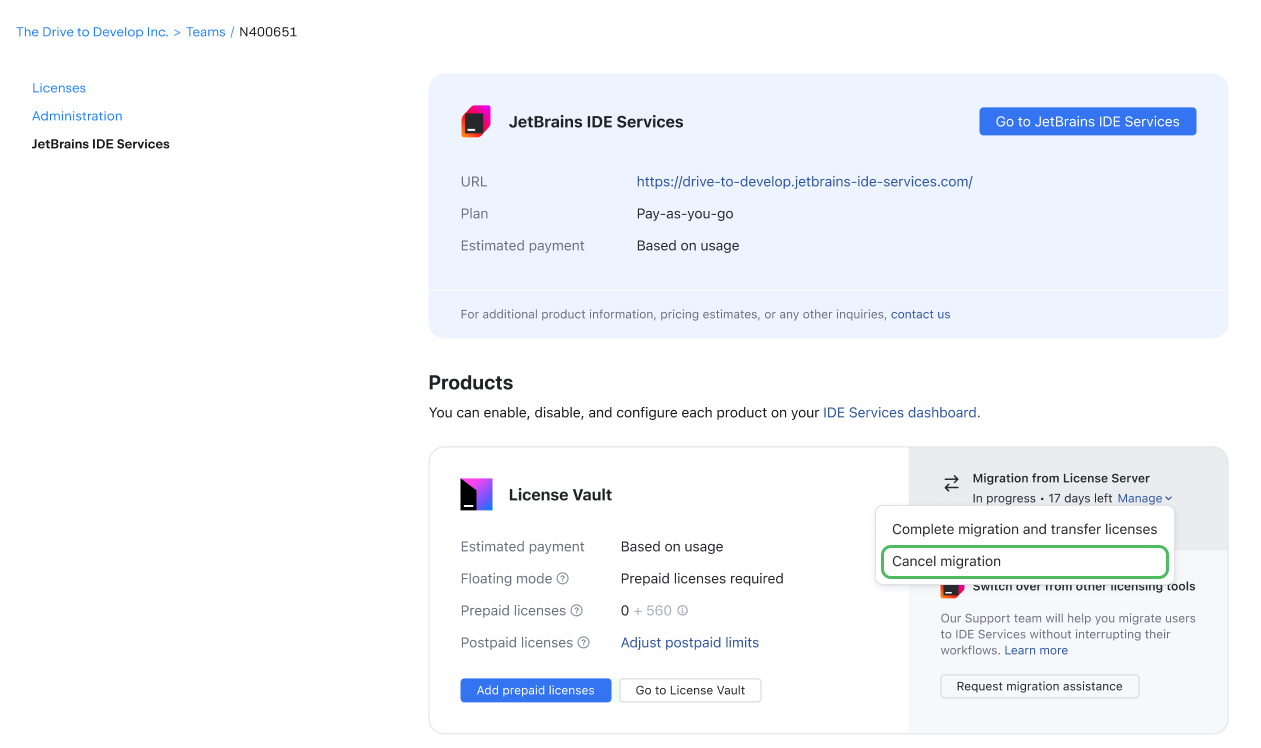
In the popup dialog, confirm your choice by clicking Cancel migration.
Migrating from other licensing tools
If you distribute licenses manually via JetBrains Account or use a standalone License Vault instance that's not integrated with IDE Services, you can switch to IDE Services in a few steps.
Manually migrating to IDE Services
Notify your team about the migration in advance.
Coordinate with your team and make sure that your developers get the new activation instructions before you start transferring your licenses to the IDE Services instance.
Instruct your team.
Ask your developers to install the Toolbox App and connect to IDE Services. Send them an invitation link for the Toolbox App, which can be generated according to the User management guide.
If you have several authentication modules, specify which one your users should log in with. If only one module is set as the default, users will be automatically directed to it upon clicking Log in.
Start transferring licenses to IDE Services.
When your team is ready, start transferring the licenses to License Vault. For instructions, refer to Adding licenses to your License Vault.
We recommend transferring the licenses in batches for a more controlled and smoother transition. Start by transferring a portion of your licenses and then keep an eye on your license usage statistics and the Denials report for a while. Once you have confirmed that your developers can successfully obtain licenses, move on to the next batch.
Assisted migration
If you are concerned about the migration disrupting your team's workflow, contact us for assistance.
Go to the IDE Services management page in your JetBrains Account.
If you don't have active License Servers, in the License Vault section, click Request migration assistance.
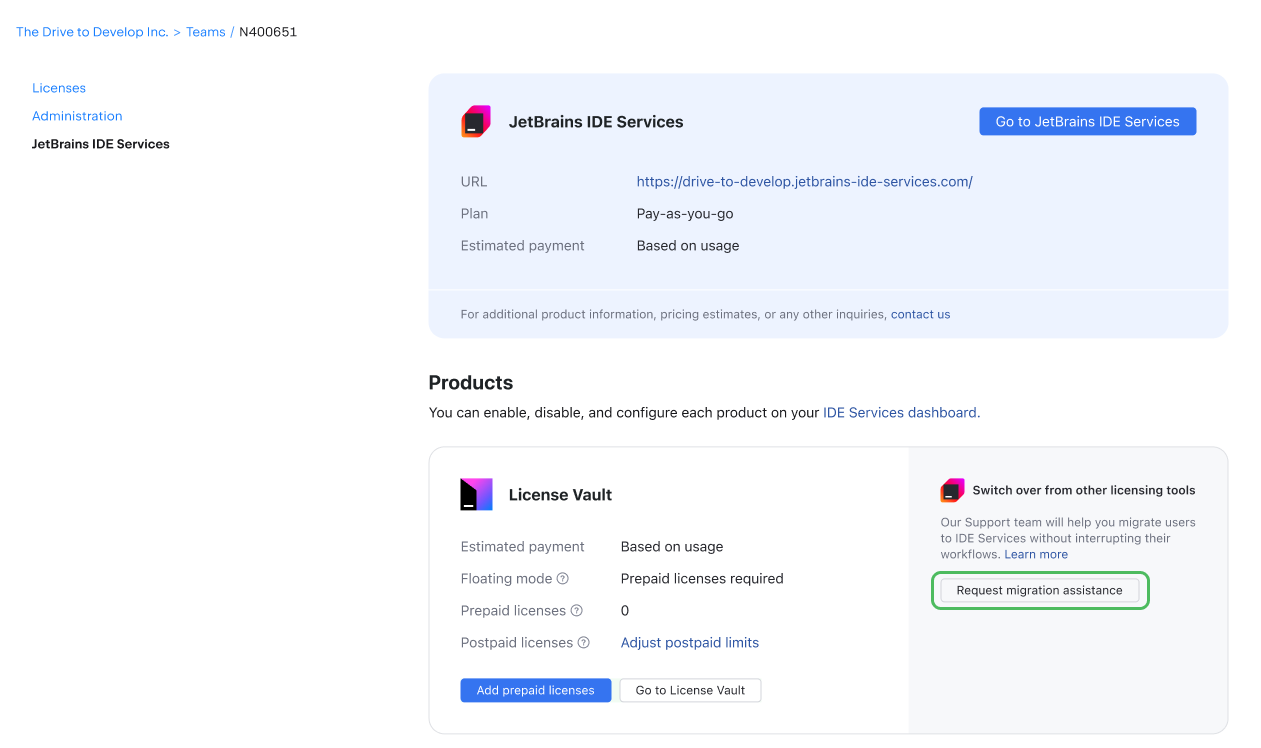
Otherwise, click Start migration and select Migrate from other licensing tools.
In the popup dialog, click Request migration support.
Our Sales team will get in touch with you to discuss your migration options.
Using License Vault without the Toolbox App
The Toolbox App is required for you to fully utilize the capabilities of IDE Services. But if your organization currently uses only License Vault and prefers not to use the Toolbox App, your users can activate their JetBrains tools manually. You will need to send them the following information:
The activation instructions along with the URL of your IDE Services instance.
If you have automatic server discovery set up for your IDE Services instance, let the users know they can use the Discover server option in Step 5 of the activation instructions.
Without automatic server discovery, make sure to share the URL of your IDE Services instance.
If you have several authentication modules, specify which one your users should log in with. If only one module is set as the default, users will be automatically directed to it upon clicking Log in.